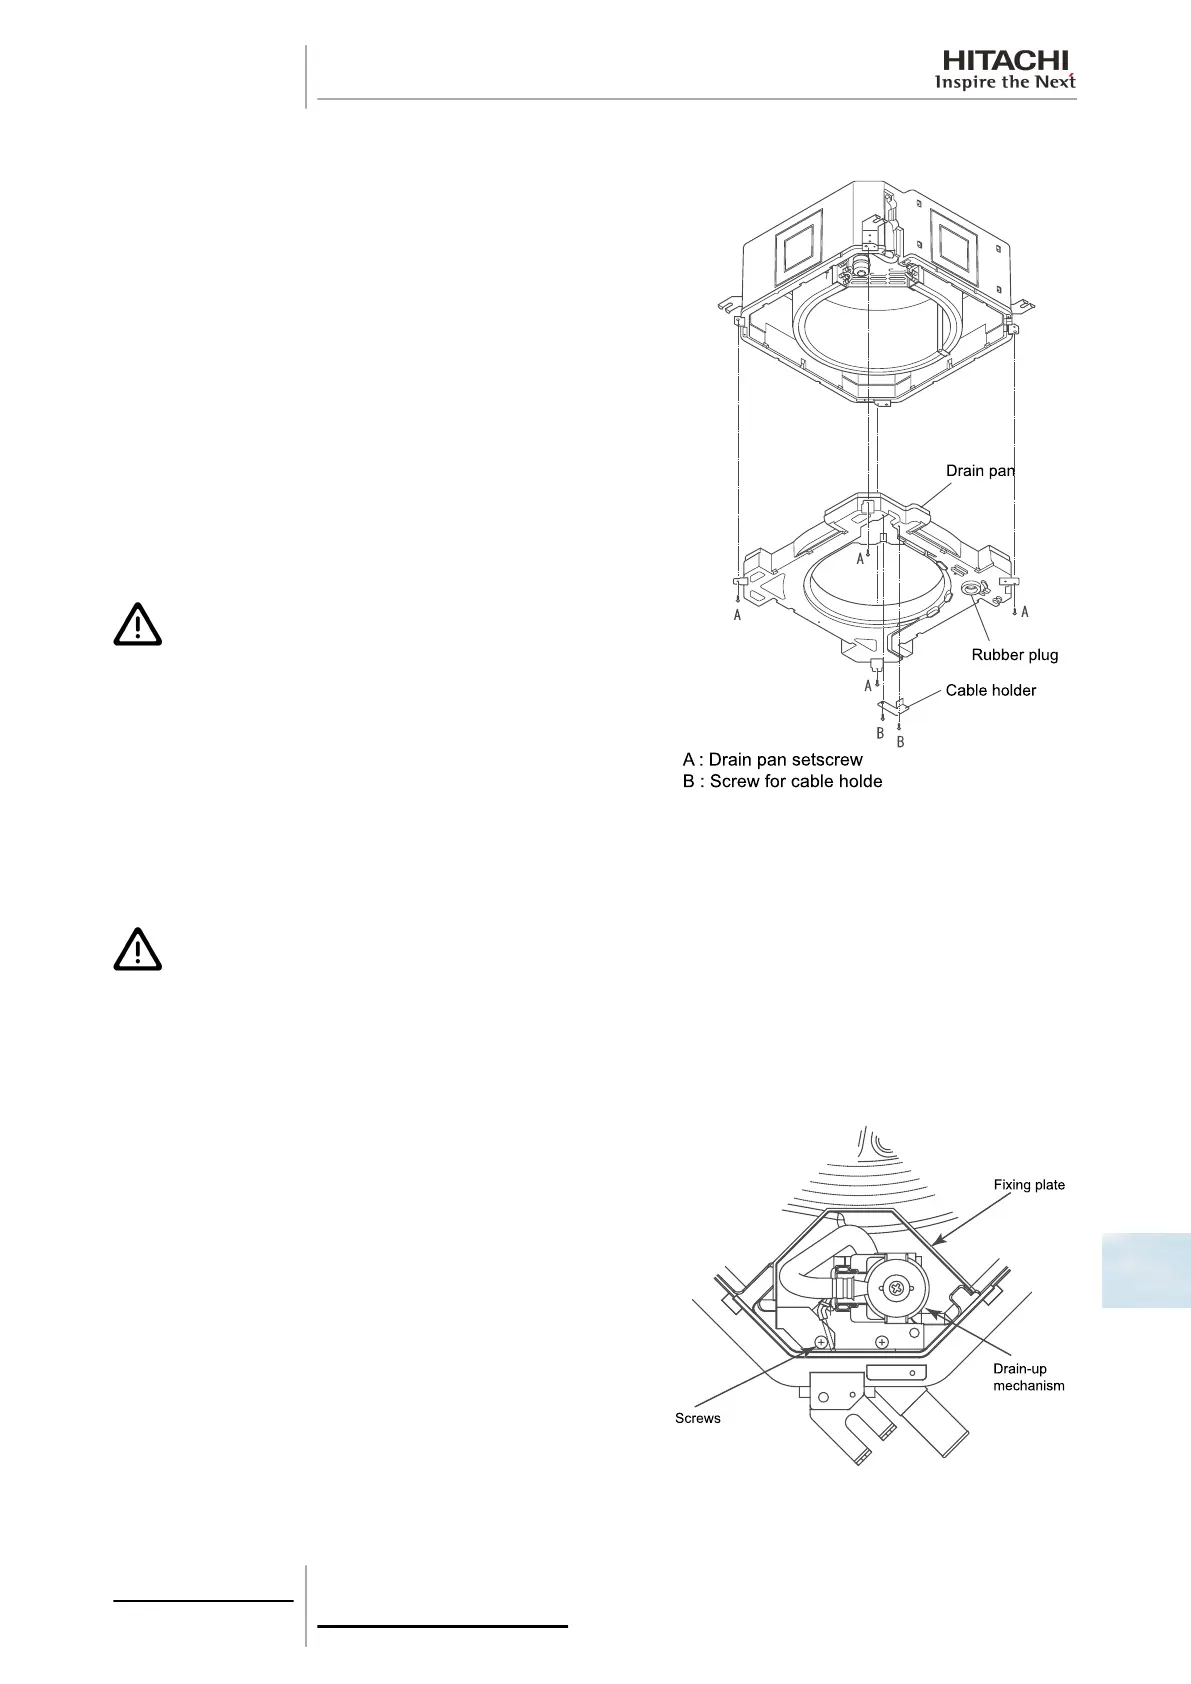
10.2.8 Removal of the drain pan
Remove the air panel in line with the instructions given in chapter
Removal of the optional air panel, see on page 278.
Remove the electrical box cover as indicated in chapter Removal
of the electrical box, see on page 279.
Separate the connectors from:
1 The air outlet thermistor.
2 The two pipe thermistors.
3 The electronic expansion valve.
4 The drainage pump.
5 The float switch.
Remove the fan duct and motor as indicated in chapter Removal
of the fan duct and the fan, see on page 280.
Remove the two screws securing the cable support to the drain pan
and remove the support.
Empty the pan of water by removing the rubber plug.
C A U T I O N
• The plug is sealed with silicone but can be easily removed
by pulling on the bottom of it.
• Do not use a knife or similar to remove the rubber plug, as
this could damage it.
• Do not remove or damage the lower plug insulation when
refitting.
Check that the drainage hole is not blocked.
Remove the drain pan after removing the four set screws, pulling it carefully downwards.
C A U T I O N
• Do not use a sharp tool, such as a screwdriver, to fit the rubber plug, as this could damage it.
• After fitting the plug, there must be a space of 2 - 3 mm between it and the drain pan.
10.2.9 Removal of the drain mechanism
Remove the drain pan as indicated in chapter Removal of the drain
pan, see on page 281.
10 Servicing
281
SMGB0063 rev. 1 - 10/2010
10
 Loading...