ID50 Series Panel - Installation, Commissioning & Configuration Manual
Configuration Mode
45
997-263-000-11, Issue 11
January 2010
5.5.2 Site Details
The Site Details Setup option enables site name and
service contractor information to be displayed on the
panel. With ID60 panels there is an option for configuring
a service due date (refer to Appendix 2 for details).
5.5.2.1 Service Phone Number
This option allows a service contact phone number to be
displayed with fault messages. To enter or change the number:
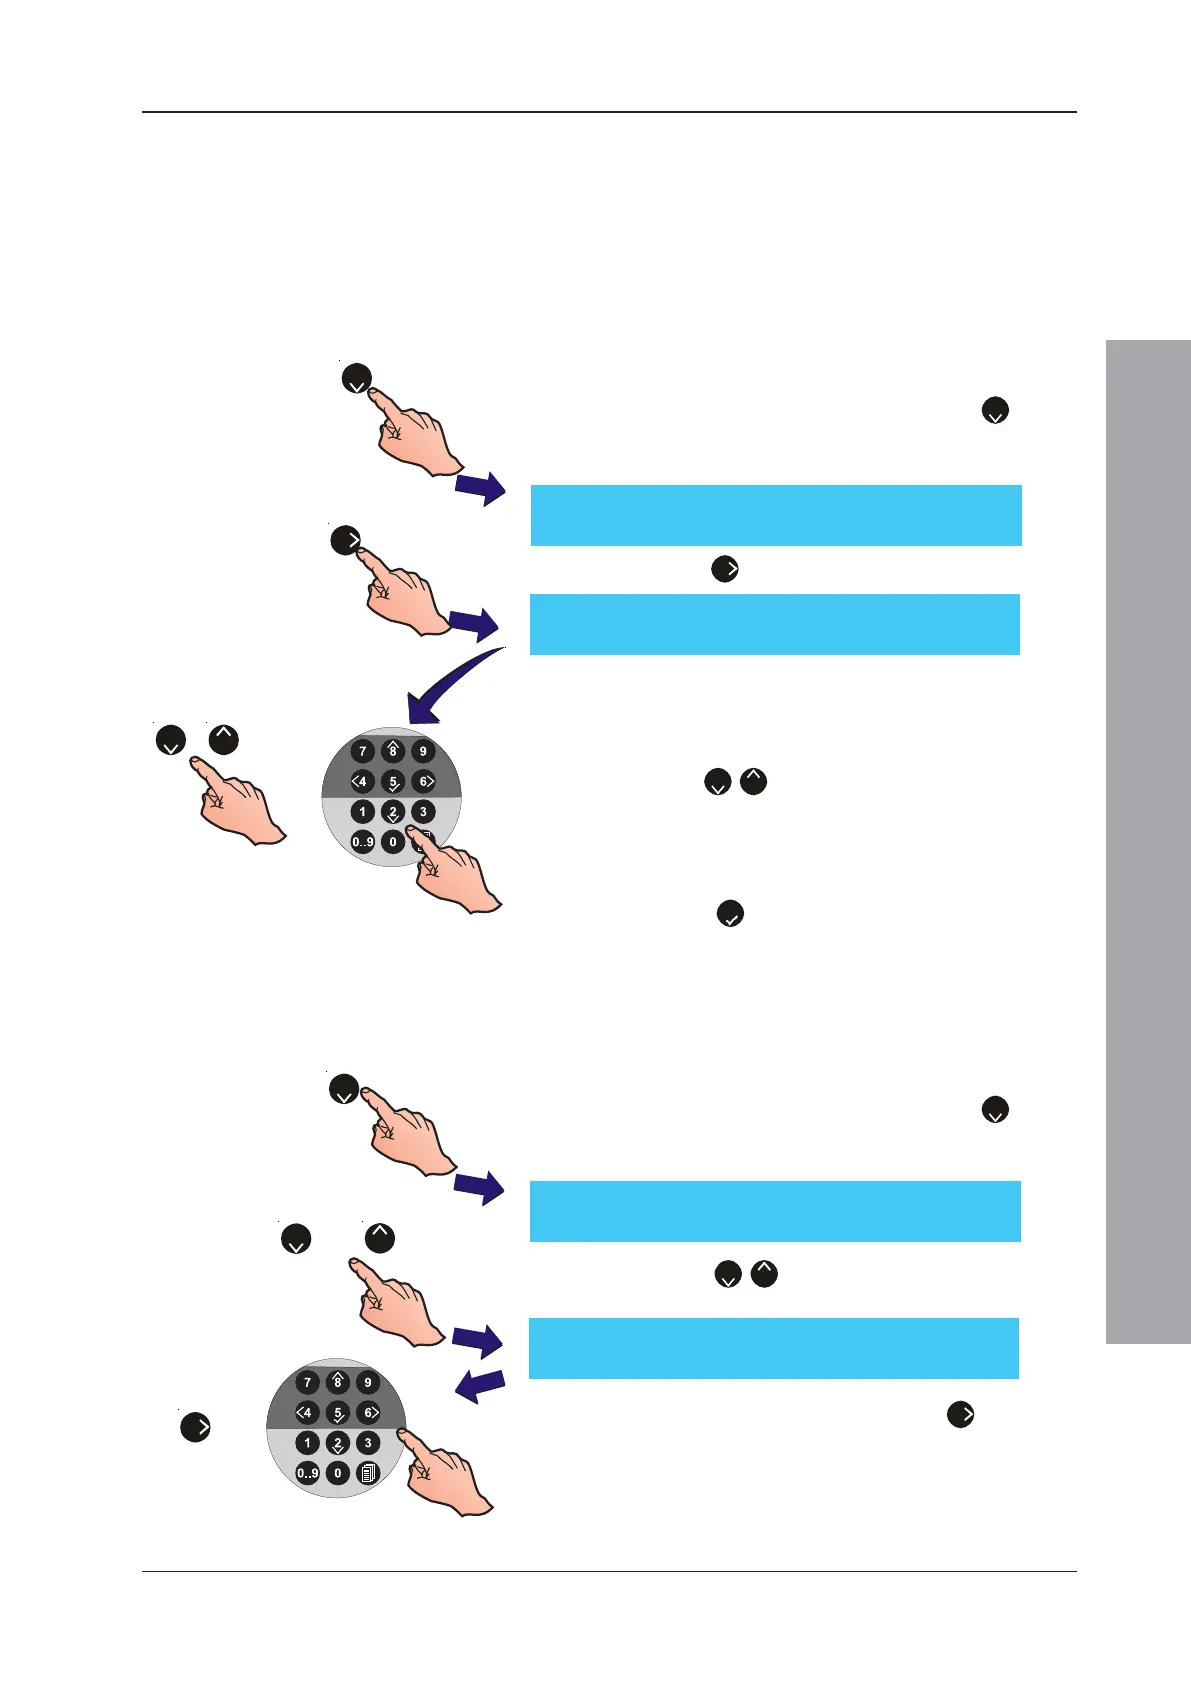
1 From the Setup menu screen, press the ‘
2
’ button
on the numeric keypad to select the Site Details option.
The Service Phone Number option is displayed:
2 Press the ‘
6
’ button to enter the text editing menu.
3 The existing 20-characters of text are shown on the
upper line (for new panels this area is blank). The current
cursor position is indicated by a flashing character. Enter
the required telephone number via the numeric keypad
or use the ‘
2
/
8
’ buttons to scroll through the available
alphanumeric characters.
Note: For further information on how to edit text, refer to
Section 5.8, Zone Texts.
4 Press the ‘
5
’ button to confirm and return to the
Setup menu screen.
5.5.2.2 Site Name
The Site Name option allows the entry of up to
20 characters to replace the ‘Status: NORMAL’ display
on the LCD. To edit/change the characters:
1 From the Setup menu screen, press the ‘
2
’ button
on the numeric keypad to select the Site Details option.
The Service Phone Number option is displayed first:
2 Press the ‘
2
/
8
’ buttons to display the Site Name
screen.
3 To edit/change the site name, press the ‘
6
’ button. The
LCD display is replaced by a text editing menu with the
existing 20-characters of text on the upper line. The current
cursor position is indicated by a flashing character.
Note: For further information on how to edit text, refer to
Section 5.8, Zone Texts.
2
6
[Setup] Phone = < blank/existing text >
> : Change ¦ : More < : Exit
or
8
2
2
[]¦ : Char : Done
> : Next < : Previous u1:Delete u3:Insert
[Setup] Phone = < blank/existing text >
> : Change ¦ : More < : Exit
/
82
or
6
and
[]¦ : Char : Done
> : Next < : Previous u1:Delete u3:Insert

 Loading...