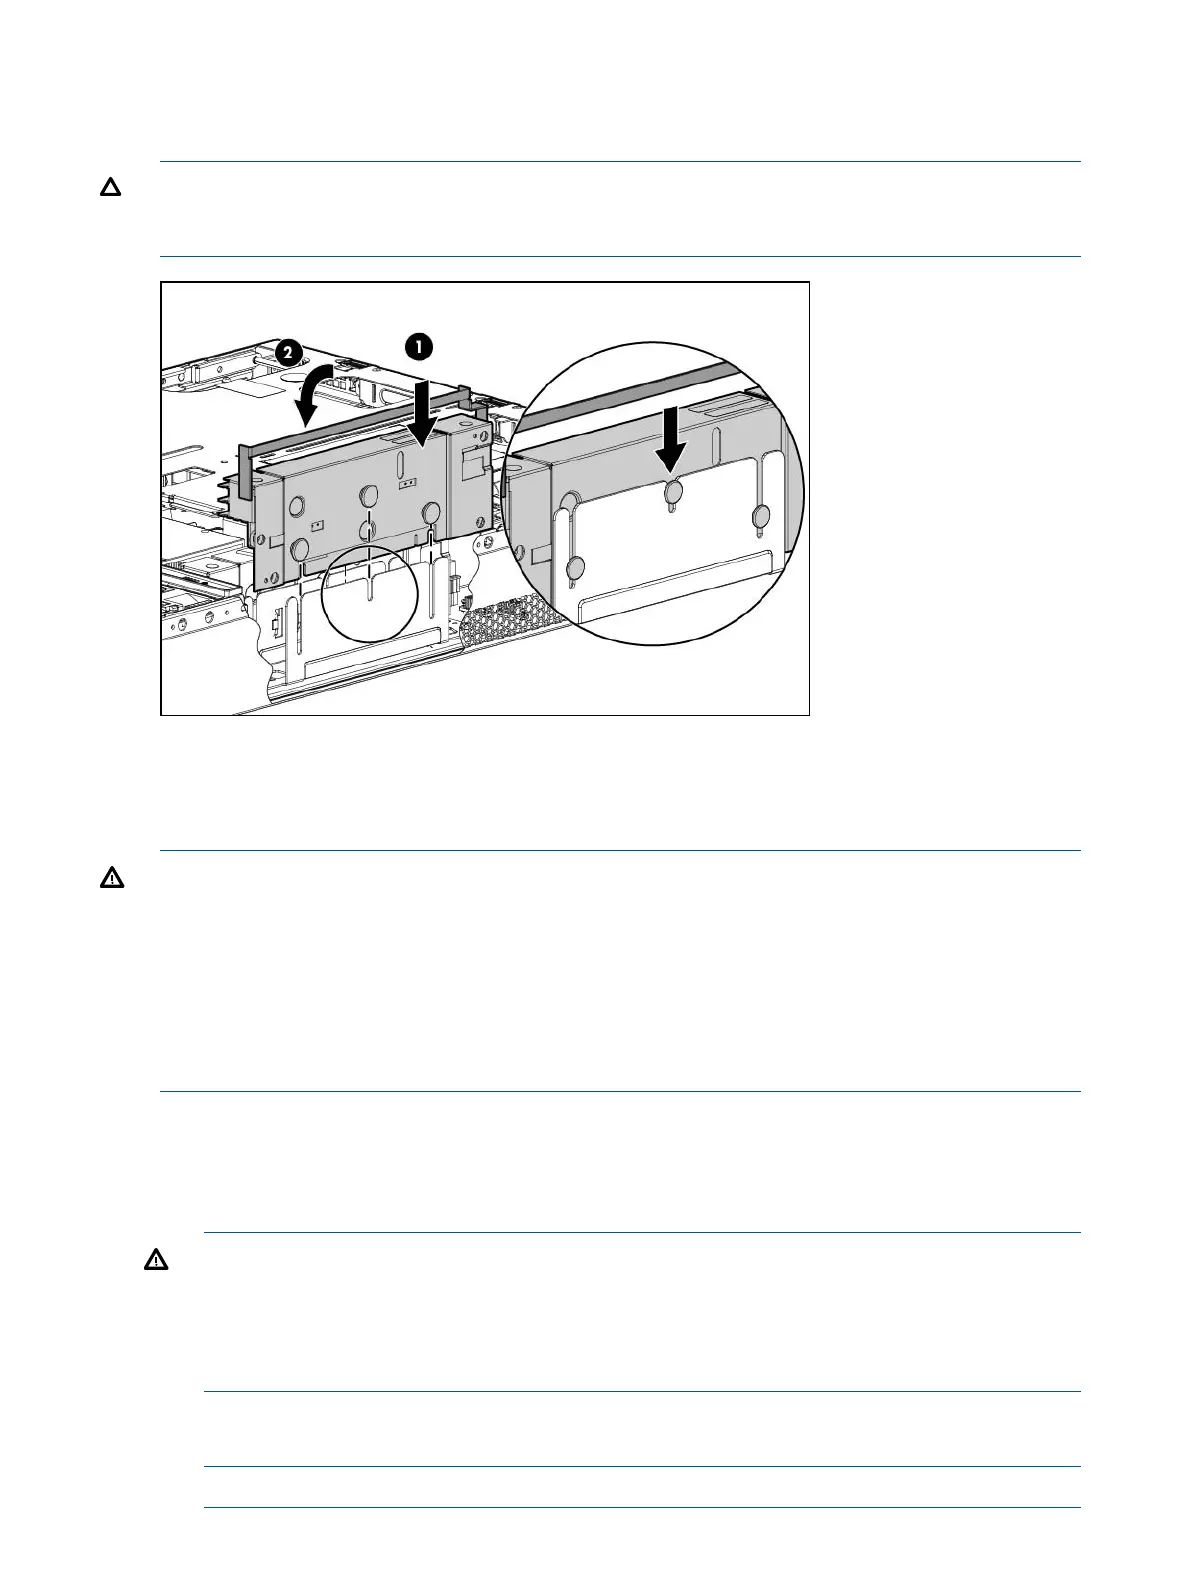
To replace the component, reverse the procedure. Ensure that you follow the memory loading order
when you replace DIMMs. For memory configuration information, see “Memory configurations”
(page 47).
CAUTION: Before inserting the memory expansion board, the three stand-off posts on the
expansion board must be aligned with the alignment slots on the system board. Failure to align
the stand-off posts correctly might result in damage to the expansion board.
Removing and replacing the PDH battery (system battery)
If the server no longer automatically displays the correct date and time, you might have to replace
the battery that provides power to the real-time clock.
WARNING! The computer contains an internal lithium manganese dioxide, a vanadium pentoxide,
or an alkaline battery pack. If the battery pack is not properly handled, a risk of fire and burns
exists. To reduce the risk of personal injury:
• Do not attempt to recharge the battery.
• Do not expose the battery to temperatures higher than 60°C (140°F).
• Do not disassemble, crush, puncture, short external contacts, or dispose of in fire or water.
• Replace only with the spare designated for this product.
1. Power off the server (“Powering off the server” (page 94)).
2. Extend the server from the rack (“Extending the server from the rack” (page 93)).
3. Remove the access panel (“Removing and replacing the access panel” (page 99)).
4. Remove the PCI riser cage (“Removing and replacing the PCI riser cage” (page 104)).
WARNING! Do not attempt to remove the battery by hand. Doing so can cause the battery
holder to separate from the system board.
WARNING! Do not attempt to remove the battery from the side marked “+” first. If your
battery holder does not have the “+” marking, the side of the holder with springs will be the
“+” end.
5. Using a nonconductive tool small enough to fit into the battery slot as leverage, gently remove
the battery from the holder from the end marked “---“.
NOTE: HP recommends using ESD safe, non-conductive tweezers or a similar tool.
114 Removal and replacement procedures
 Loading...