Eclipse Additional Information Page 185
9.4 General Operation of TEOAE25
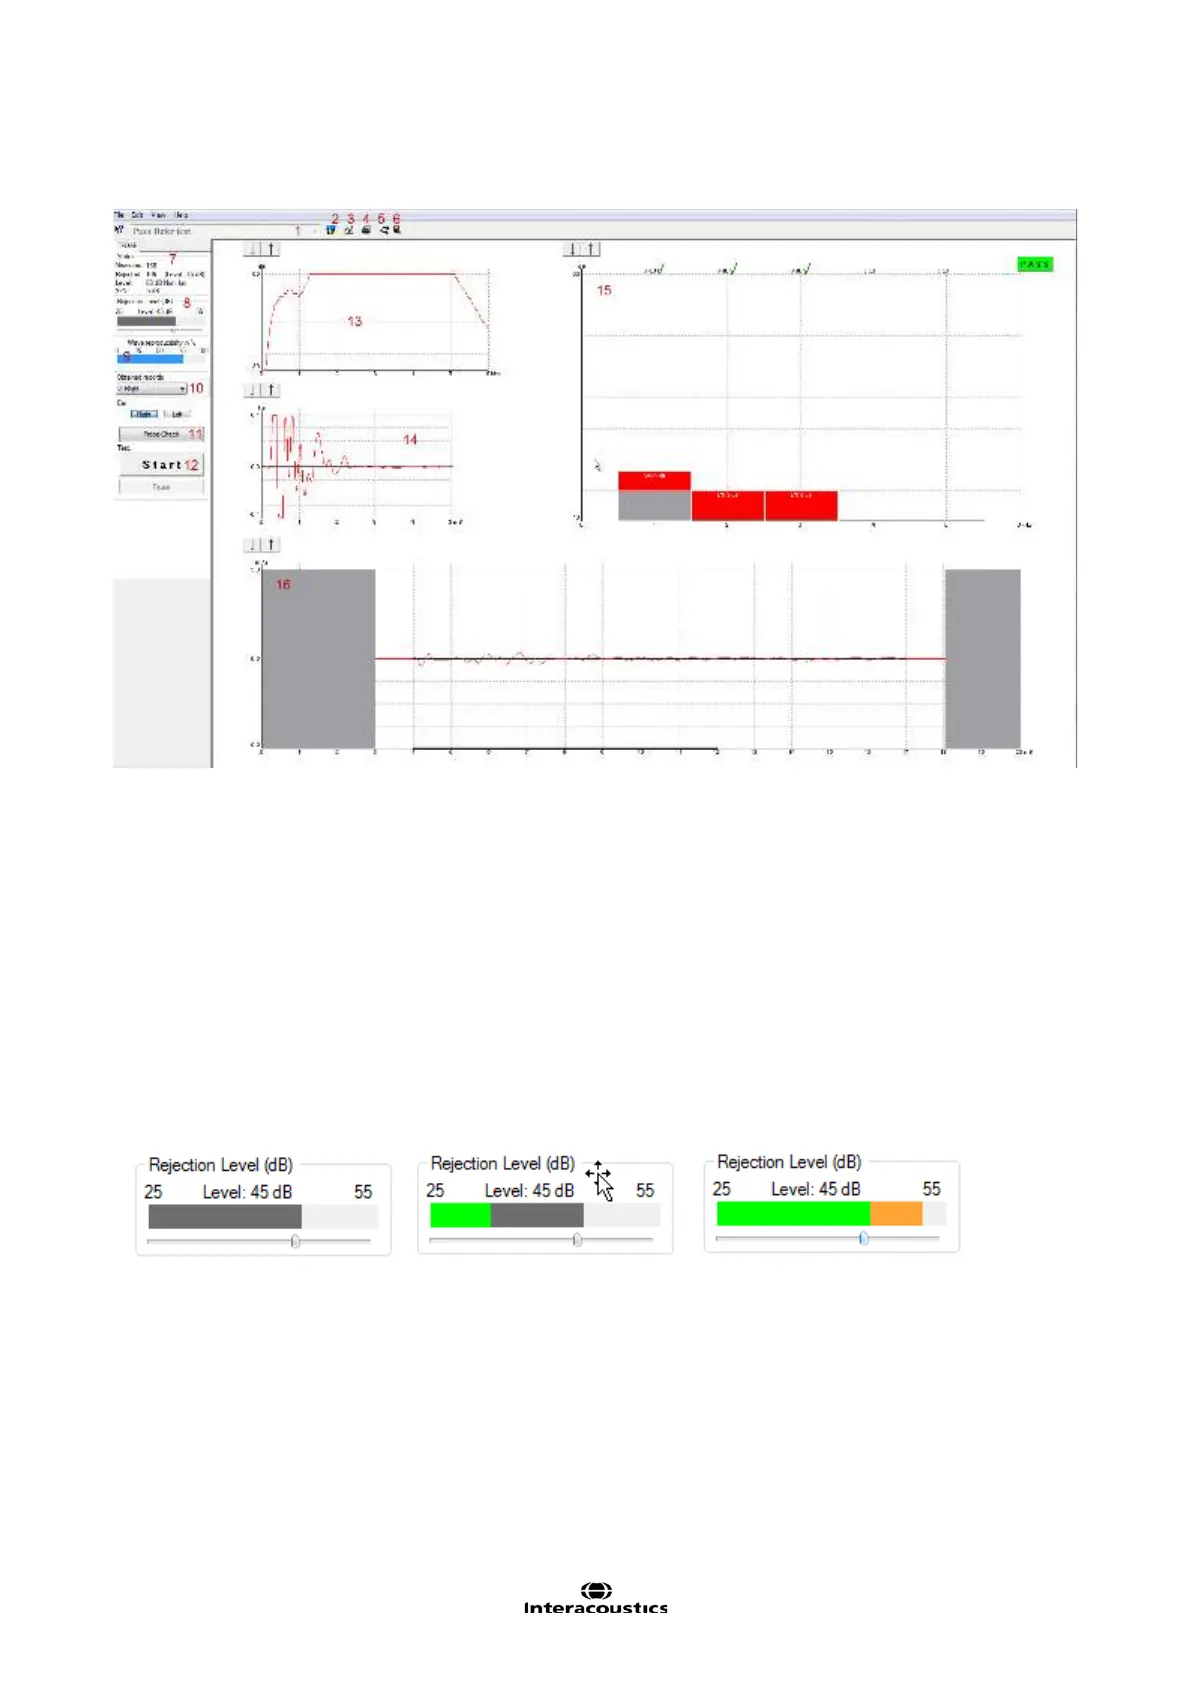
1. Protocol selection: From the dropdown box to select desired test protocol.
2. Temporary setup takes you to the temporary protocol setup and allows you to make temporary changes
your settings before you start the test.
3. Report: Write patient report.
4. Print: Pressing the Printer button will print out all current test results.
5. A & B: Pressing the A & B curves button will display both A and B buffer recordings on the OAE time win-
dow (bottom display of screen). The A and B buffers store waveforms from consecutive sweeps. These
are then averaged to give the OAE waveform. If there is a good correlation between the two waves the
emission can be identified as a biologic response. If there is poor correlation then the nature of the re-
sponse must be questioned. By displaying the A and B curves a visual examination of this correlation can
be conducted.
6. The Save and Exit button saves all current results and quit to OtoAccess™.
7. Status shows measured data, rejected measurements, stimulus level, and S/N ratio.
8. Rejection Level shows the set rejection level and the level can be changed prior starting the TEAOE
measurement.
The Rejection Level slider allows setting the rejection level limit between 25 and 55 dB SPL. Sweeps rec-
orded above the set rejection level are considered to be too noisy and are rejected.
The grey area on the VU meter indicates the dB SPL limit set. During testing, the VU meter will become
green to indicate the noise level recorded. The VU meter becomes amber in color when exceeding the
set rejection level.
When the measurement is rejecting, the timer will stop counting. Artifact rejection is dependent upon
the specified Rejection Level.
9. Wave Reproducibility indicates the reproducibility of the response.
10. Obtained records shows a list of the recordings you have performed during the session.
 Loading...