Eclipse Additional Information Page 23
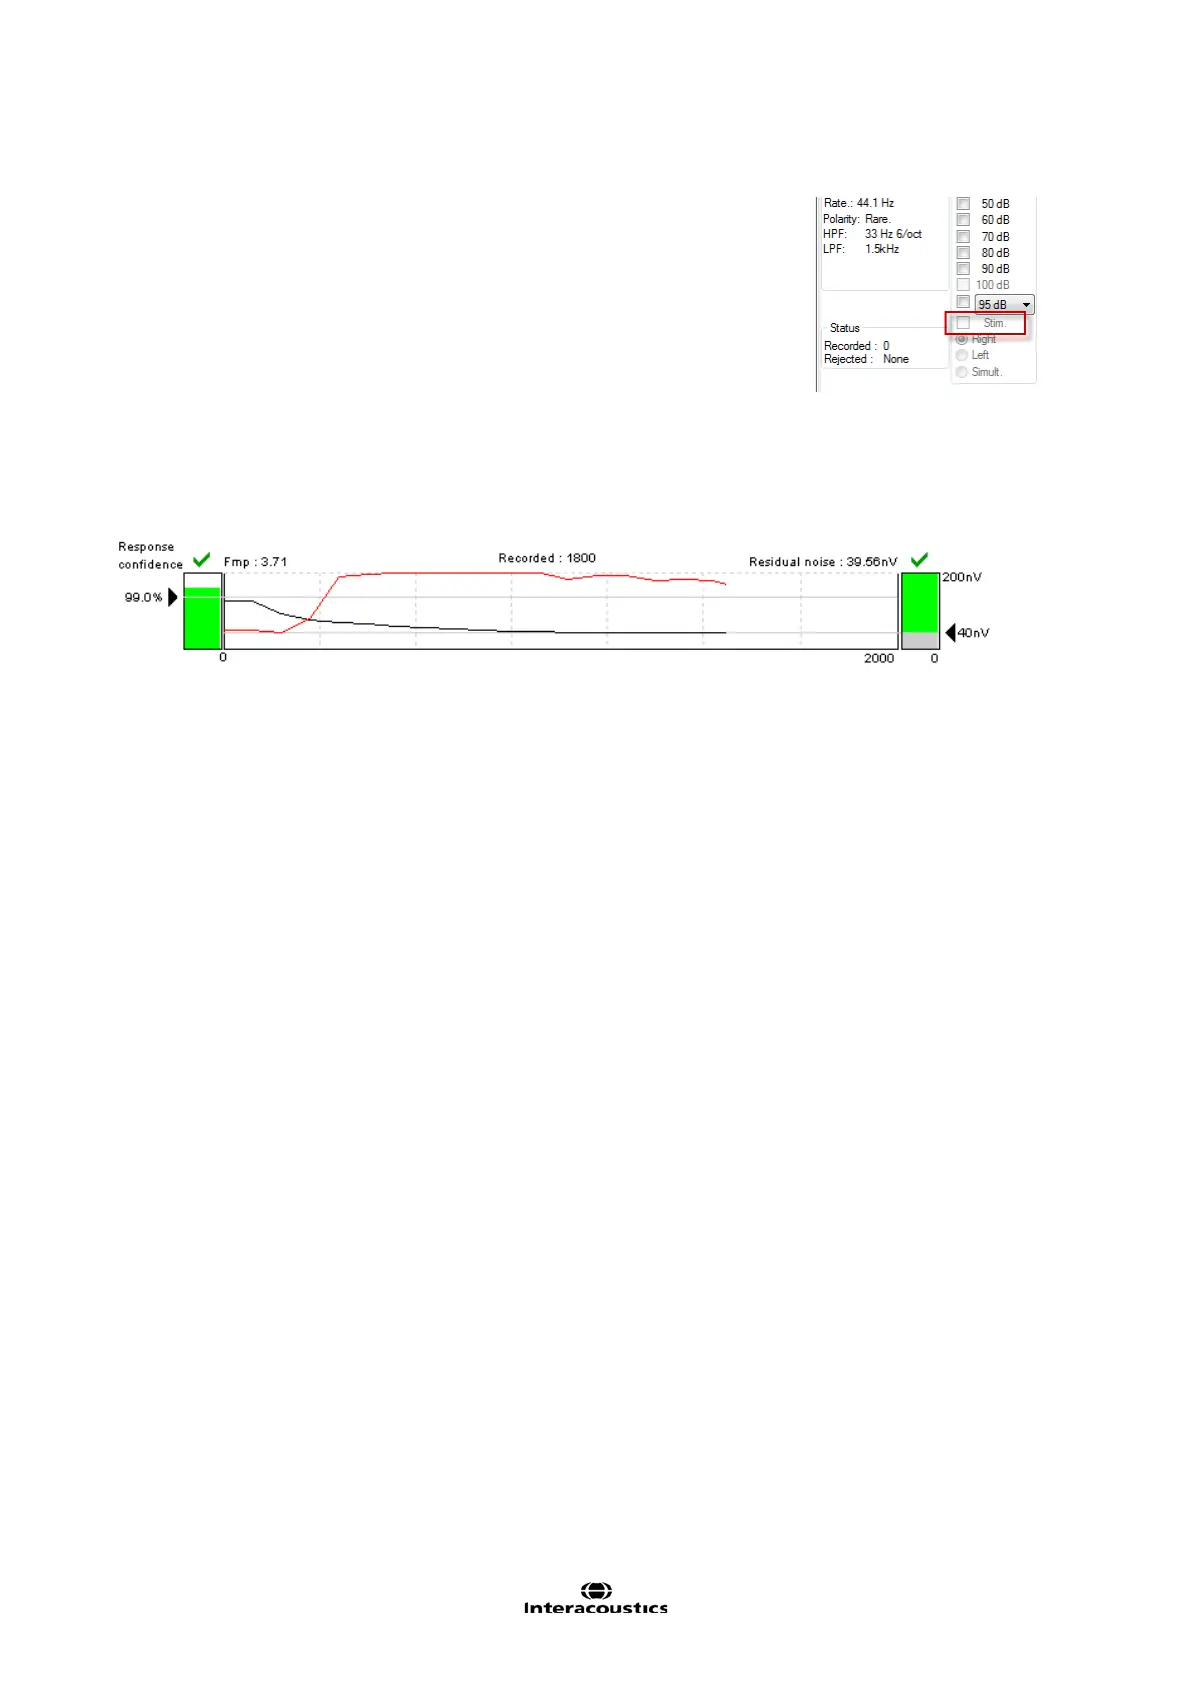
Checking the rejection level with the stimuli enabled
You may also wish to set the rejection level with the stimuli enabled. Please
note that the activation of the stimulus is only available from the main screen
and not in the Protocol Setup. The stimulus can be activated with a click on
Stim @ 0dB nHL. For other intensity level, select the required intensity -
click the Stim. box and adjust the rejection level in the control panel on the
right.
Note that the rejection window can be resized and its position moved so that
you can keep the window open during recording if you wish.
3.4.4 Fmp and Residual Noise
This is the area for evaluating the quality of a recording. It shows the data that relates to whatever
curve is highlighted.
The Confidence Interval, Fmp value, and the Residual Noise may be used to indicate the quality of the rec-
orded ABR. The values can also be used together to answer the important clinical question: When to stop
averaging? Examples are described in detail by Don and Elberling (1996):
Stop when a given F
mp (~SNR2) has been achieved.
Stop when a given residual averaged background noise level has been reached.
Residual Noise
The residual EEG-noise in the averaged ABR waveform calculated during the ABR recording by measuring
the stability of the entire averaged waveform. The residual noise calculation is based on the principles de-
scribed in detail by Elberling and Don (1984 & 2006), and Don and Elberling (1994 & 1996). During the re-
cording of the ABR, the actual residual background noise and a graph showing how this noise develops
along with the data collection (number of sweeps), is presented on the screen.
The Residual Noise indicates exactly how much noise is included in the recording that may visually obscure
the presence of a response. Continued averaging will reduce this residual noise. This residual noise calcula-
tion is a much more relevant stopping criteria than the number of sweeps (e.g. 2000 sweeps), that is often
used to decide when to stop a recording.
The reason for this is that the number of sweeps is only a relative measure of quality as it depends very
much on the actual amounts of noise having entered the averaging process.
The residual noise on the other hand is not a relative measure but an exact indication of the status of the ob-
tained noise reduction through averaging.
A Residual noise value of 40nV or less indicates that the waveform contains a minimal amount of noise and
the recording can be stopped. Therefore if a response is present it is not due to noise in the recording. If a
response is absent with a low residual noise value, it can be concluded that there is no repeated response in
the actual recording, hence averaging can be stopped. In the Auto Protocol Setup residual noise can be set
as stop criteria.
The scale for the residual noise goes from 0nV to 200nV. The arrow points at the noise target – here
40nV. Typically a residual noise level of 40nV is considered by some as a practical noise target for no-re-
sponse situations. This residual noise target is set in the Auto Protocol, and it may be set to operate as an
automatic stop criterion. Lower residual noise figures (ideally 20nV or less) increase the confidence that a
response is truly absent rather than being obscured by residual noise.
The grey curve and bar indicates the residual noise level. As the averaging, continues the residual noise will
drop towards the noise target. Noise levels above the 200nV display limit will be shown with the curve
against the ceiling of the display area.
 Loading...