6D3 – 14 CHARGING SYSTEM
VACUUM PUMP
Visual check
• Inspect the following parts for wear, damage or other
abnormal conditions.
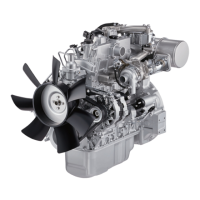
Disassembly of Vacuum pump
• For the center plate, rotor and vane in the mentioned.
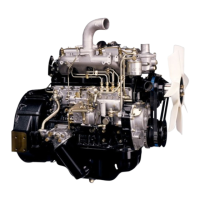
Housing
• Measure the inside diameter of housing and place if it
exceed the standard.
mm (in)
Standard
57.0 - 57.1
(2.244 - 2.248)
Vane
Measure the length of vanes
mm (in)
Standard 12.5 - 13.5 (0.492 - 0.531)
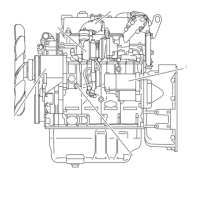
Check Valve
1. Apply a light pressure onto the "B" side of valve with a
screw driver and check that valve operates smoothly.
2. Apply compressed air 1 - 5 kg/cm
2
onto "A" side of
valve and check if there is air leak.
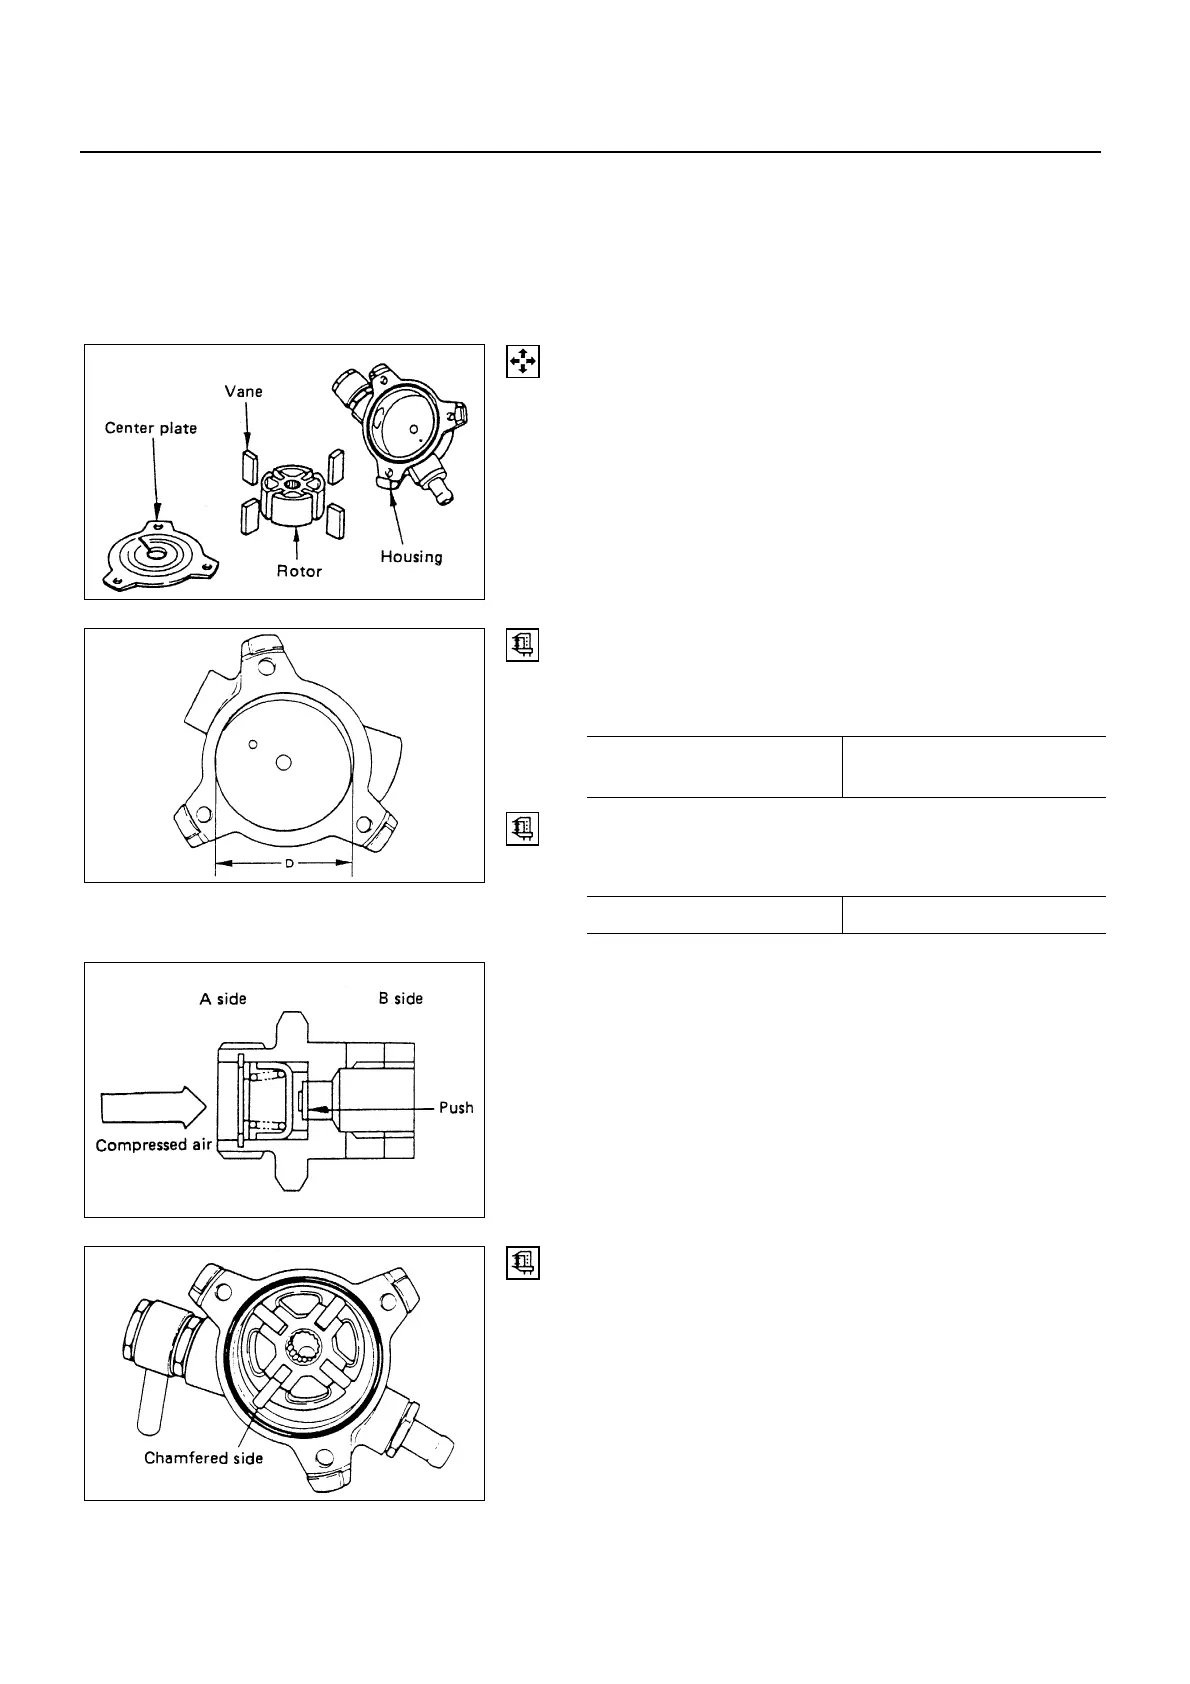
Reassembly of vacuum pump
1. Position the rotor, with the serrated boss turned up, on
the center plate and housing.
Align the holes in center plate and rotor.
2. Install vanes into slits in rotor.
The vanes should be installed with chamfered side
turned outward.
3. Install the O-ring and center plate
6D3-14-1.tif
6D3-14-2.tif
6D3-14-3.tif
6D3-14-4.tif
 Loading...