Manual reception
When [Automatic POP] is disabled, use the control panel to manually connect to the POP3 server
and check for new e-mails.
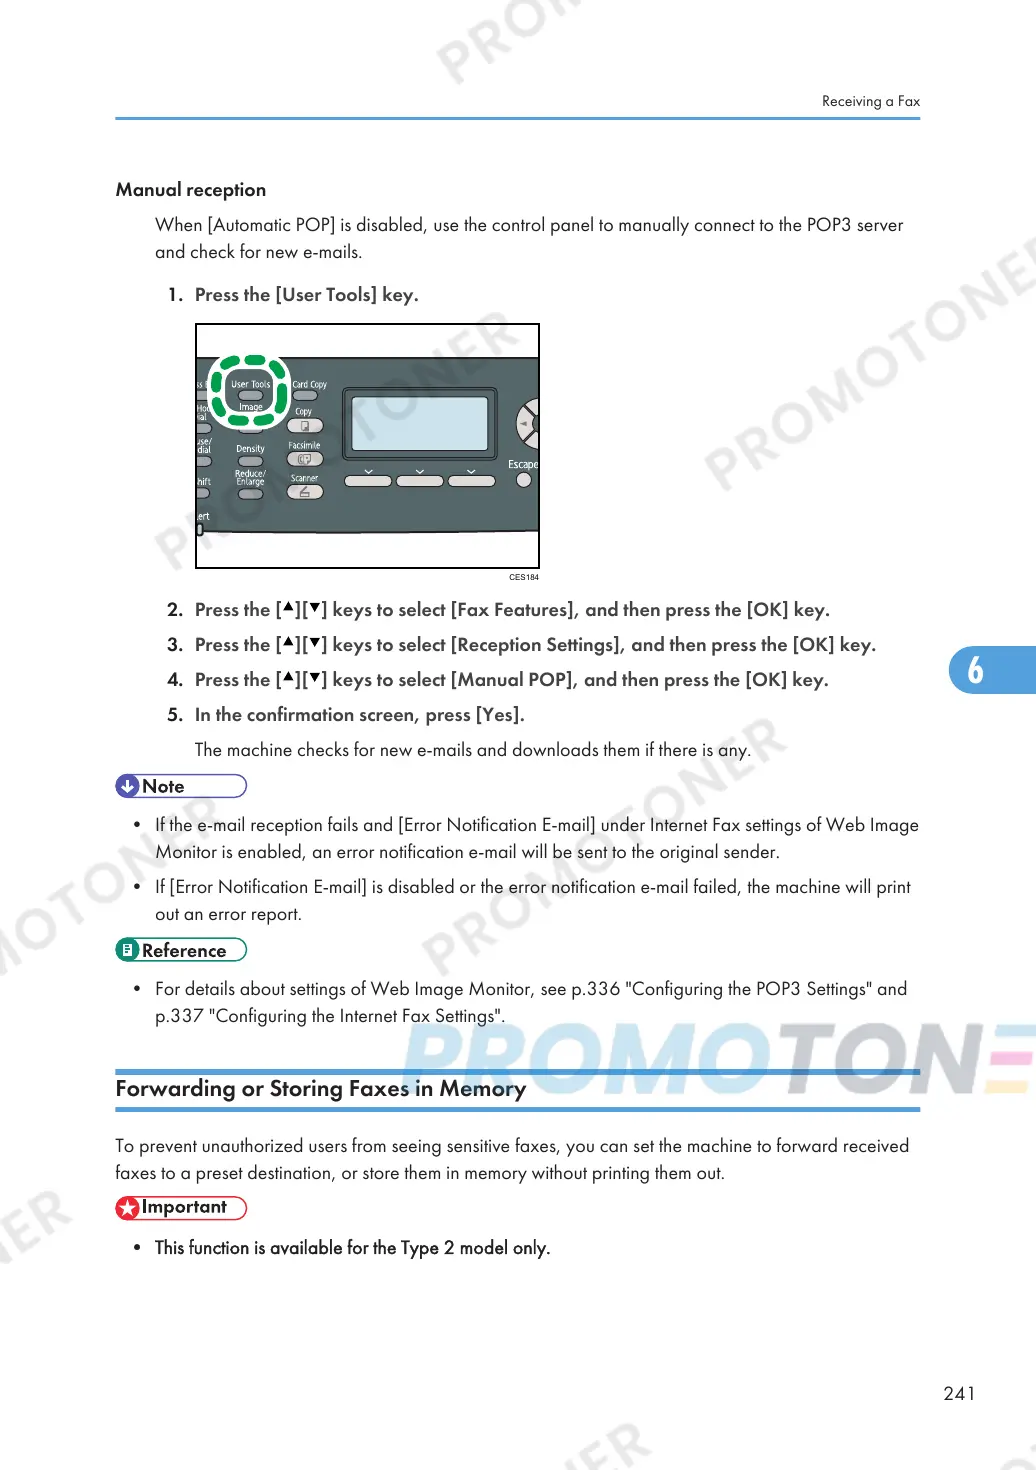
1. Press the [User Tools] key.
2. Press the [ ][ ] keys to select [Fax Features], and then press the [OK] key.
3. Press the [ ][ ] keys to select [Reception Settings], and then press the [OK] key.
4. Press the [ ][ ] keys to select [Manual POP], and then press the [OK] key.
5. In the confirmation screen, press [Yes].
The machine checks for new e-mails and downloads them if there is any.
• If the e-mail reception fails and [Error Notification E-mail] under Internet Fax settings of Web Image
Monitor is enabled, an error notification e-mail will be sent to the original sender.
• If [Error Notification E-mail] is disabled or the error notification e-mail failed, the machine will print
out an error report.
• For details about settings of Web Image Monitor, see p.336 "Configuring the POP3 Settings" and
p.337 "Configuring the Internet Fax Settings".
Forwarding or Storing Faxes in Memory
To prevent unauthorized users from seeing sensitive faxes, you can set the machine to forward received
faxes to a preset destination, or store them in memory without printing them out.
• This function is available for the Type 2 model only.
Receiving a Fax
241

 Loading...