• For details about [Paper Tray Priority], see p.274 "System Settings"
Receiving or Rejecting Faxes from Special Senders
You can set the machine to receive (or reject) faxes only from the registered Special Senders. This helps
you screen out unwanted documents, such as junk faxes, and prevents the wasting of fax paper.
To use this function, you must first register Special Senders using Web Image Monitor, and then select
whether to accept or reject faxes from them.
• This function is not available with Internet Fax.
Registering the Special Senders
This section describes how to register Special Senders.
A maximum of 30 Special Senders can be registered.
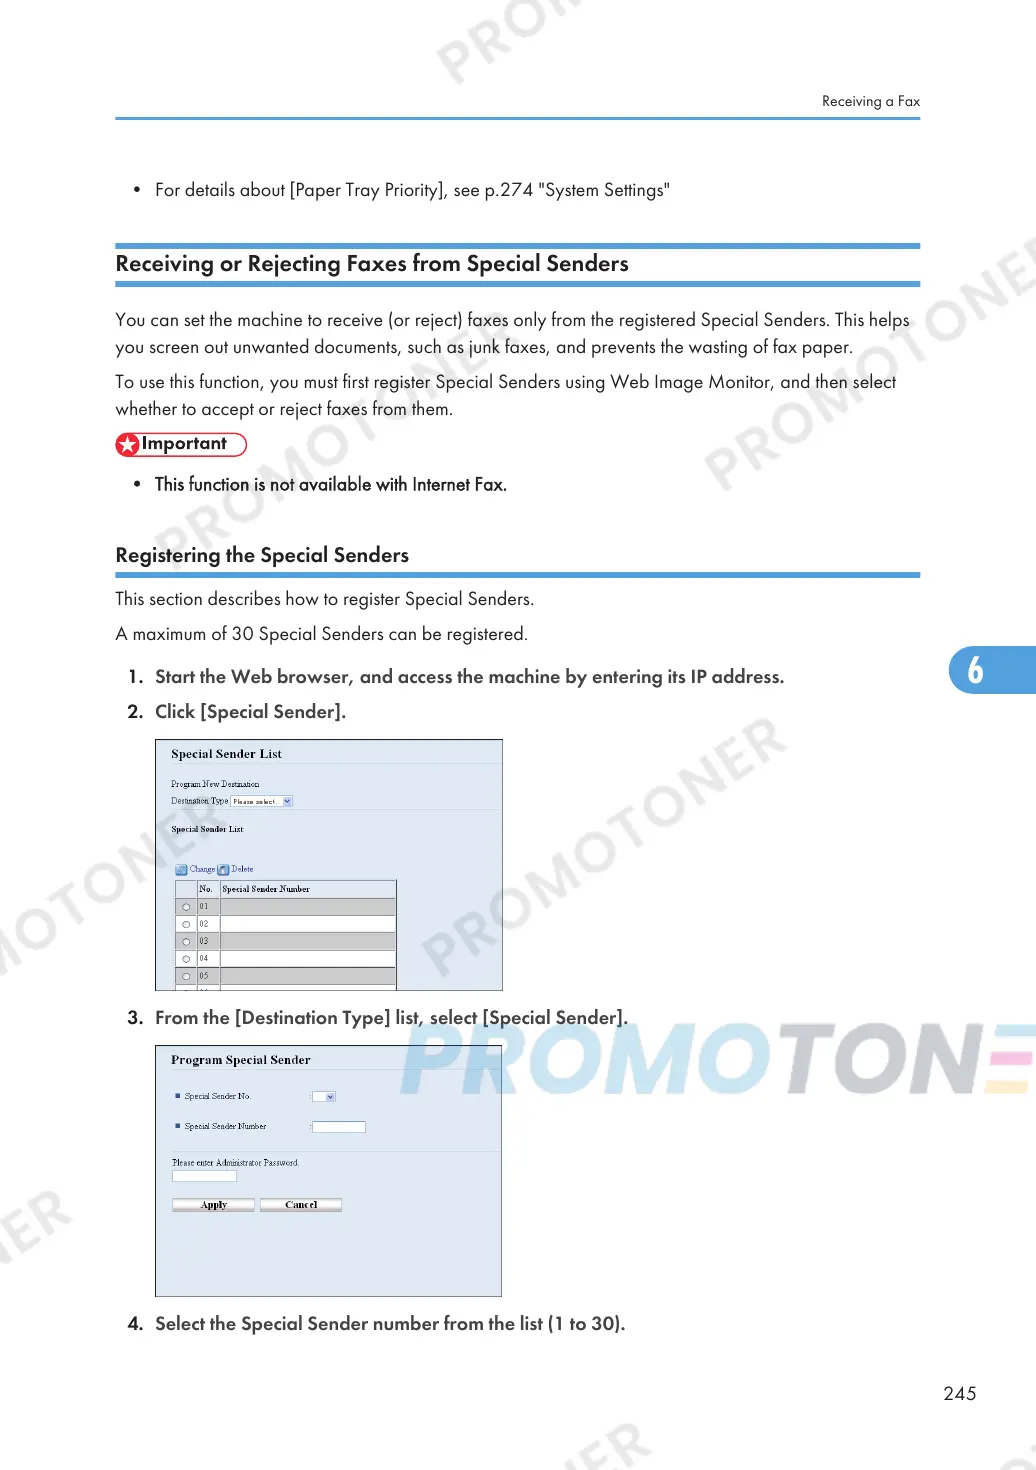
1. Start the Web browser, and access the machine by entering its IP address.
2. Click [Special Sender].
3. From the [Destination Type] list, select [Special Sender].
4. Select the Special Sender number from the list (1 to 30).
Receiving a Fax
245

 Loading...