RIGOL Chapter 5 Trigger
5-10 DS4000E User’s Guide
3. Specify the trigger mode
Press Sweep to select “Auto”, “Normal” or “Single” (please refer to “Trigger
Mode”). The corresponding status light of the trigger mode currently selected in
the trigger control area (TRIGGER) at the front panel turns on.
4. Set the trigger coupling, trigger holdoff and noise rejection
Press Setting to enter the trigger setting submenu. In this submenu:
1) Press Coupling to select “DC”, “AC”, “LF Reject” or “HF Reject” (please
refer to “
Trigger Coupling”).
2) Press Holdoff to adjust the holdoff time (please refer to “Trigger
Holdoff”). The range is from 100 ns to 10 s.
3) Press Noise Reject to turn the noise rejection on or off (please refer to
“
Noise Rejection”).
Pulse Trigger
In pulse trigger, the oscilloscope triggers on the positive or negative pulse with a
specified width.
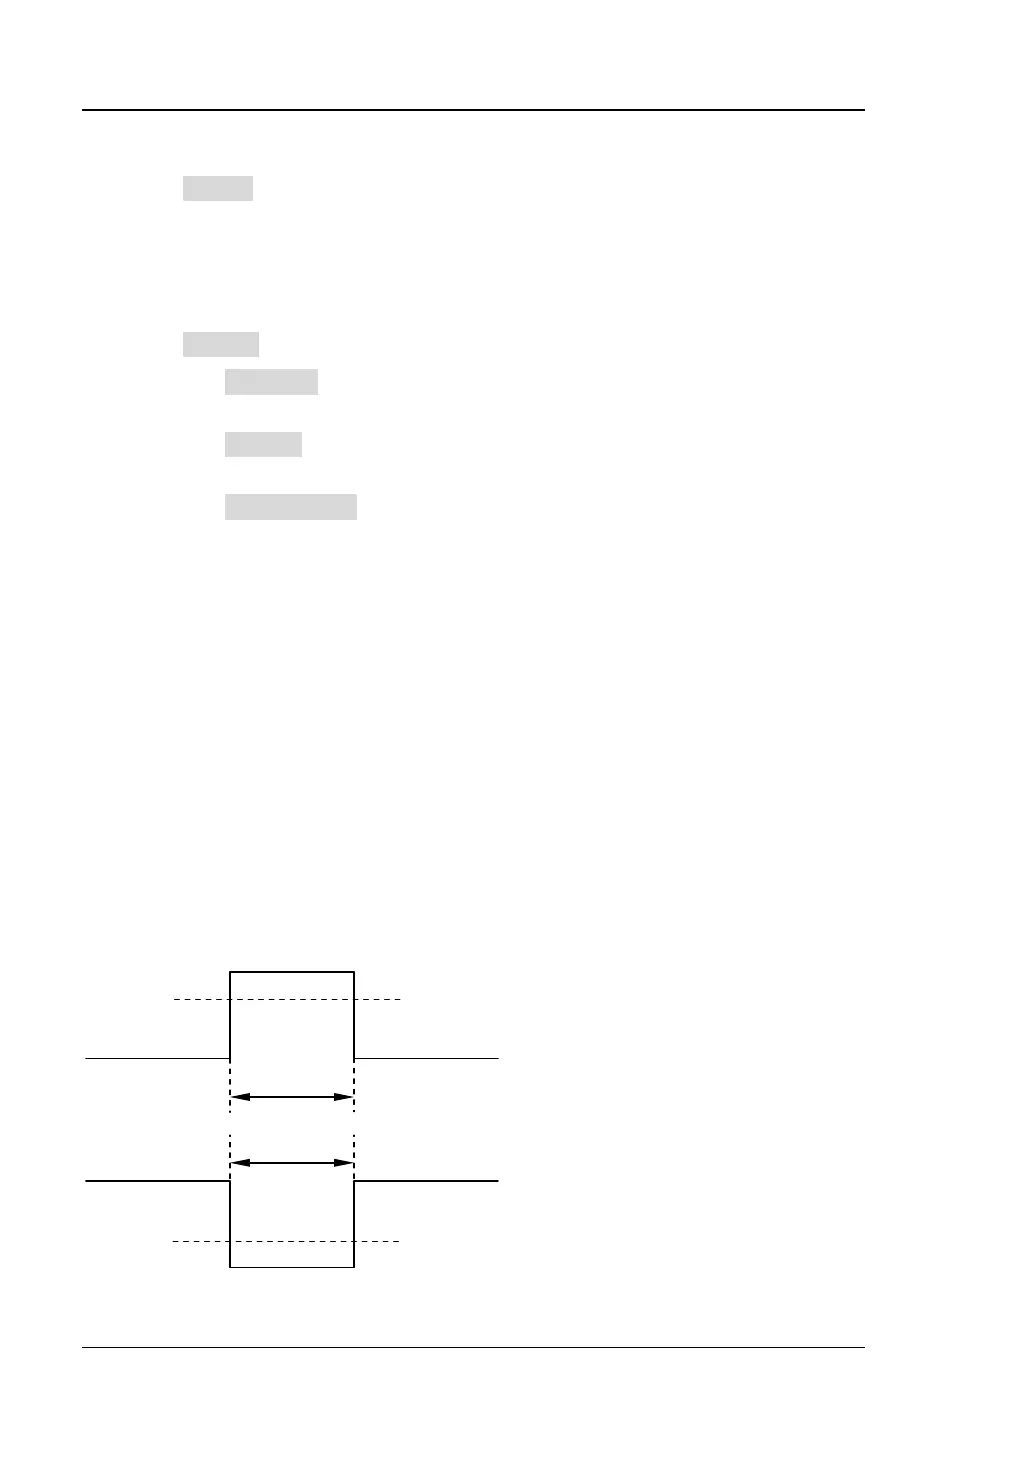
For this oscilloscope, the positive pulse width is defined as the time difference
between the two crossing points of the trigger level and positive pulse and the
negative pulse width is defined as the time difference between the two crossing
points of the trigger level and negative pulse, as shown in the figure below.
Trigger Level
Trigger Level
Positive
Pulse Width
Negative
Pulse Width
 Loading...