4-2-2. XVS-8000/7000/6000
Procedure
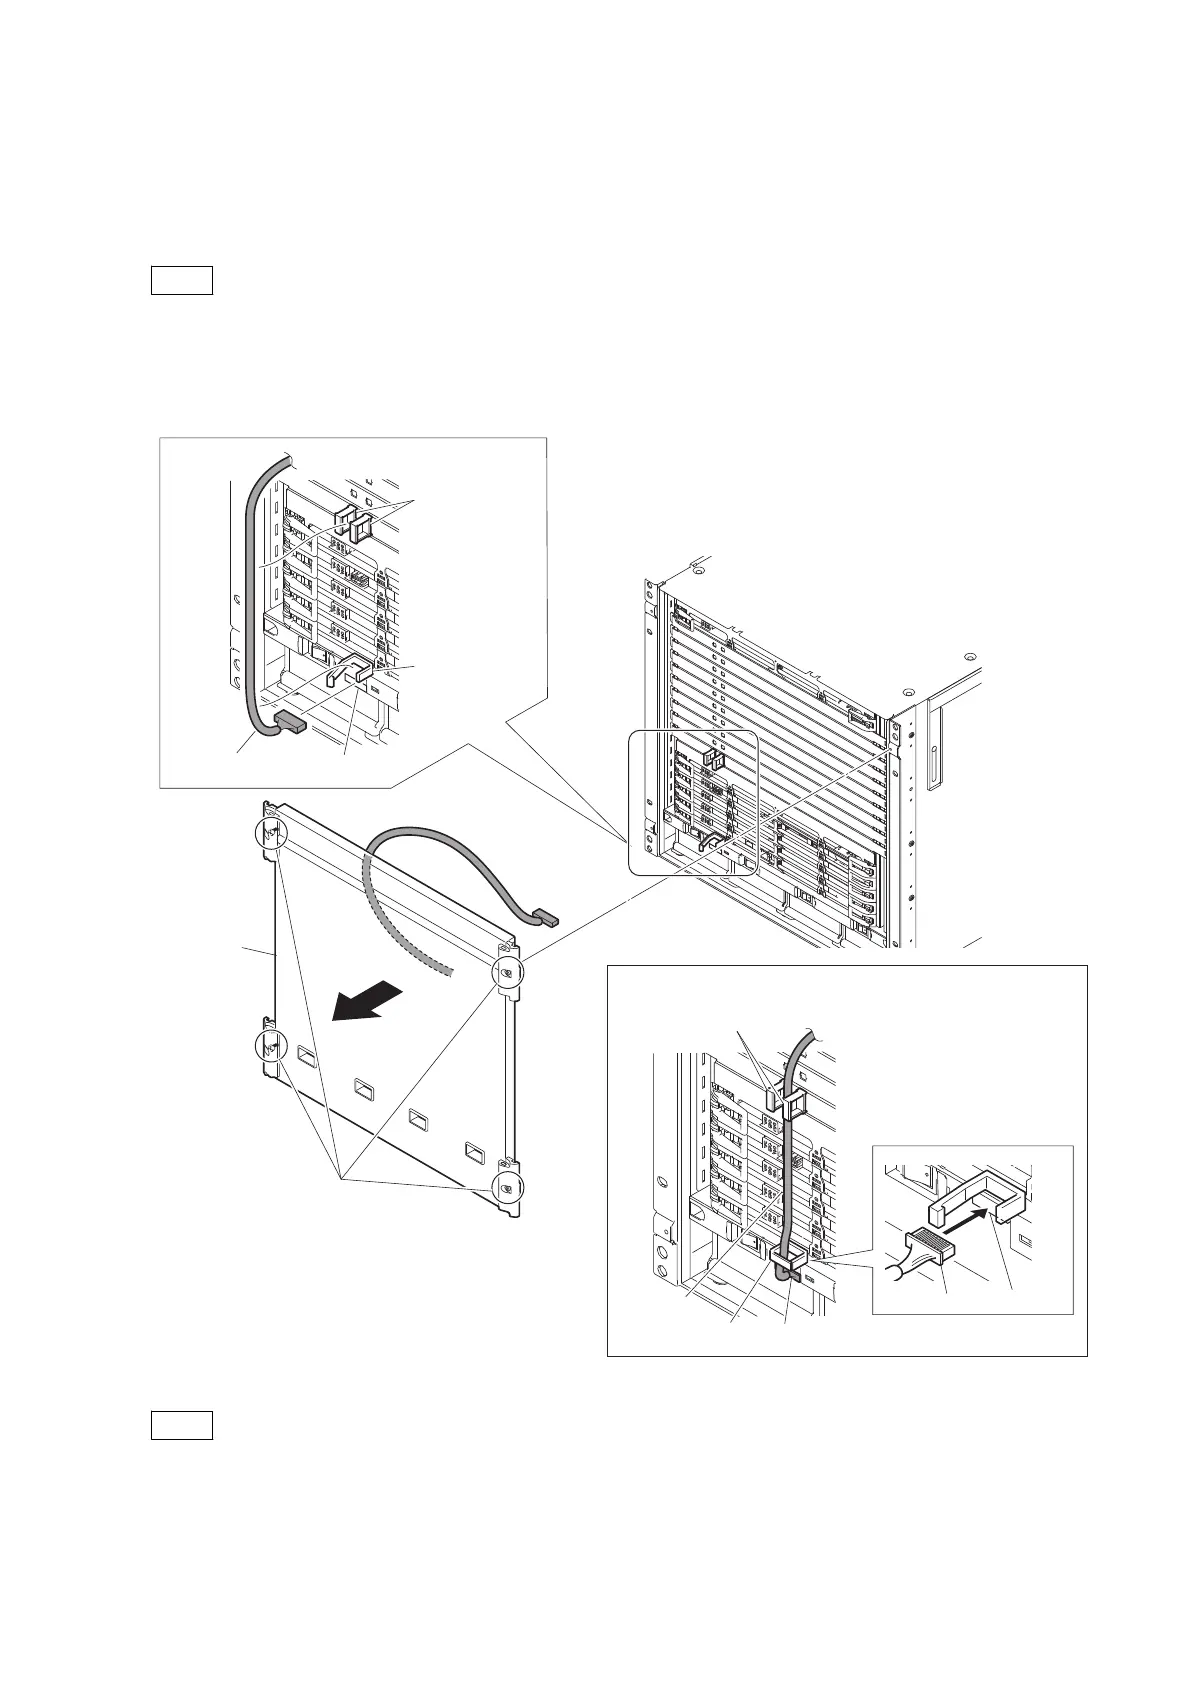
1. Loosen the four screws (with drop-safe) and remove the front panel to the arrow.
Note
The front panel is connected to the unit by the harness. When removing the front panel, be careful not too pull the
harness.
2. Open the clamper.
3. Remove the harness from the clamper, and then remove the front panel.
This figure shows XVS-8000.
Front panel
Harness
Connector
Clamper
Screw
(with drop-safe)
Harness guide
Harness
Harness
Connector
Connector
Clamper
Harness guide
Precaution during installation
4. Install the removed parts by reversing the steps of removal.
Note
• Do not use an electric screwdriver to attach the front panel. Using an electric screwdriver to attach the front
panel may damage screws.
• When installing the front panel, pass the harness to the clamper. (This step is not required for XVS-6000.)
XVS-9000-C/XVS-8000-C/XVS-7000-C/XVS-6000-C
4-3

 Loading...