4-15. MPU-163B Board (XVS-9000/8000/7000/6000)/MPU-163C Board
(XVS-9000)
Removing Procedure
XKS-C8111/XKS-C8166
1. Proceed to step 2.
XKS-C9111/XKS-C9111N
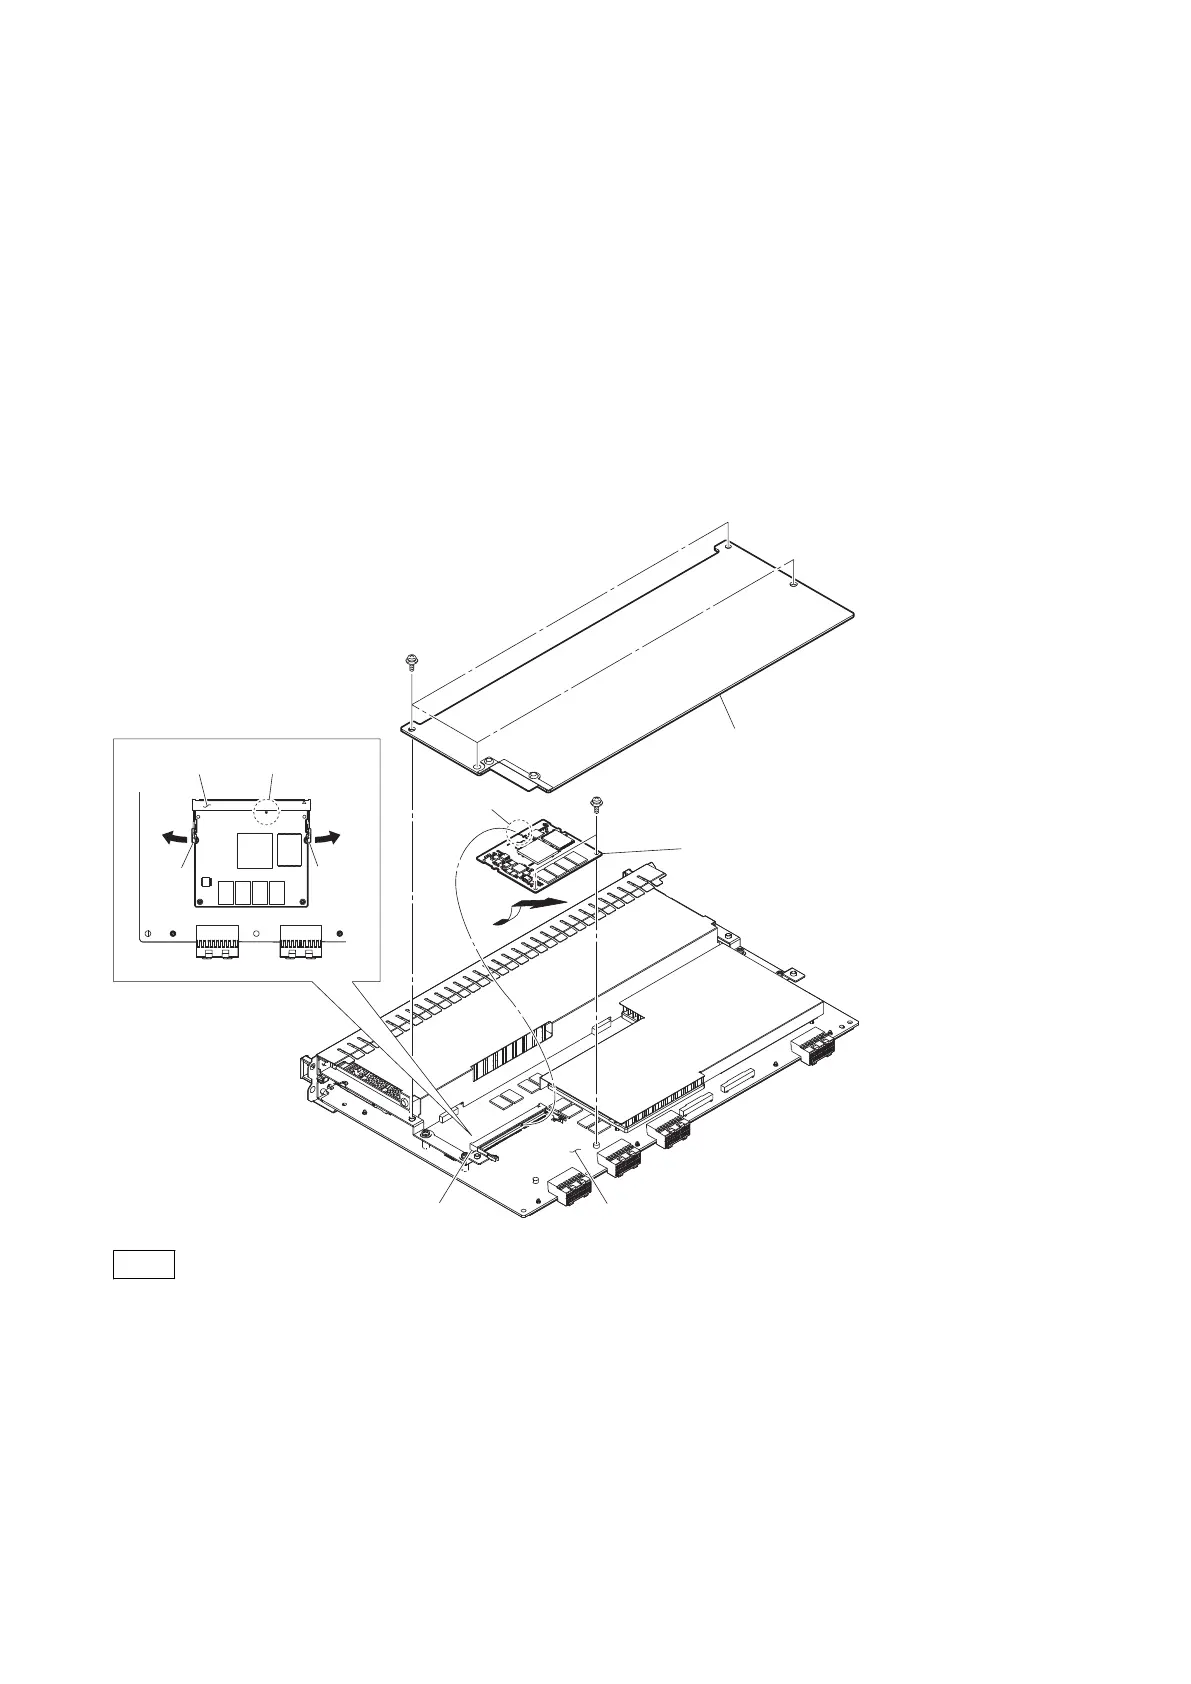
1. Remove the four screws (PSW3 x 6) , then remove the dummy plate.
XKS-C9121/XKS-C9121N
1. Remove the CNO-45 board. (Refer to “4-14. CNO-45 Board (XVS-9000)”)
2. Remove the two screws (PSW2 x 5).
3. Open the levers of the socket in the direction of the arrow (1).
4. Remove the MPU-163B board/MPU-163C board in the direction of the arrow (2).
Notch
Socket
Socket
(2)
PSW
3 x 6
PSW
2 x 5
(1)(1)
LeverLever
(b)
(a)
Dummy plate
Notch
MPU-163B board/
MPU-163C board
NET-42 board
Note
When installing the dummy plate or CNO-45 board, tighten the screws in the following sequence: (a), (b), others.
Installing Procedure
1. Insert the MPU-163B board/MPU-163C board into the socket at an angle.
2. Turn the memory module to horizontal position until a clicking sound is made.
3. Assemble this unit.
XVS-9000-C/XVS-8000-C/XVS-7000-C/XVS-6000-C
4-29

 Loading...