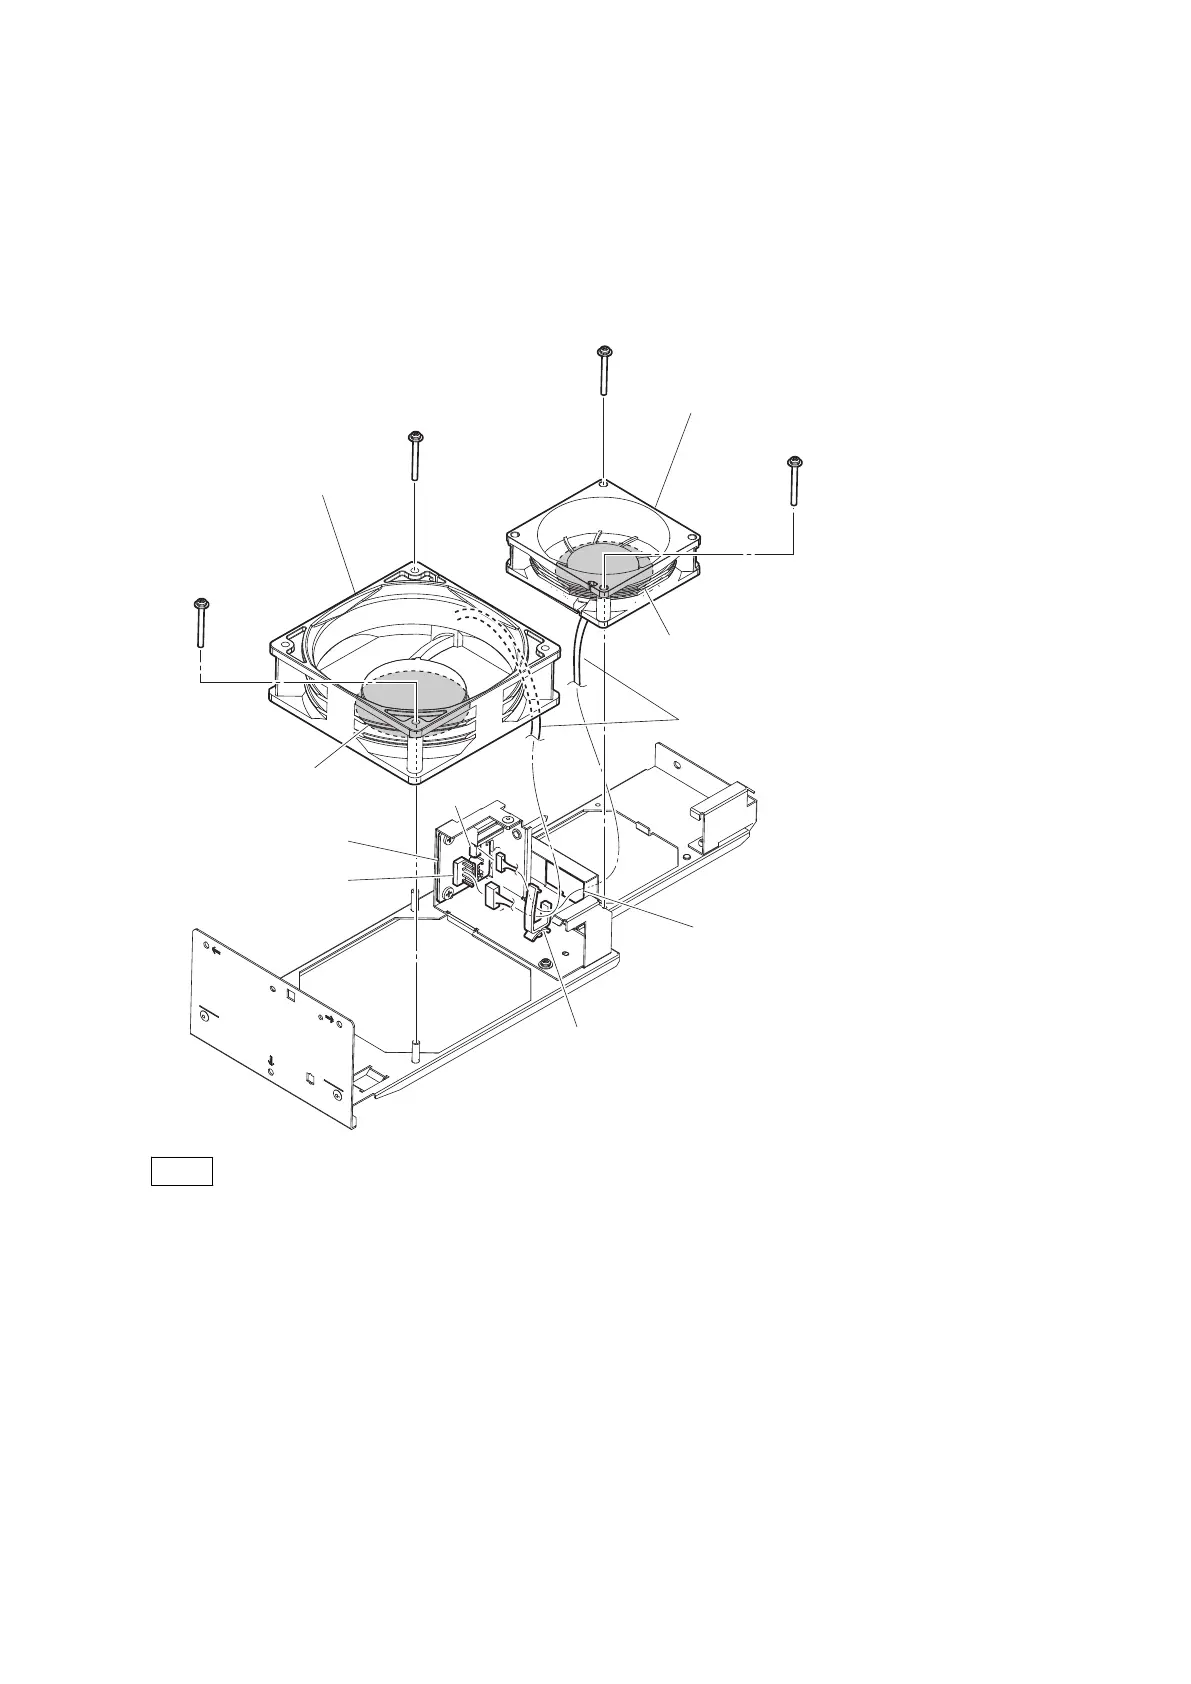
2. Disconnect the harness from the connector (CN003) on the CN-3824 board.
3. Open the clamper, then release the two harnesses.
4. Remove the two screws [a], then remove the DC fan (120 square) (thick type).
5. Remove the two screws [b].
6. Pull out the harness from the hole, then remove the DC fan (80 square).
[b]
PSW3 x 30
[b]
PSW3 x 30
[a]
PSW3 x 30
[a]
PSW3 x 30
CN003
Label
CN002
DC fan(80 square)
CN-3824 board
Clamper
Hole of the chassis
Label
Harnesses
DC fan(120 square) (Thick type)
Note
When attaching the DC fan, pay attention to the position of label and harness.
7. Install the removed parts by reversing the steps of removal.
4-4-4. DC Fan (Fan Holder Assembly (C)) (XVS-9000)
XVS-9000-C/XVS-8000-C/XVS-7000-C/XVS-6000-C
4-8

 Loading...