Charging System: 1J-9
• When installing the transfer gearshift arm, align the
wide spline teeth of the arm and shaft.
• Install the gearshift link arm in the following angle. (LT-
F400/F).
• Connect the oil hose. Refer to “Oil Cooler / Oil Cooler
Hose Removal and Installation in Section 1E
(Page 1E-10)”.
• Apply grease to new O-ring and oil seal lip.
: Grease 99000–25010 (SUZUKI SUPER
GREASE A or equivalent)
CAUTION
!
Replace the O-ring with a new one.
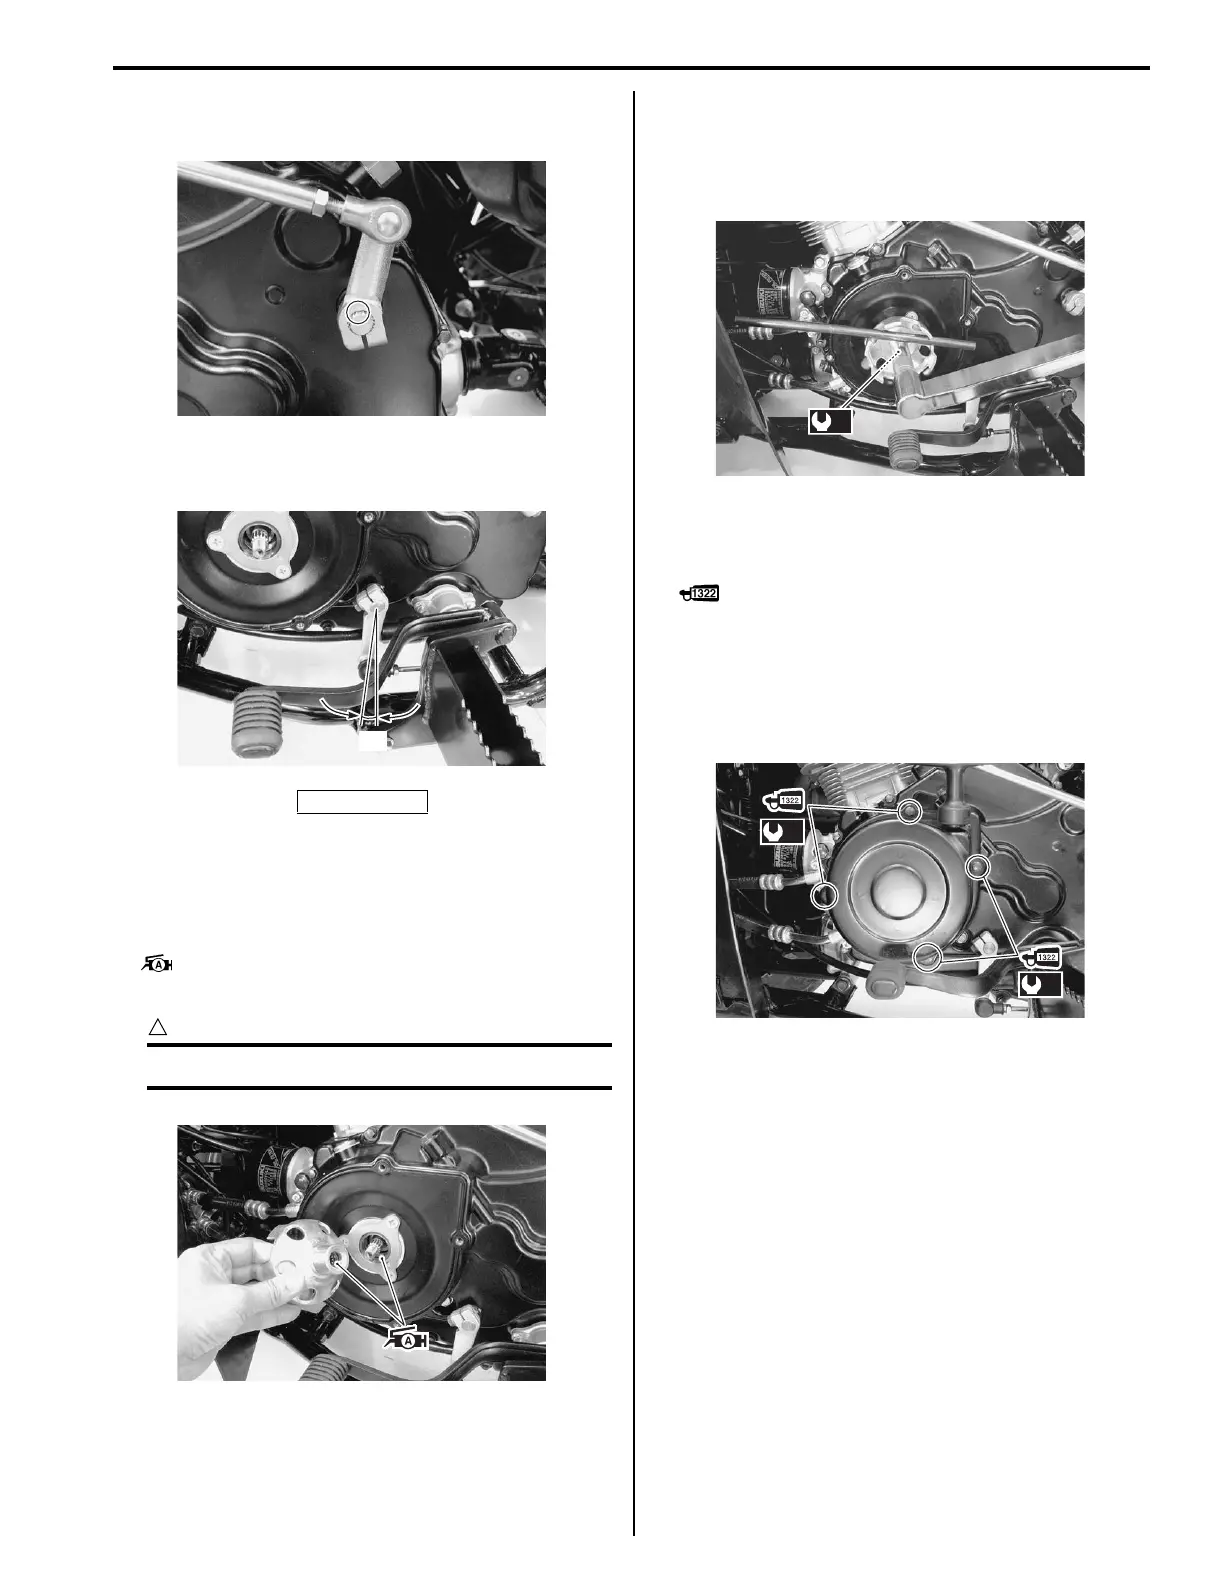
• Tighten the starter cup nut to the specified torque with
a proper bar.
Tightening torque
Starter cup nut (f): 38 N·m (3.8 kgf-m, 27.5 lb-ft)
• Apply a small quantity of thread lock to the recoil
starter mounting bolts and tighten to the specified
torque.
: Thread lock cement 99000–32110
(THREAD LOCK CEMENT SUPER 1322 or
equivalent)
Tightening torque
Recoil starter mounting bolt (g): 10 N·m (1.0 kgf-
m, 7.0 lb-ft)
“a”: 5°
I827H11A0025-01
“a”
I827H11A0026-03
I827H11A0027-01
(f)
I827H11A0028-02
(g)
(g)
I827H11A0029-01

 Loading...


