1D-6 Engine Mechanical:
Engine Assembly Removal
B827H11406013
Before taking the engine out of the frame, wash the
engine using a steam cleaner. Engine removal is
sequentially explained in the following steps:
1) Drain engine oil. Refer to “Engine Oil and Filter
Replacement in Section 0B (Page 0B-7)”.
2) Disconnect the battery lead wires.
CAUTION
!
When disconnecting the battery lead wires,
be sure to disconnect the battery (–) lead
wire first.
3) Remove the following parts from the vehicle.
• Front fender. Refer to “Exterior Parts Removal
and Installation in Section 9D (Page 9D-3)”.
• Rear fender. Refer to “Exterior Parts Removal and
Installation in Section 9D (Page 9D-3)”.
• Footrest mudguards. Refer to “Exterior Parts
Removal and Installation in Section 9D (Page 9D-
3)”.
• Under covers. Refer to “Exterior Parts Removal
and Installation in Section 9D (Page 9D-3)”.
4) Remove the V-belt cooling ducts (1). (LT-A400/F)
Refer to “V-belt Cooling Duct Removal and
Installation (LT-A400/F) in Section 5A (Page 5A-6)”.
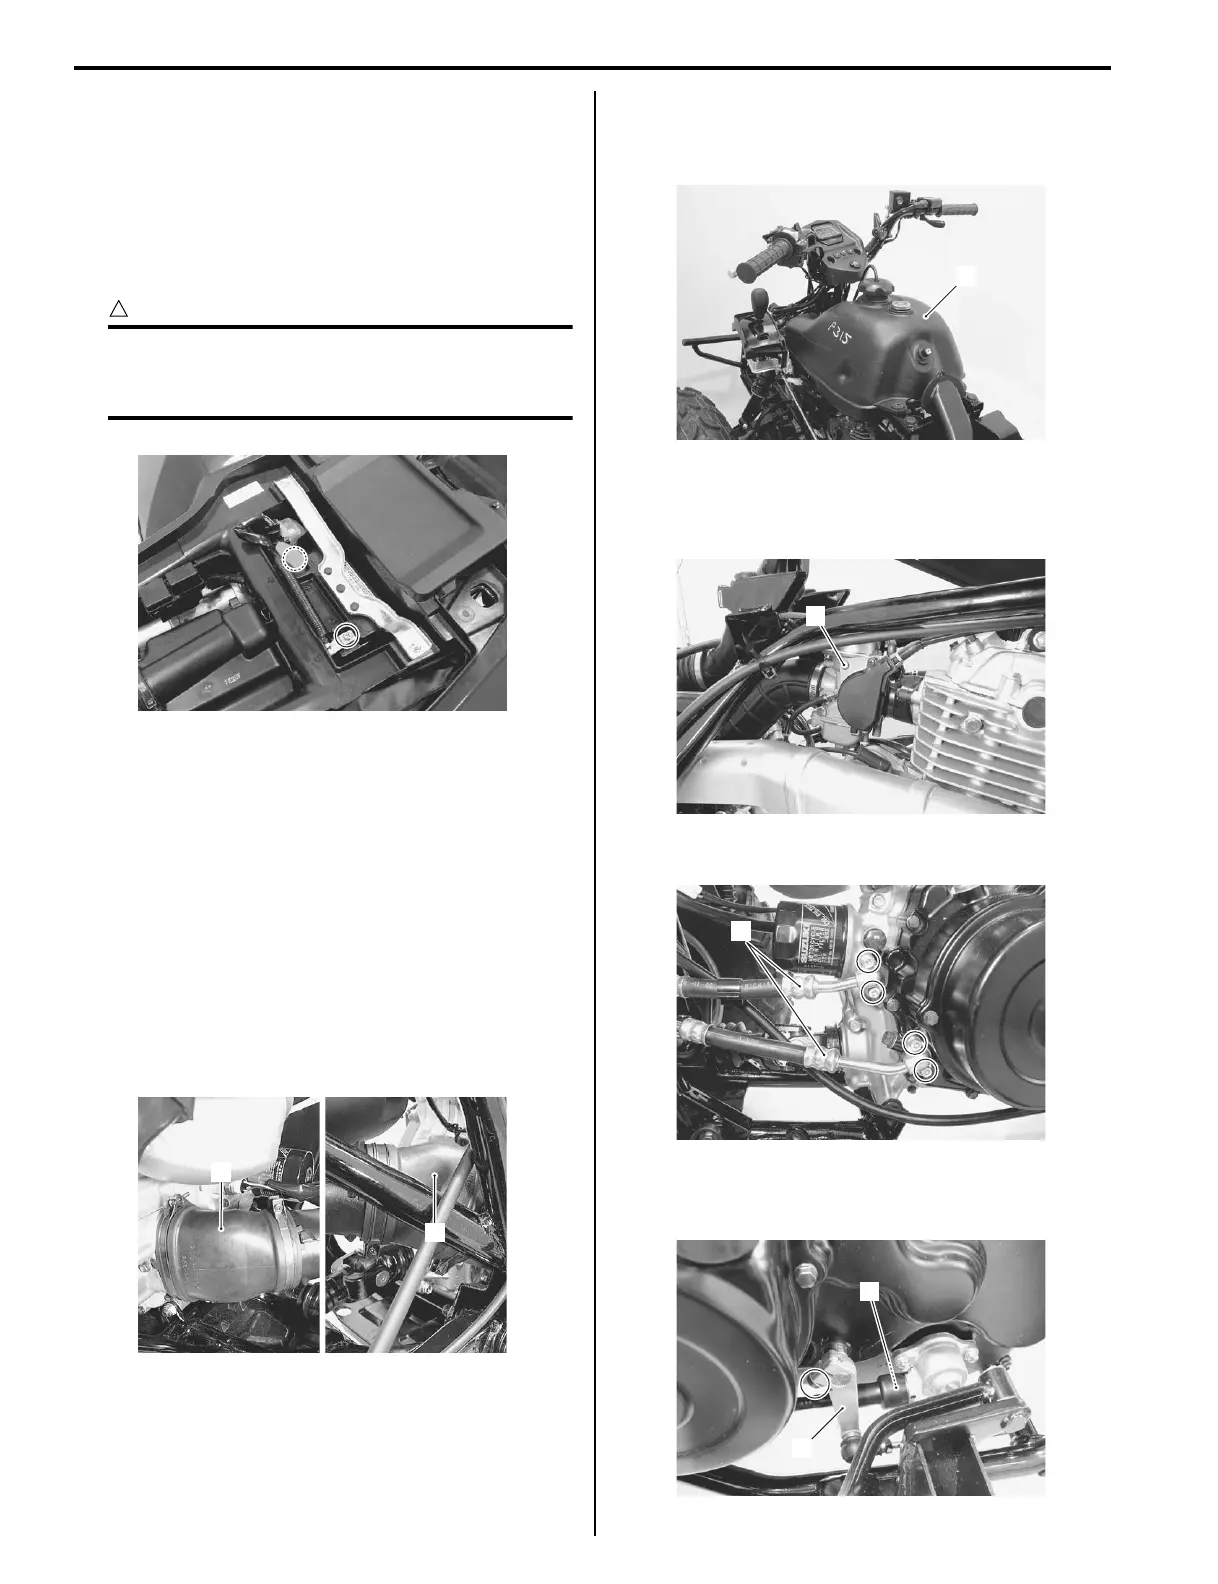
5) Remove the fuel tank (2). Refer to “Fuel Tank
Removal and Installation in Section 1G (Page 1G-
13)”.
6) Remove the carburetor (3). Refer to “Carburetor
Assembly Removal and Installation in Section 1G
(Page 1G-17)”.
7) Disconnect the oil hoses (4).
8) Disengage the gearshift link arm (5). (LT-F400/F)
9) Remove the speedometer cable (6).
I827H1140232-01
1
1
I827H1140233-01
2
I827H1140234-02
3
I827H1140235-01
4
I827H1140236-01
5
6
I827H1140237-01

 Loading...


