Exterior Parts: 9D-6
Rear Fender
Removal
1) Remove the rear carrier. Refer to “Rear Carrier
Removal and Installation in Section 9E (Page 9E-4)”.
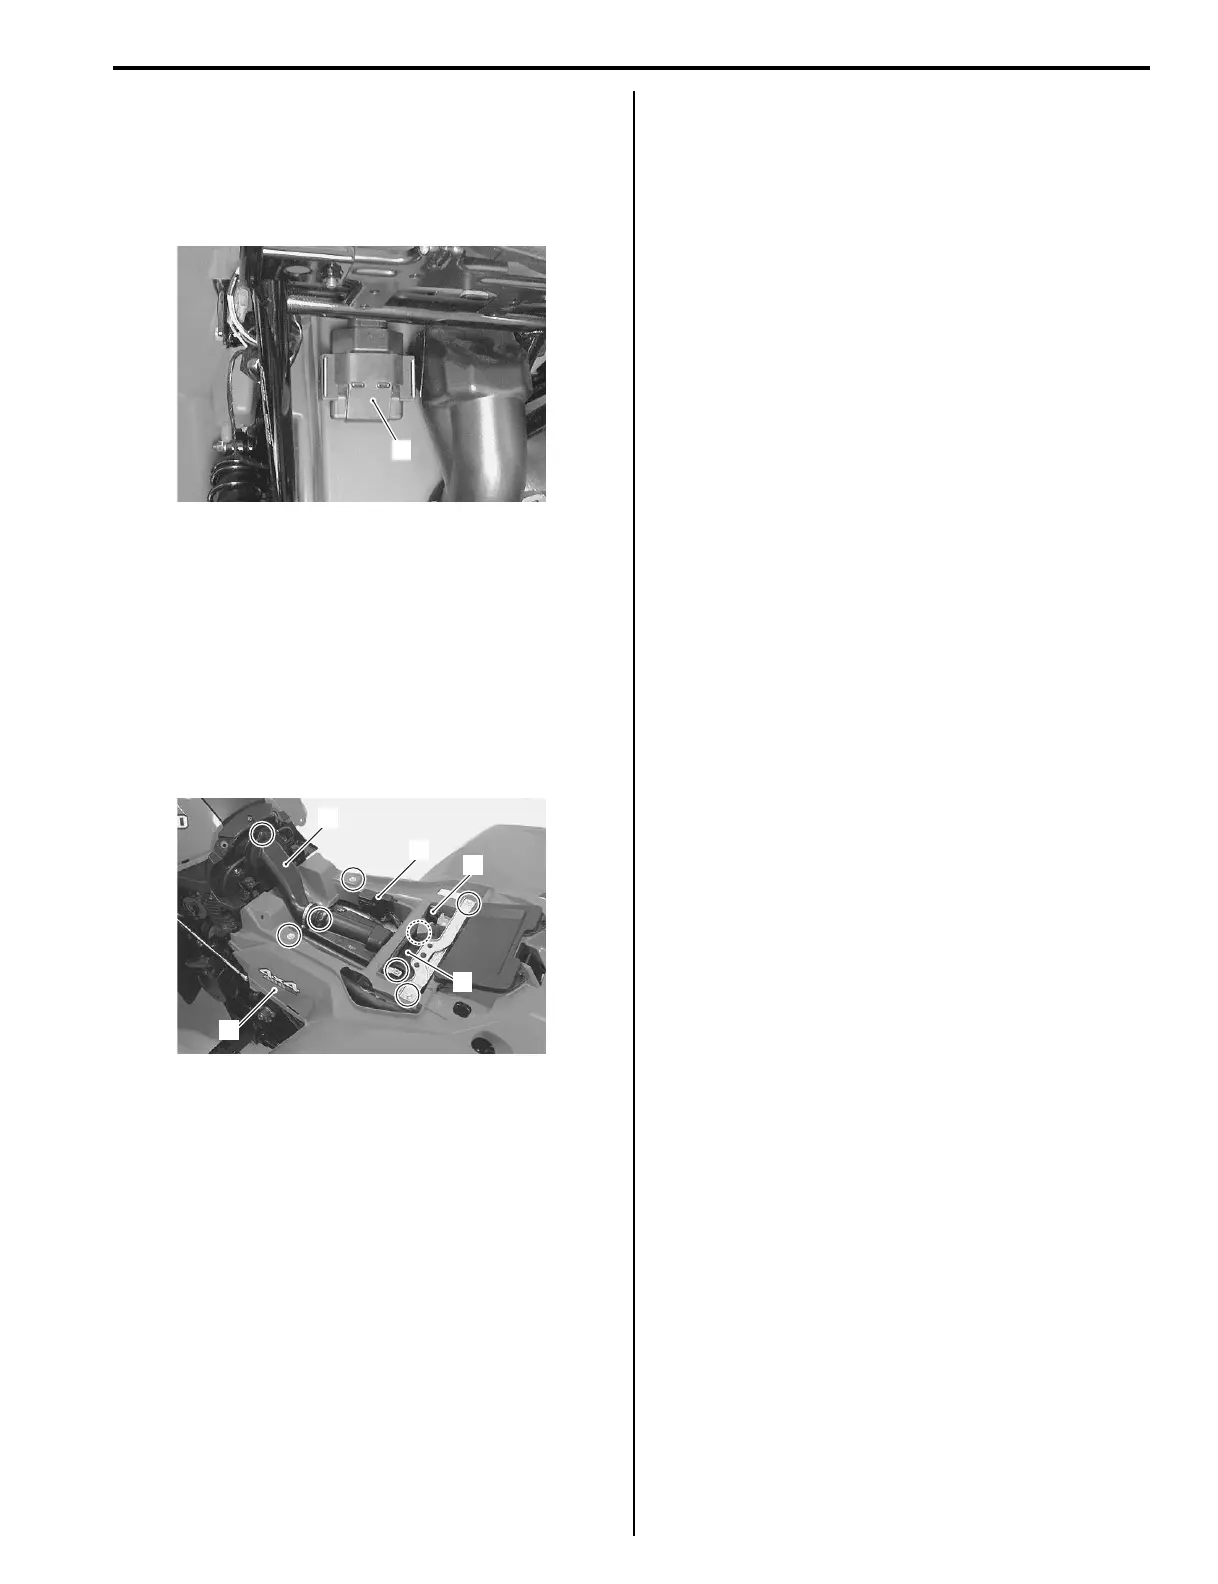
2) Remove the CDI unit (1) from the bracket.
3) Remove the side covers.
4) Remove the footrest mudguards.
5) Remove the battery (2). Refer to “Battery Removal
and Installation in Section 1J (Page 1J-13)”.
6) Remove the starter relay (3). Refer to “Starter Relay
Removal and Installation in Section 1I (Page 1I-5)”.
7) Disconnect the fuse box (4) from the bracket.
8) Remove the air cleaner duct (5).
9) Remove the rear fender (6).
Installation
Installation is in the reverse order of removal.
1
I827H1940023-01
3
4
5
2
6
I827H1940020-03

 Loading...


