Engine Mechanical: 1D-19
• Fit a new gasket (2).
CAUTION
!
Use new gasket to prevent oil leakage.
• Tighten the cam chain tension adjuster bolts (3) to the
specified torque.
Tightening torque
Cam chain tension adjuster bolt (a): 10 N·m (1.0
kgf-m, 7.0 lb-ft)
• Install O-ring, spring and spring holder bolt (4).
CAUTION
!
Use new O-ring to prevent oil leakage.
• tighten the spring holder bolt (4) to the specified
torque.
Tightening torque
Cam chain tension adjuster spring holder bolt
(b): 8 N·m (0.8 kgf-m, 6.0 lb-ft)
CAUTION
!
• When the cam chain tension adjuster
assembly has been installed, check for
cam chain tension to determine if the
tension adjuster is functioning properly.
• Turn the crankshaft and check that all the
moving parts work properly.
• Inspect the valve clearance. Refer to “Valve
Clearance Inspection and Adjustment in Section 0B
(Page 0B-4)”.
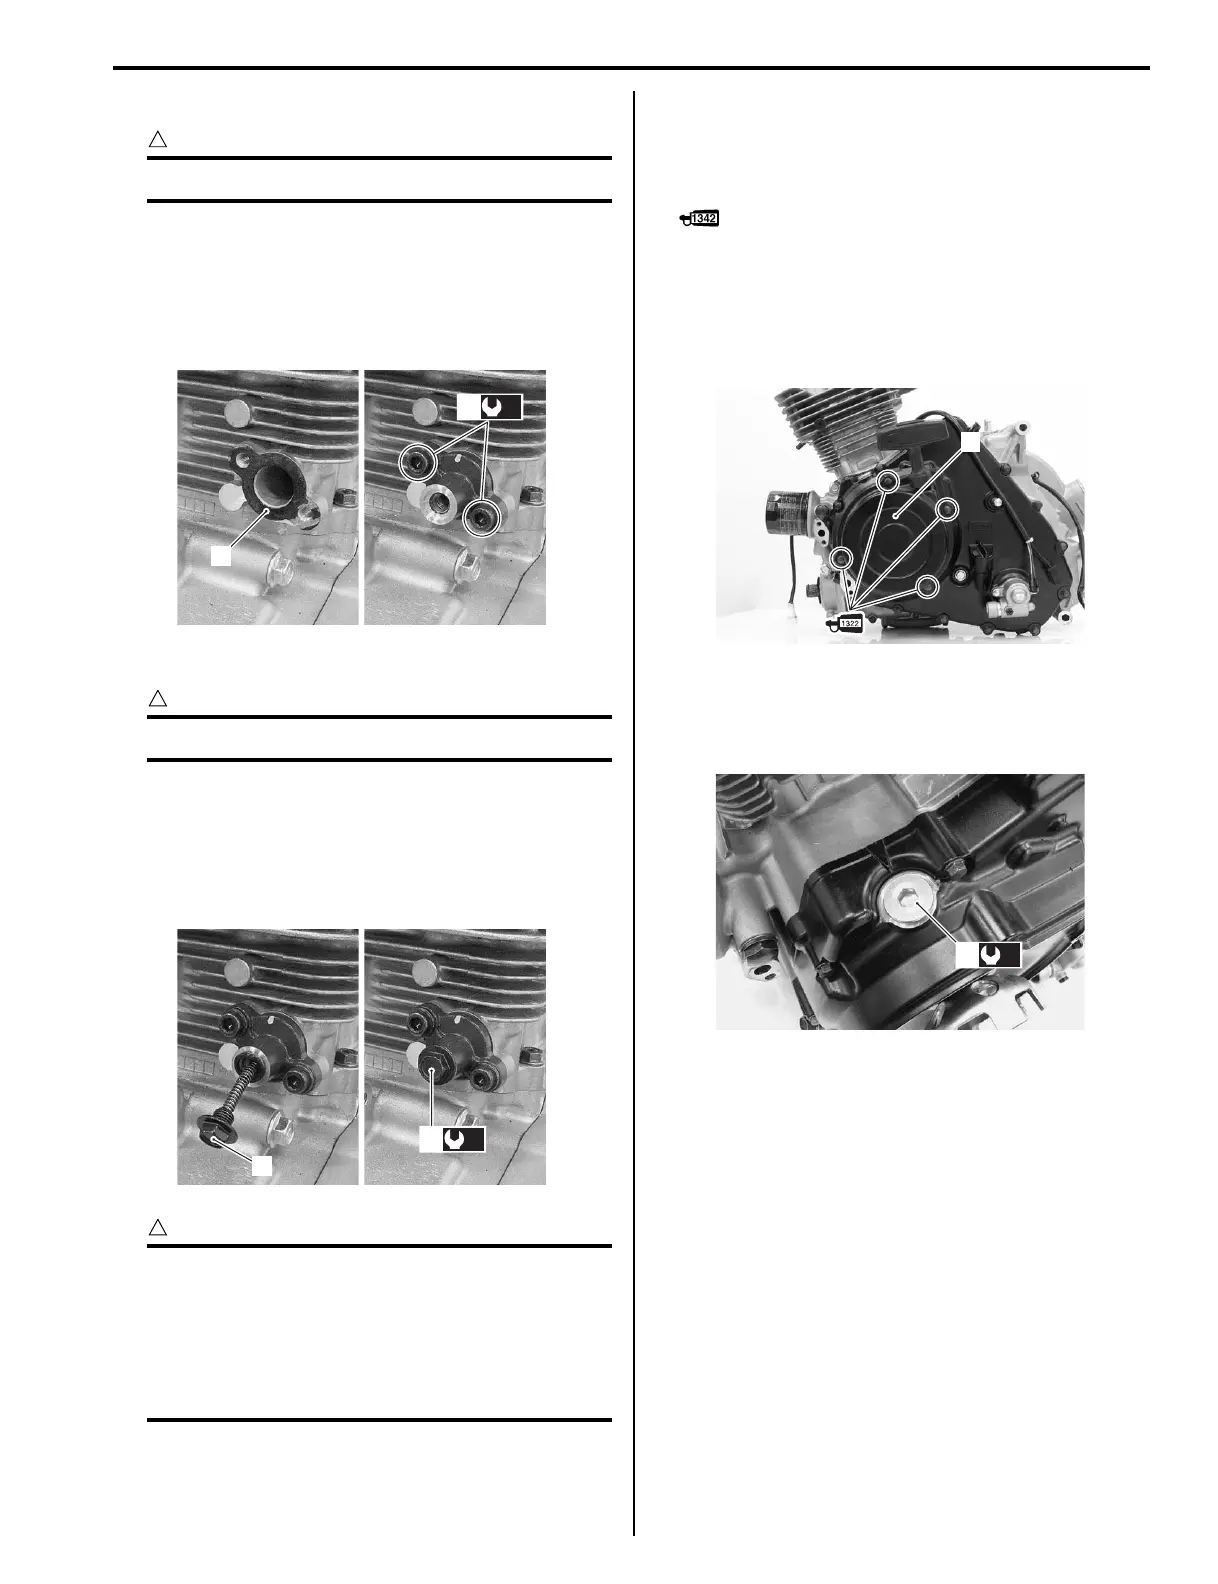
Recoil Starter
• Install the recoil starter assembly (1).
• Apply a small quantity of thread lock to the bolts and
tighten them to the specified torque.
: Thread lock cement 99000–32110
(THREAD LOCK CEMENT SUPER 1322 or
equivalent)
Tightening torque
Recoil starter mounting bolt (a): 10 N·m (1.0 kgf-
m, 7.0 lb-ft)
• Install TDC plug (2).
Tightening torque
TDC plug (b): 23 N·m (2.3 kgf-m, 16.5 lb-ft)
2
(a)
3
I827H1140033-02
4
(b)
4
I827H1140036-02
1
I827H1140039-01
(b)
2
I827H1140040-01

 Loading...


