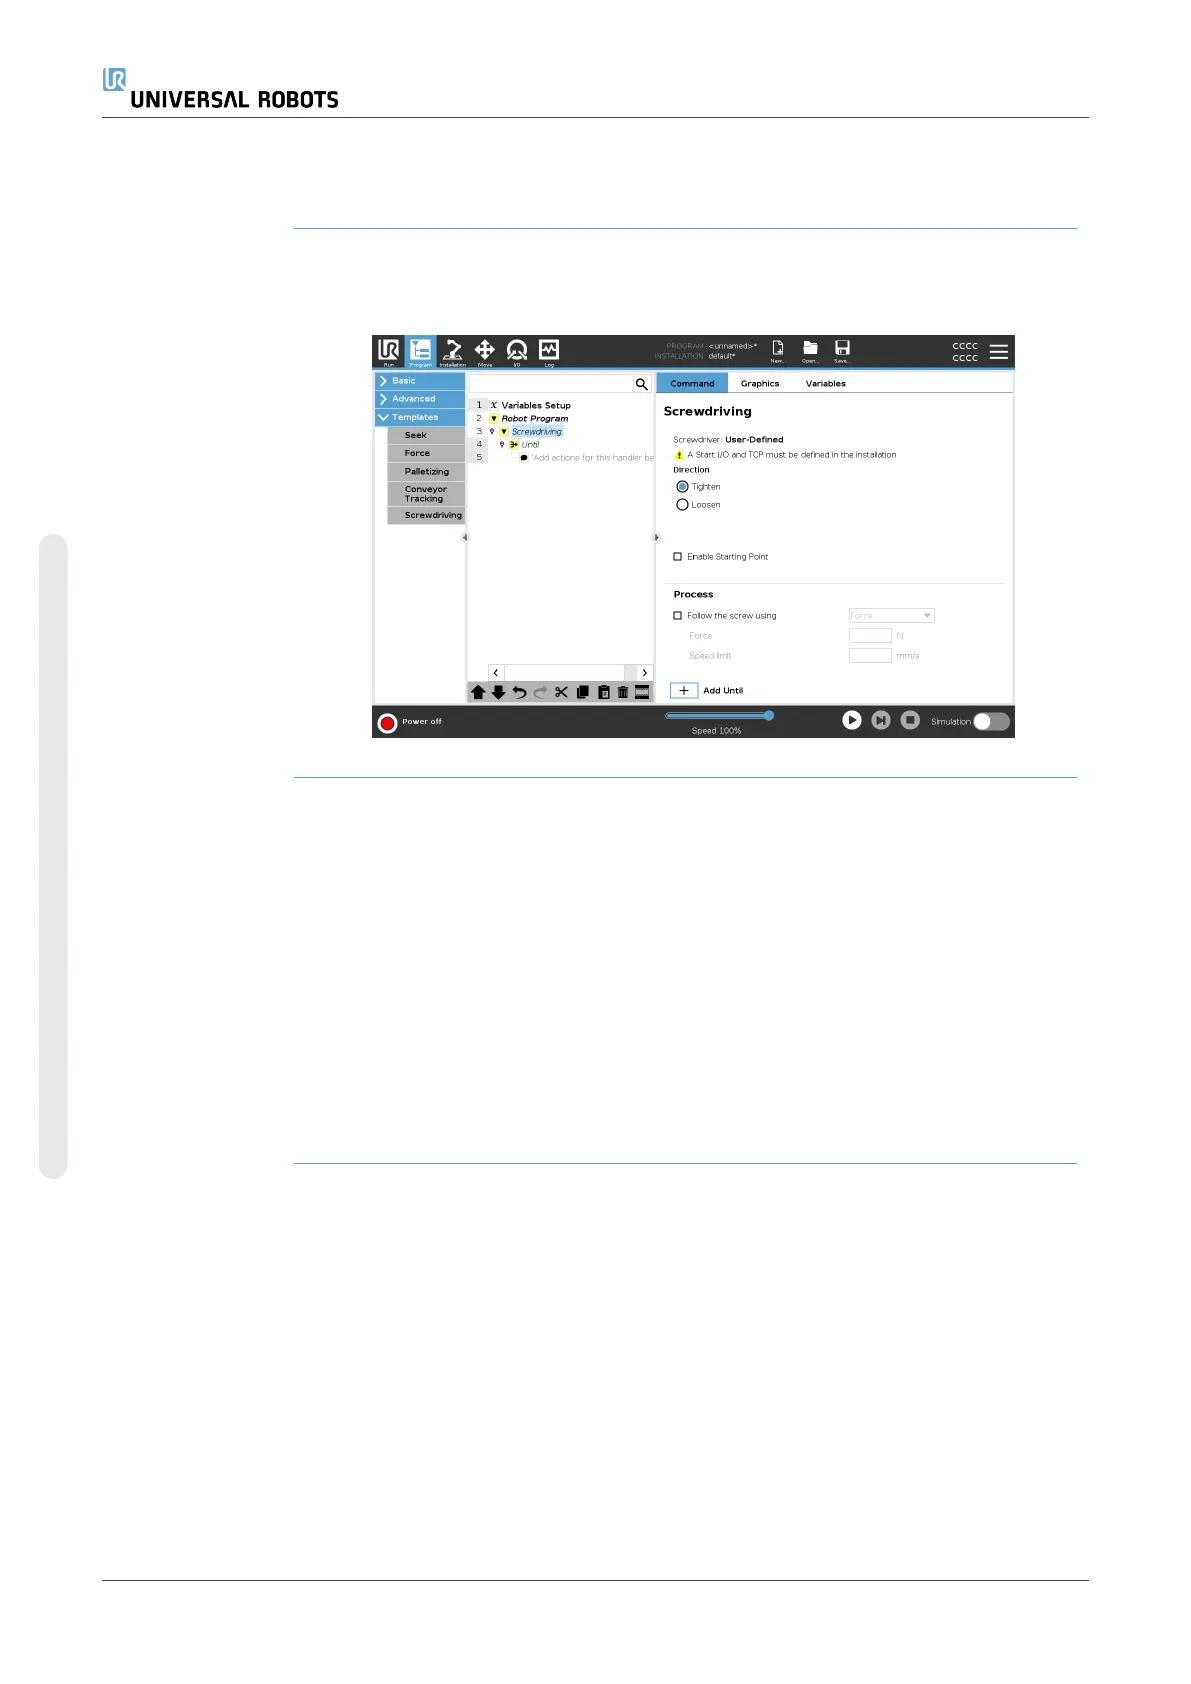
19.9.5. Screwdriving
Description The Screwdriving program node provides an easy way to add a screwdriving
application for an attached screwdriver. Configuring the screwdriver and its
connections to the robot is defined in the Installation Tab (seeGeneral).
Adding a
Screwdriving
Node
1. In the Header, tap Program.
2. Under Templates, tap Screwdriving.
3. Select Tighten to follow the screw in a tightening direction (in), or select Loosen
to follow the screw in a loosening direction (out). This selection only impacts the
motion of the robot to follow the screw and its measuring calculations.
4. In the Program Selection field, you can select a screwdriver program,
depending on the Program Selection signals in the Installation.
5. Select Enable Starting Point, to add a MoveL to the Program Tree that is
executed when the screwdriver is already running.
Select Enable Machine Error Handler, to add a corrective measure, if required,
to the Program Tree before the screwdriving actions begins.
UR10e 266 User Manual
Copyright © 2009–2024 by UniversalRobotsA/S. All rights reserved.
 Loading...


