NetSure
™
Control Unit (NCU)
User Manual, UM1M830BNA
Spec. No: 1M830BNA, 1M830DNA Code: UM1M830BNA
Model No: M830B, M830D Revision M, May 12, 2017
Viewing the NCU Controller’s Device Inventory
Local Menu Navigation:
Main Menu / ESC to view Info Screens / ENT to view Inventory.
Web Menu Navigation:
System Inventory Menu.
Clearing or Resetting Alarms
Local Menu Navigation:
Main Menu / Settings Icon / Alarm Settings / select alarm to clear
or reset.
Web Menu Navigation:
Settings Menu / navigate the various device tabs to select an alarm
to clear.
Clearing Logs
Local Menu Navigation:
None.
Web Menu Navigation:
Advance Settings Menu / Clear Data Tab / select log to clear.
Changing the Local LCD Display Orientation
M830B Only: The rotation of the text in the local menus can be
changed to allow the controller to be mounted in different
orientations. If the text is not in the proper orientation for your
application, change the LCD Rotation setting.
Local Menu Navigation:
Main Menu / Settings Icon / Sys Settings / LCD Rotation.
Web Menu Navigation:
Settings Menu / System Tab / LCD Rotation.
Disabling the Local Keypad Sound
Local Menu Navigation:
Main Menu / Settings Icon / Sys Settings / Keypad Voice.
Web Menu Navigation:
None.
Blocking Alarms
Local Menu Navigation:
Main Menu / Settings Icon / Alarm Settings / Alarm Blocked.
Web Menu Navigation:
Settings Menu / System Tab / Outgoing Alarms Blocked.
Changing the Date and Time
Local Menu Navigation:
Main Menu / Settings Icon / Sys Settings / Date.
Main Menu / Settings Icon / Sys Settings / Time.
Date: Use the Up Arrow and Down Arrow to select the date field.
Press ENT. Use Up Arrow and Down Arrow to select the year then
press ENT, next use Up Arrow and Down Arrow to select the month
then press ENT, and finally use Up Arrow and Down Arrow to select
the day then press ENT.
Time: Use the Up Arrow and Down Arrow to select the time field.
Press ENT. Use Up Arrow and Down Arrow to select the hour then
press ENT, next use Up Arrow and Down Arrow to select the
minute then press ENT, and finally use Up Arrow and Down Arrow
to select the second then press ENT.
Web Menu Navigation:
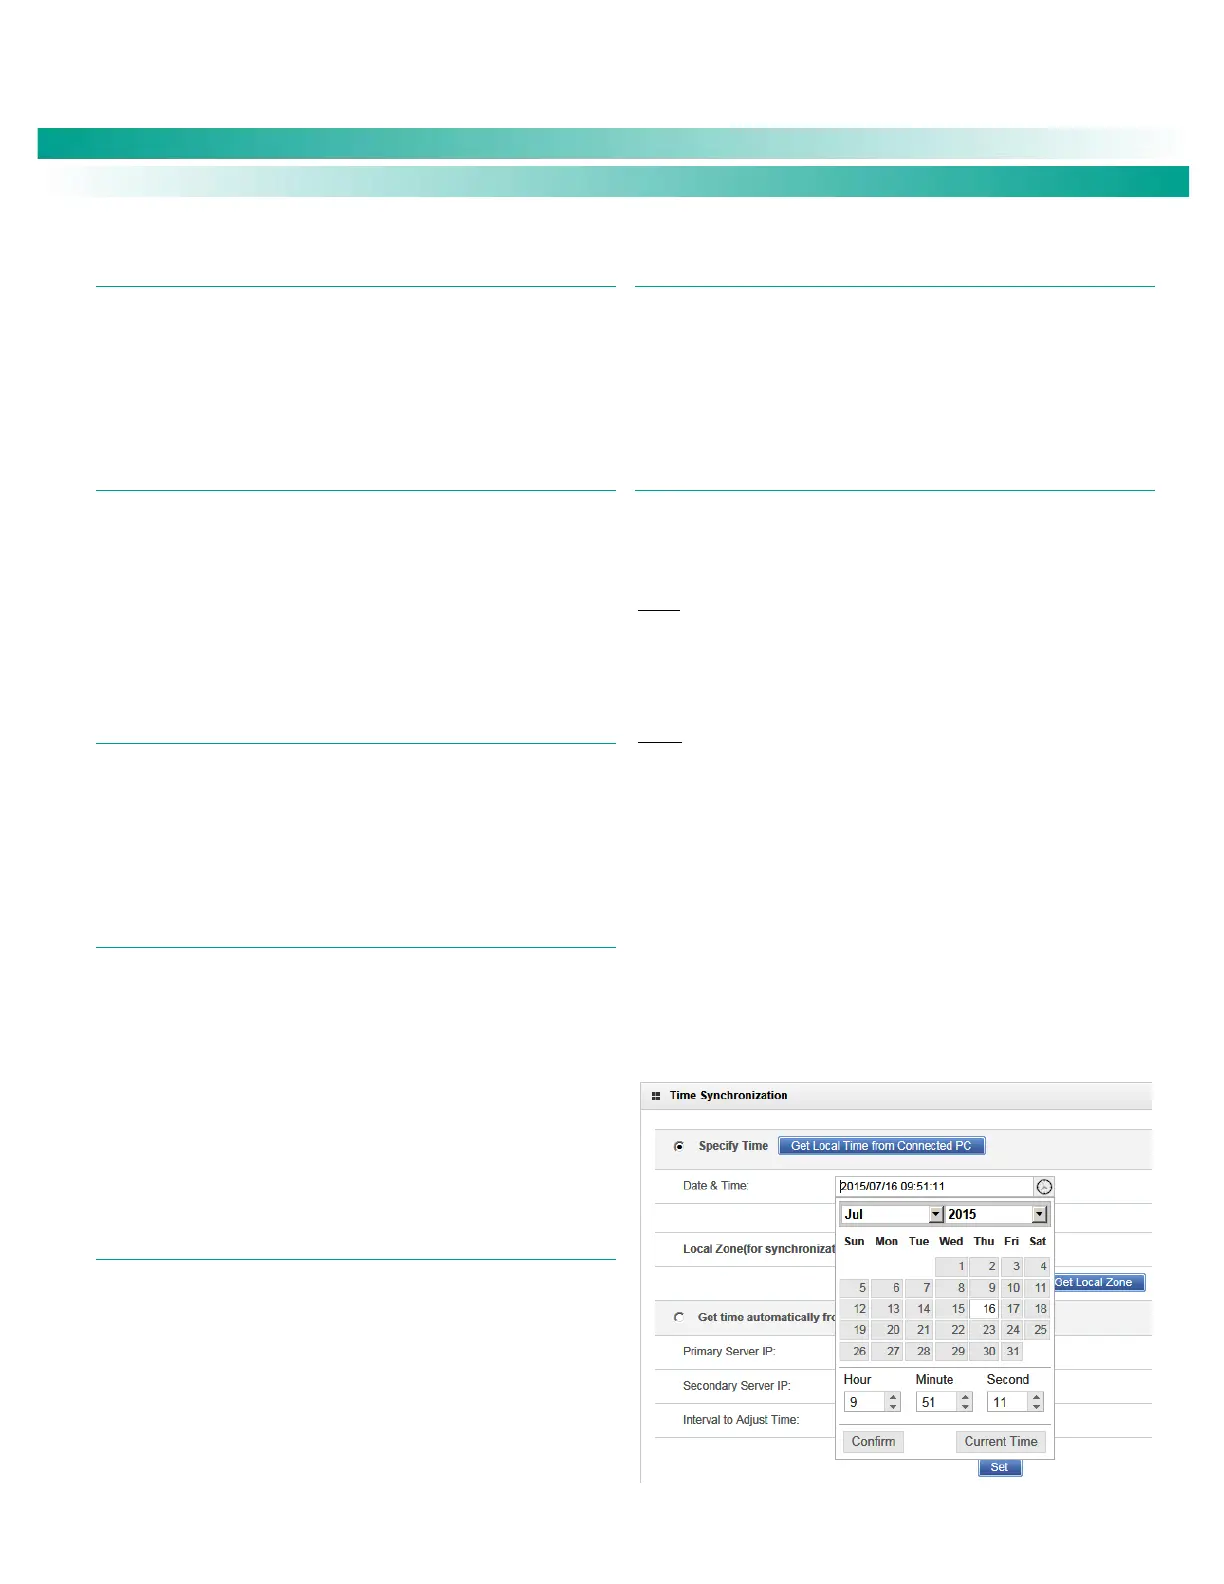
Settings Menu / Time Settings Tab.
In the Specify Time section, click on "Get Local Time from
Connected PC" and then “Set” to automatically set the date and
time. To manually set the date and time, click on “the clock
symbol” and enter the date and time. See Figure 9. Then select
the “Confirm” button. Then click on “Set” to save the change.
Figure 9. Manual Date and Time Menu
 Loading...