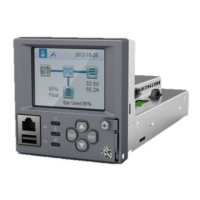
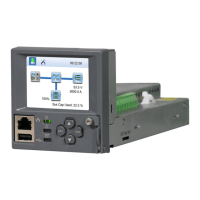
NetSure
™
Control Unit (NCU)
User Manual, UM1M830BNA
Spec. No: 1M830BNA, 1M830DNA Code: UM1M830BNA
Model No: M830B, M830D Revision M, May 12, 2017
Setting External Shunts (connected to the SM-DU+ Assembly)
Local Menu Navigation:
None.
WEB Menu Navigation:
Advance Settings Menu / Shunts Tab / SMDUP # / press
“Modify/View” and enter the following parameters. When done,
press “Set”.
Parameters
Set As (enabled, disabled)
Signal Full Name
Signal Abbr Name
Full Scale Current
Full Scale Voltage
Break Value (Device Rating)
High 1 Curr Limit Alarm (% of Breaker Value)
High 1 Curr Alarm Severity
High 1 Curr Alarm Relay
High 2 Curr Limit Alarm (% of Breaker Value)
High 2 Curr Alarm Severity
High 2 Curr Alarm Relay
Setting Shunts (connected to the SM-DU Assembly)
Local Menu Navigation:
None.
WEB Menu Navigation:
Advance Settings Menu / Shunts Tab / SMDU # / press
“Modify/View” and enter the following parameters. When done,
press “Set”.
Parameters
Set As (Not Used, General, Load, Battery)
Signal Full Name
Signal Abbr Name
Full Scale Current
Full Scale Voltage
Break Value (Device Rating)
High 1 Curr Limit Alarm (% of Breaker Value)
High 1 Curr Alarm Severity
High 1 Curr Alarm Relay
High 2 Curr Limit Alarm (% of Breaker Value)
High 2 Curr Alarm Severity
High 2 Curr Alarm Relay
WEB Menu Navigation (for shunts set as battery):
Settings Menu / Quick Settings Tab / Signal Settings Section /
SMDU#Batt# Rated Capacity and enter the following parameters.
Parameters
SMDU#Batt#, Rated Capacity
Setting the System Current Alarm
Local Menu Navigation:
None.
WEB Menu Navigation:
Settings Menu / System Tab / System Current Alarm (Enter a value
(in AMPS). If system current exceeds this value, a system current
alarm is issued).
Using the Relay Test Feature
NOTE: The relay test can only be performed when no alarms
are present.
Automatic Test
When placed in Relay Automatic Test Mode; all relays on an IB2
board, EIB board, and the NCU de-energize (since Fail Safe is
enabled, relay 1on the 1st IB2 will be in alarm state, if wired for fail
safe), then one-by-one each relay energizes for the time period
selected and then de-energizes. Relay 1 will stay in the alarm state
during the rest of the relay tests.
Local Menu Navigation:
None.
WEB Menu Navigation:
Settings Menu / System Tab / set the Relay Test Time.
or
Advance Settings Menu / DO (Relay) Tab / set the Relay Test Time.
then
Settings Menu / System Tab / Relay Test (set to Automatic).
or
Advance Settings Menu / DO (Relay) Tab / Relay Test (set to
Automatic).
 Loading...