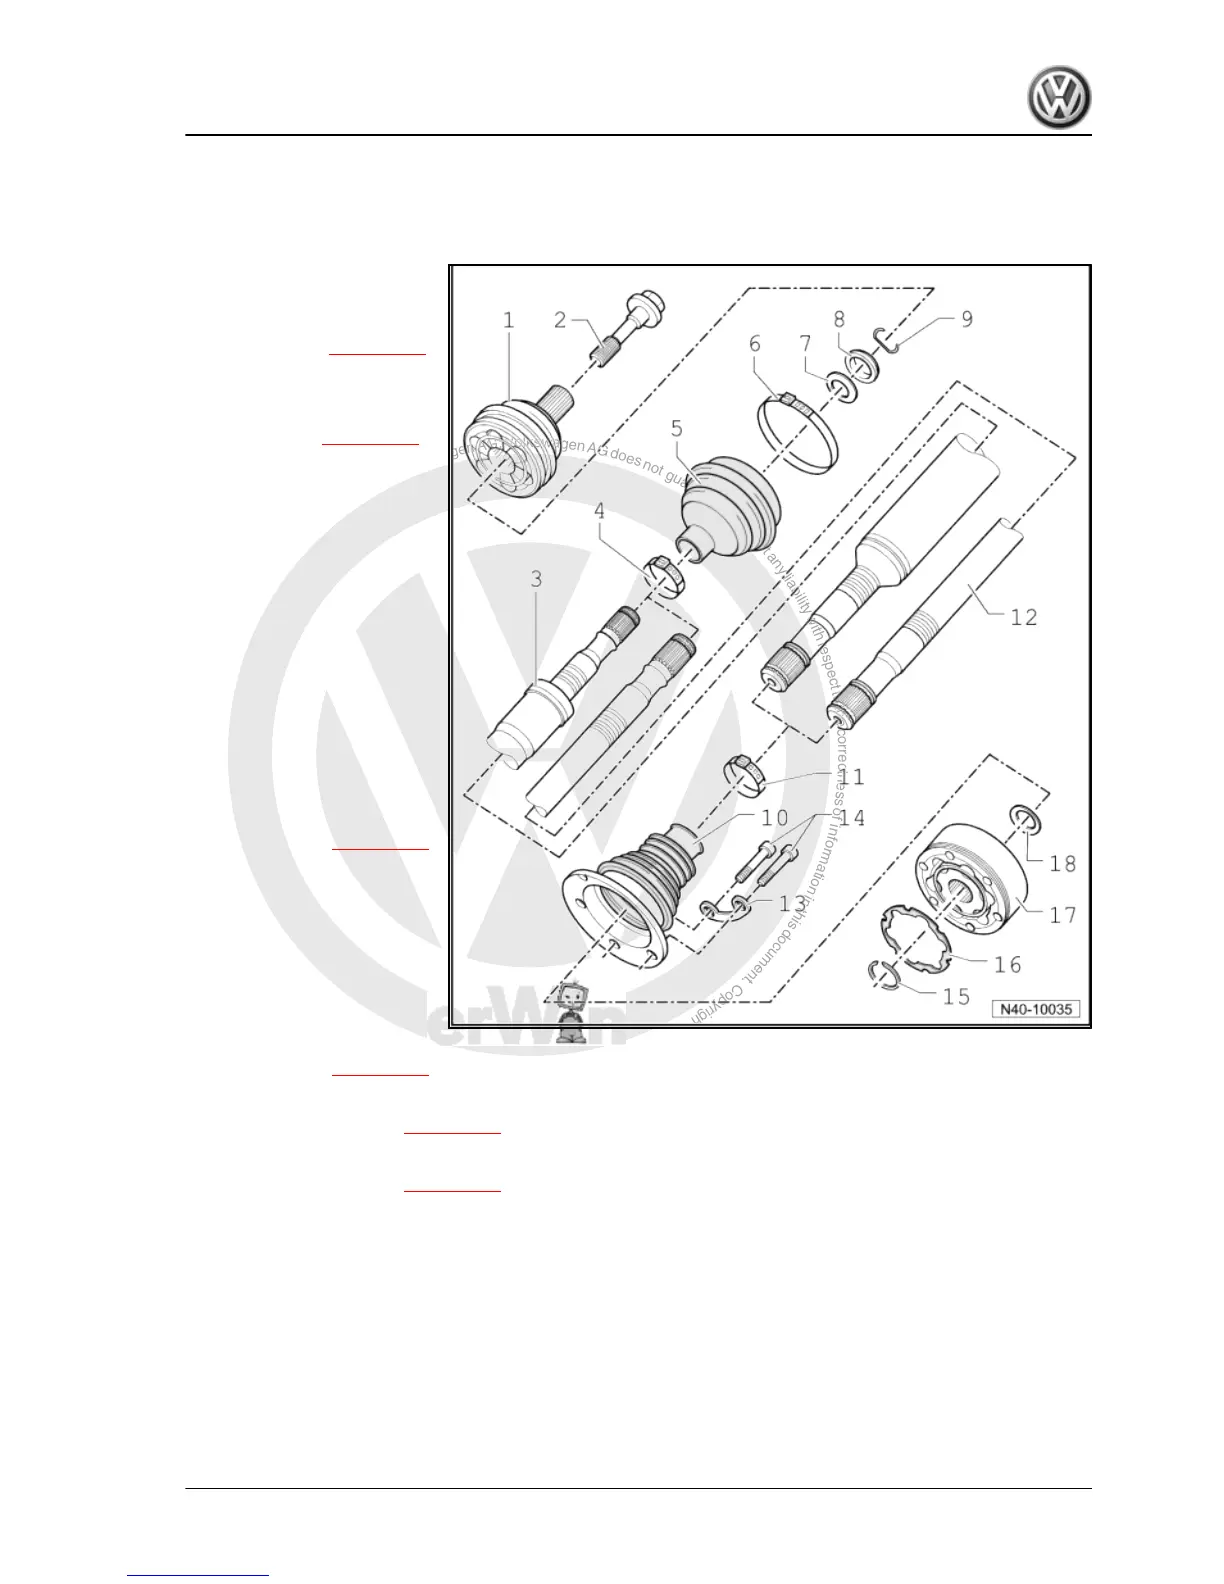
8 Assembly overview - drive shaft with VL90 or VL100 constant velocity
joint
1 - Outer constant velocity joint
❑ Renew only as com‐
plete unit
❑ Removing ⇒ page 101
❑ Installing: drive onto
shaft to stop using a
plastic mallet
❑ Checking ⇒ page 103
2 - Bolt
❑ M16 x 1.5 x 80
❑ Hexagon bolt, 200 Nm
and turn +180° further
❑ 12-point bolt, 70 Nm +
90° further
❑ Always renew after re‐
moving
When bolt is loosened or tight‐
ened, vehicle must not be
standing on its wheels
3 - Right drive shaft
4 - Hose clip
❑ Always renew after re‐
moving
❑ Tightening ⇒ page 103
5 - Boot
❑ Check for splits and
chafing
❑ Material: Hytrel (poly‐
ester elastomer)
6 - Hose clip
❑ Always renew after re‐
moving
❑ Tightening ⇒ page 103
7 - Dished spring
❑ Installation position ⇒ page 101
8 - Thrust washer
❑ Installation position ⇒ page 101
9 - Retaining ring
❑ Always renew after removing
❑ Insert in groove in shaft
10 - Boot for constant velocity joint
❑ Material: Hytrel (polyester elastomer)
❑ Without breather hole
❑ Check for splits and chafing
❑ Drive off constant velocity joint with a drift
❑ Coat sealing surface with D 454 300 A2 before installing constant velocity joint
Golf 2004 ➤ , Golf Plus 2005 ➤
Running gear, axles, steering - Edition 08.2009
8. Assembly overview - drive shaft with VL90 or VL100 constant velocity joint 97
 Loading...