OM ET18/20/24 us 1.3 * et18_20_24b510.fm 5-43
5
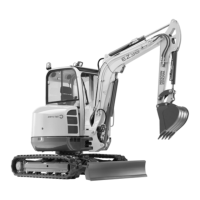
Retrofitting a bucket
Removing
1. Lower the bucket to level ground with the flat side facing downward.
2. Stop and park the machine. Stop the engine. See “Preparing
lubrication”.
3. Remove linch pins A.
4. First remove pin B, and then pin C. Carefully expel pins that are stuck
with a hammer and a brass punch.
If pin C is stuck:
1. Start the engine.
2. Slighty raise and lower the boom to take the load off the pin.
3. Stop and park the machine. Stop the engine. See “Preparing
lubrication”.
4. Raise the control lever base.
5. Remove the starting key and carry it with you.
Place the bucket only with minimum pressure on the ground as
you remove the pins. The higher the pressure on the ground, the
higher the resistance and the more difficult it is to remove the
pins.
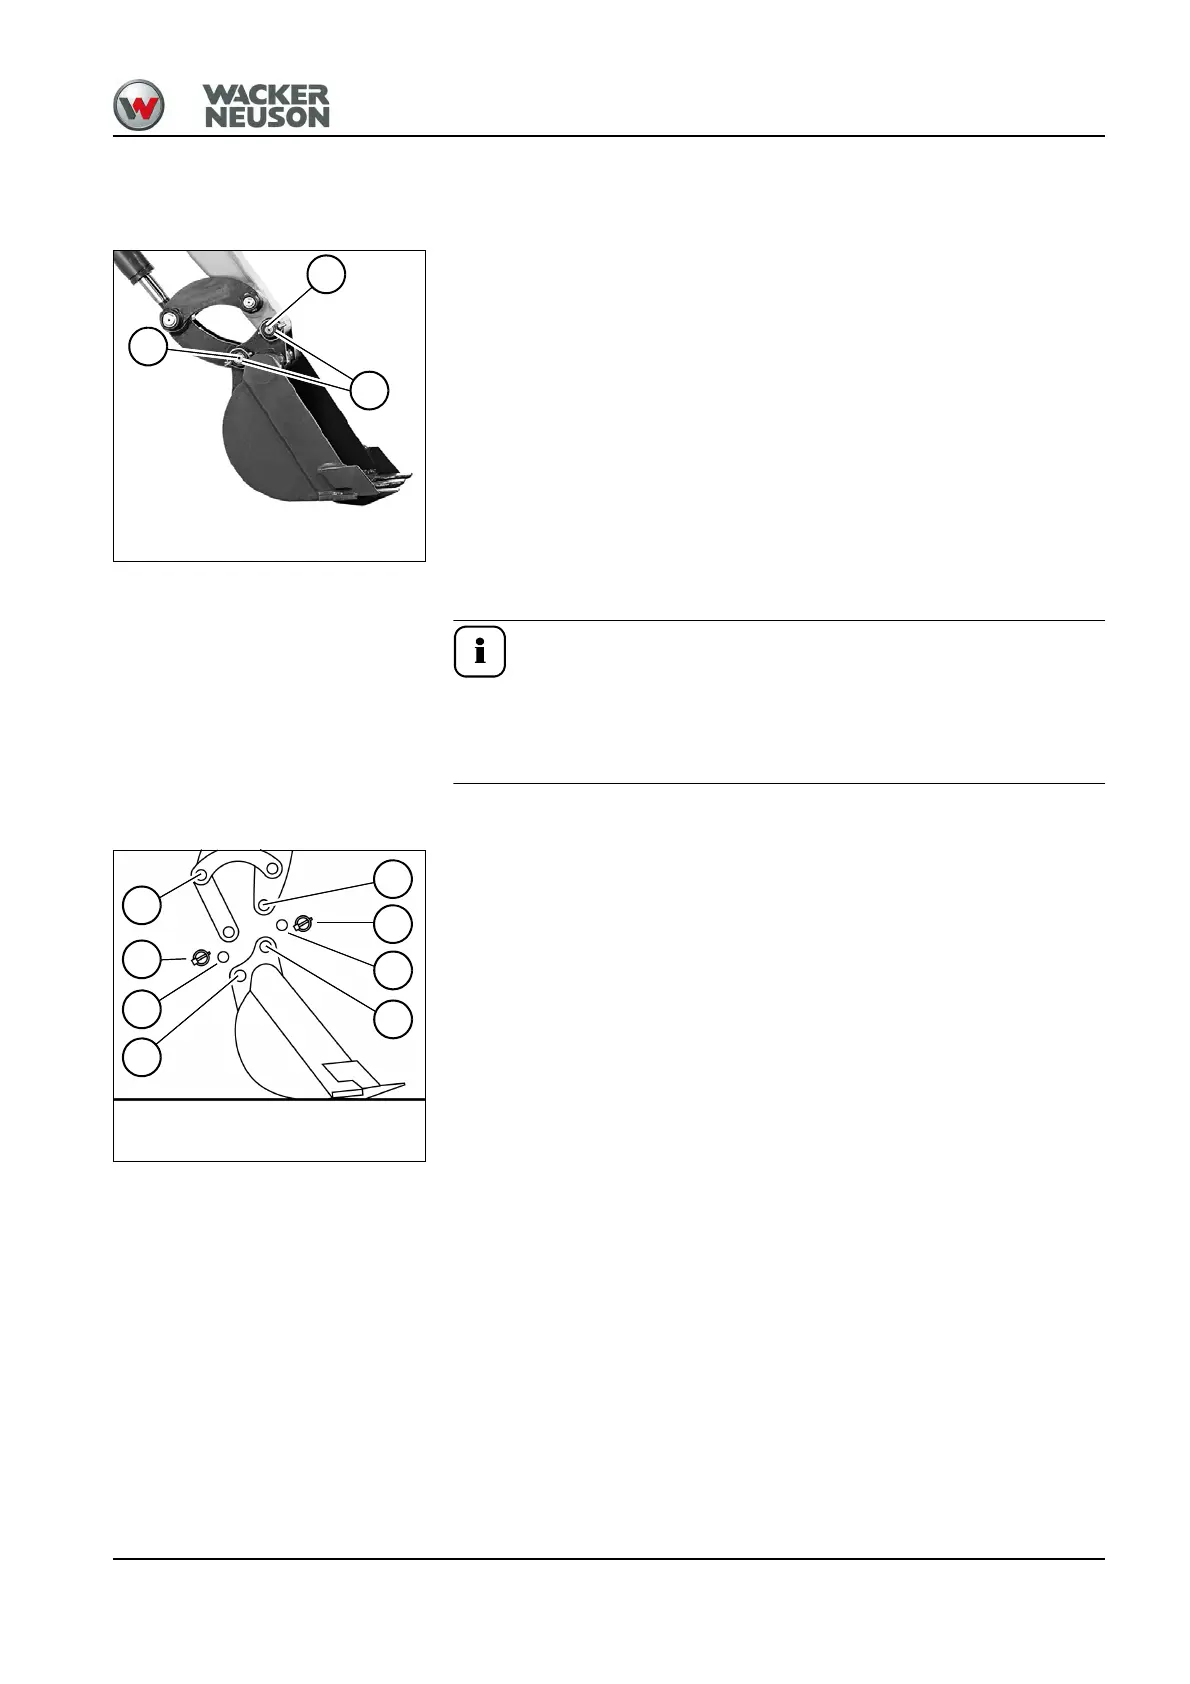
Assembly
1. Install a bucket only if it is positioned on level ground with the flat side
facing downward.
2. Stop and park the machine. Stop the engine. See “Preparing
lubrication”.
3. Apply grease to the pins and joints before inserting the pins.
4. Start the engine.
5. Straighten the stick so that bores D and E are flush.
6. Stop the engine. Raise the control lever base.
7. Insert pin F.
8. Actuate the stick hydraulic cylinder until bores H and I are flush.
9. Stop the engine. Raise the control lever base.
10.Insert pin J.
Install linch pins K.
Fig. 189: Assembly
D
K
F
E
H
I
J
K
 Loading...