RJ-901C/RJ-900C Maintenance Manual 4 Parts Replacement
4-21
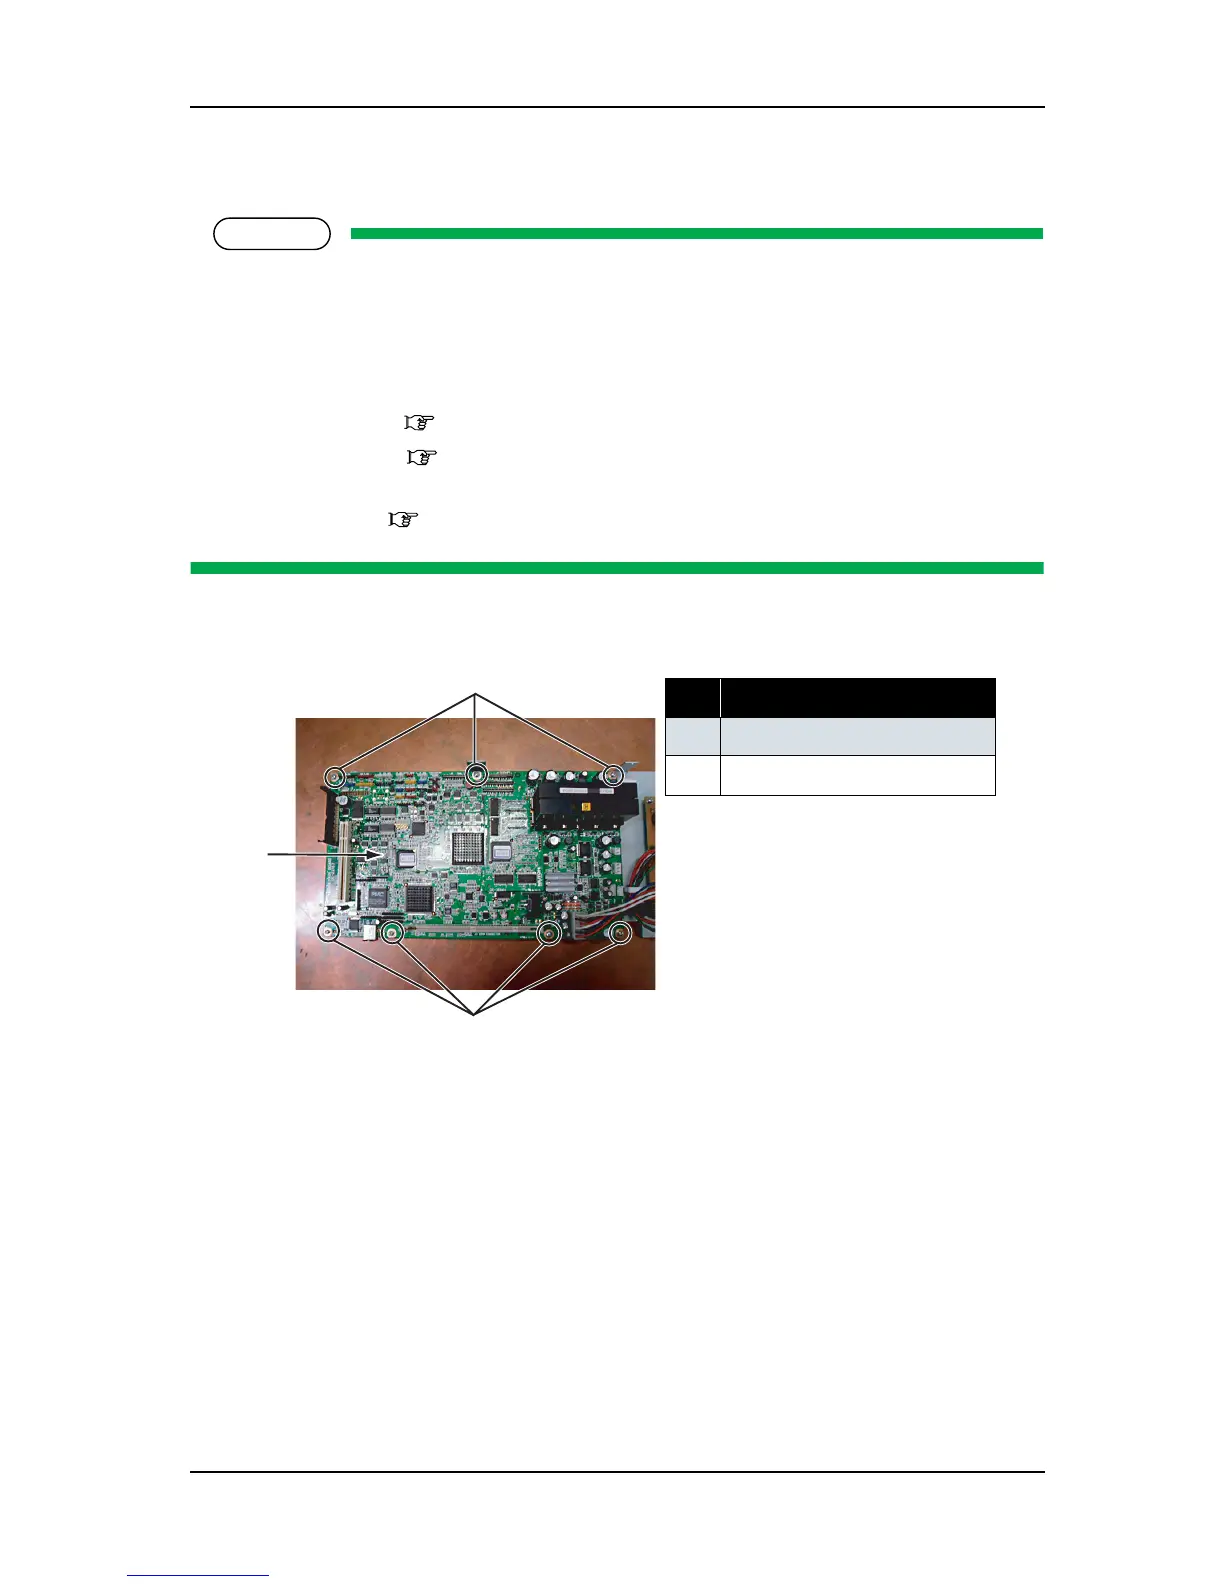
4.3.3 Replacing Main Board Assembly
NOTE
• When replacing the main board assembly, make sure to back up the parameters by following the
instructions in "7.3.1 Parameter Backup" p.7-10. Otherwise, the life counters on the waste fluid
box or the tube cannot be updated and ink may overflow inside the product.
Perform other adjustments by following the instructions in "7.2 Adjustment Item" p.7-3.
• Before replacing the main board assembly, remove the following parts.
• Media guide R2: "4.2.7 Removing Media Guide R2" p.4-14
• Connector panel: "4.3.1 Replacing Connector Panel, Network Interface Card (NIC),
Cooling Fan" p.4-16
• Board bracket: "4.3.2 Removing Board Bracket" p.4-18
1. Remove the screws retaining the main board assembly to the board bracket (cup screw M3 × 6: 7pcs).
2. Replace the main board assembly
3. To reassemble the unit, reverse the removal procedure.
4. Input the parameters and install the firmware by following the instructions in "7.3 Working with
Dedicated Network Software" p.7-10.
5. Perform adjustment on media edge sensor and the P_REAR sensor by following the instructions in "7.2
Adjustment Item" p.7-3.
No. Part name
1 Main board assembly
2
Main board assembly screw
1
2
2
 Loading...