5-40
E
POWR
1
2
3
4
5
6
7
8
9
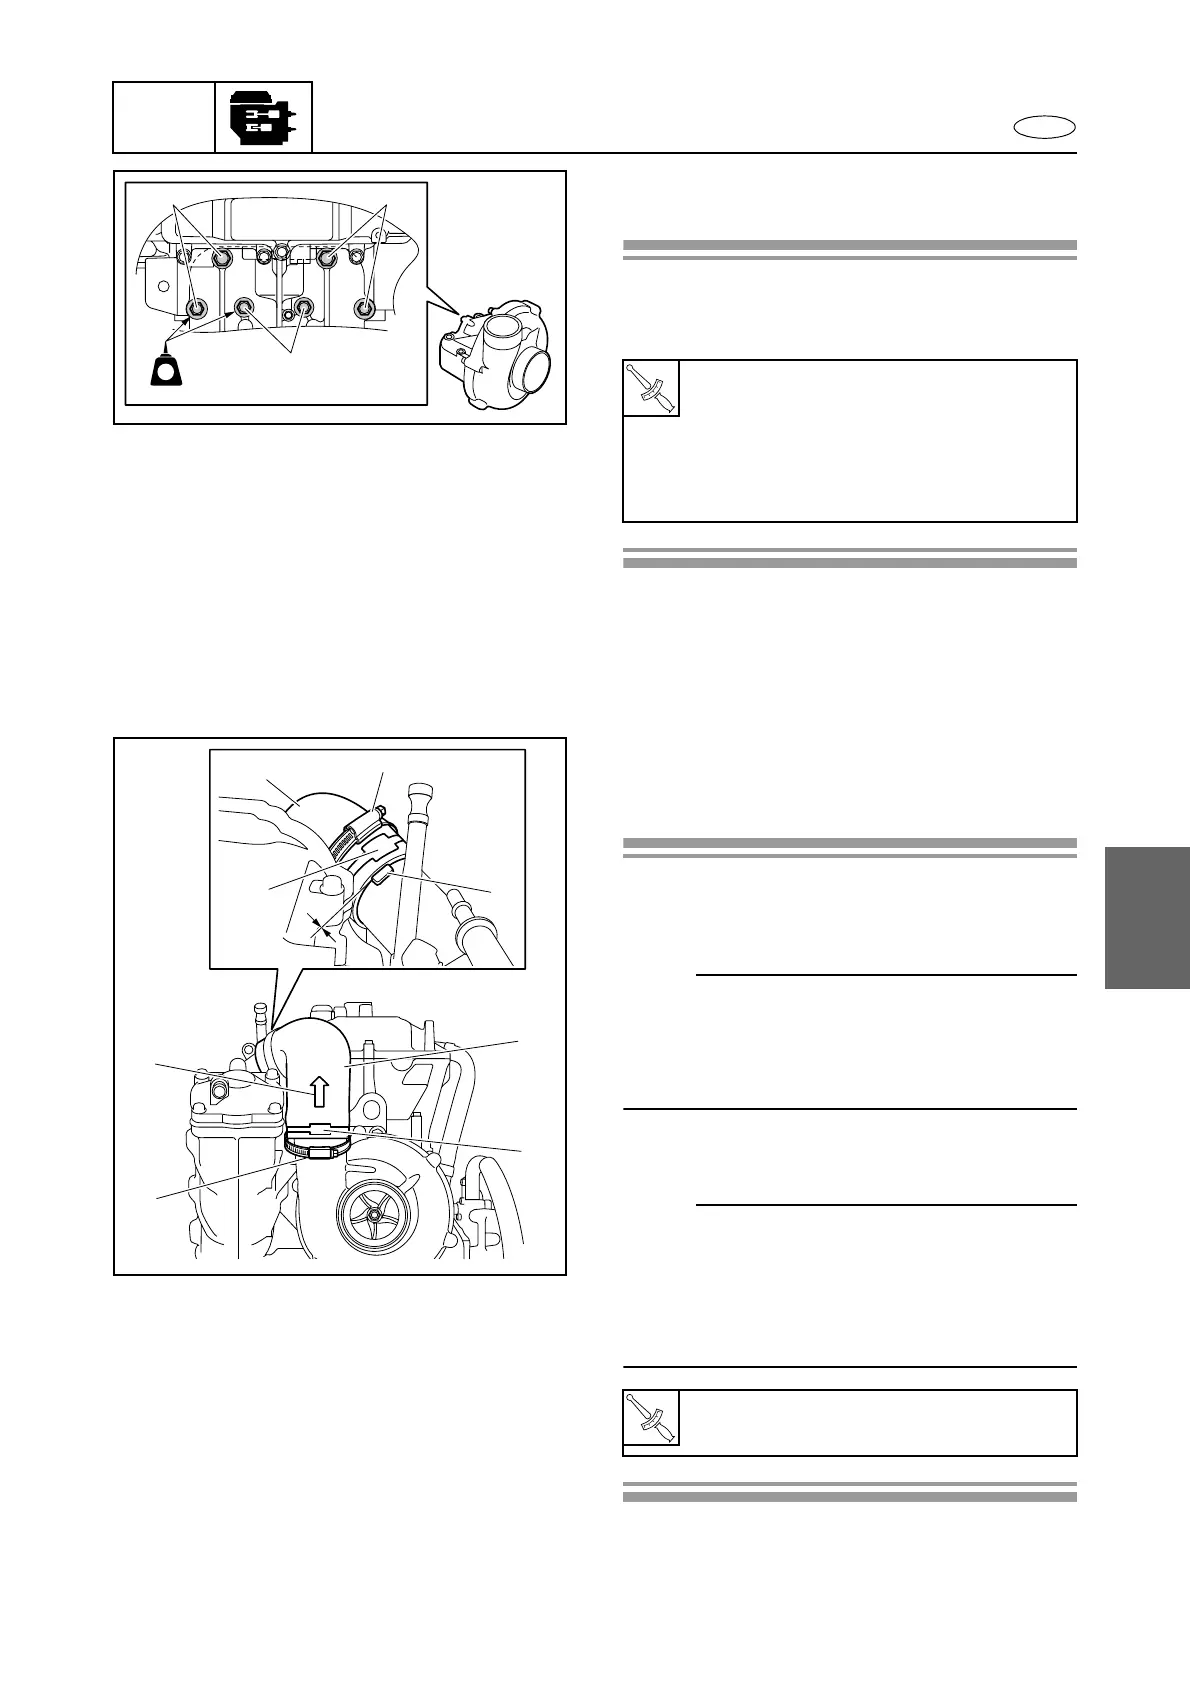
2. Install:
• Supercharger
Installation step:
1. Tighten the supercharger bolts 1, and
then bolts 2 to the specified torque.
T
R
.
.
Supercharger bolt (M8 × 65 mm) 1:
20 N·m (2.0 kgf·m, 14.8 ft·lb)
LOCTITE 242
Supercharger bolt (M6 × 65 mm) 2:
10 N·m (1.0 kgf·m, 7.4 ft·lb)
LOCTITE 242
2
11
LT
242
Air cooler intake hose installation
1. Install:
• Air cooler intake hose 1
Installation steps:
1. Install the air cooler intake hose 1
between the supercharger and air cooler.
NOTE:
• Make sure that the arrow mark a on the air
cooler intake hose 1 is pointing up.
• Make sure that the hose 1 contacts the pro-
jection b on the air cooler.
2. Tighten each clamp 2 to the specified
torque.
NOTE:
Fit each hose clamp 2 over the white paint
mark c on each end of the air cooler intake
hose 1, making sure that the fastener of the
clamp is aligned with the wide portion of the
paint mark as shown.
T
R
.
.
Air cooler intake hose clamp:
4 N·m (0.4 kgf·m, 3.0 ft·lb)
b
1
2
a
c
1
2
c
Air cooler, supercharger, and throttle body assembly
 Loading...