5-111
E
POWR
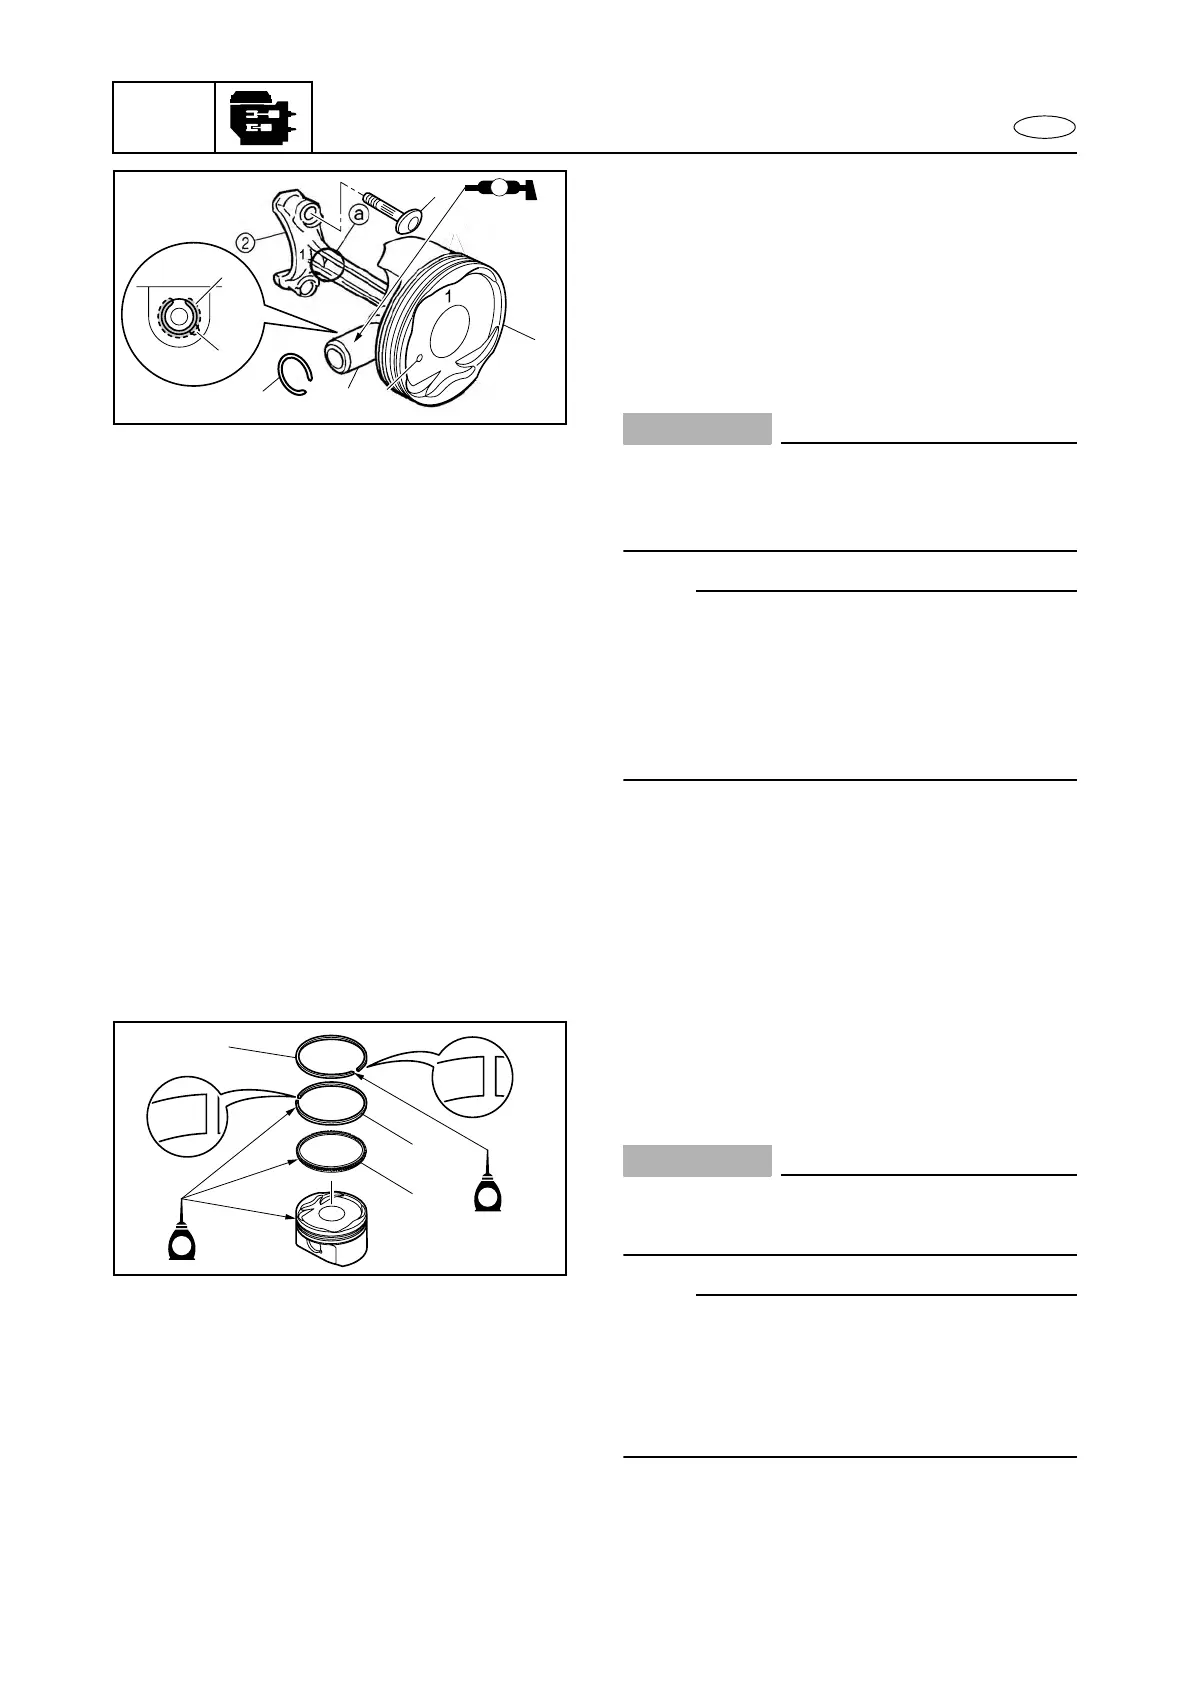
Connecting rod and piston
installation
1. Install:
• Piston 1
• Connecting rod 2
• Piston pin 3
• Piston pin clips 4
• Connecting rod cap bolts 5
CAUTION:
Do not reuse the piston pin clips 4 and
connecting rod cap bolts 5, always replace
them with new ones.
NOTE:
• When installing the connecting rod to the pis-
ton, make sure that the “Y” mark a on the
connecting rod faces towards the front mark
b on the piston crown.
• Do not allow the piston pin clip ends to align
with the piston pin slot c.
M
1
4
c
4 3
b
5
2. Install:
• Oil ring 1
• 2nd ring 2
• Top ring 3
CAUTION:
Do not scratch the pistons or break the pis-
ton rings.
NOTE:
• Be sure to install the piston rings so that the
“1T” mark on the top ring and the “2T” mark
on the 2nd ring face up.
• After installing the piston rings, check that
they move smoothly.
1T
2T
3
1
2
E
E
Crankcase, connecting rod, and piston
 Loading...