5-78
E
POWR
1
2
3
4
5
6
7
8
9
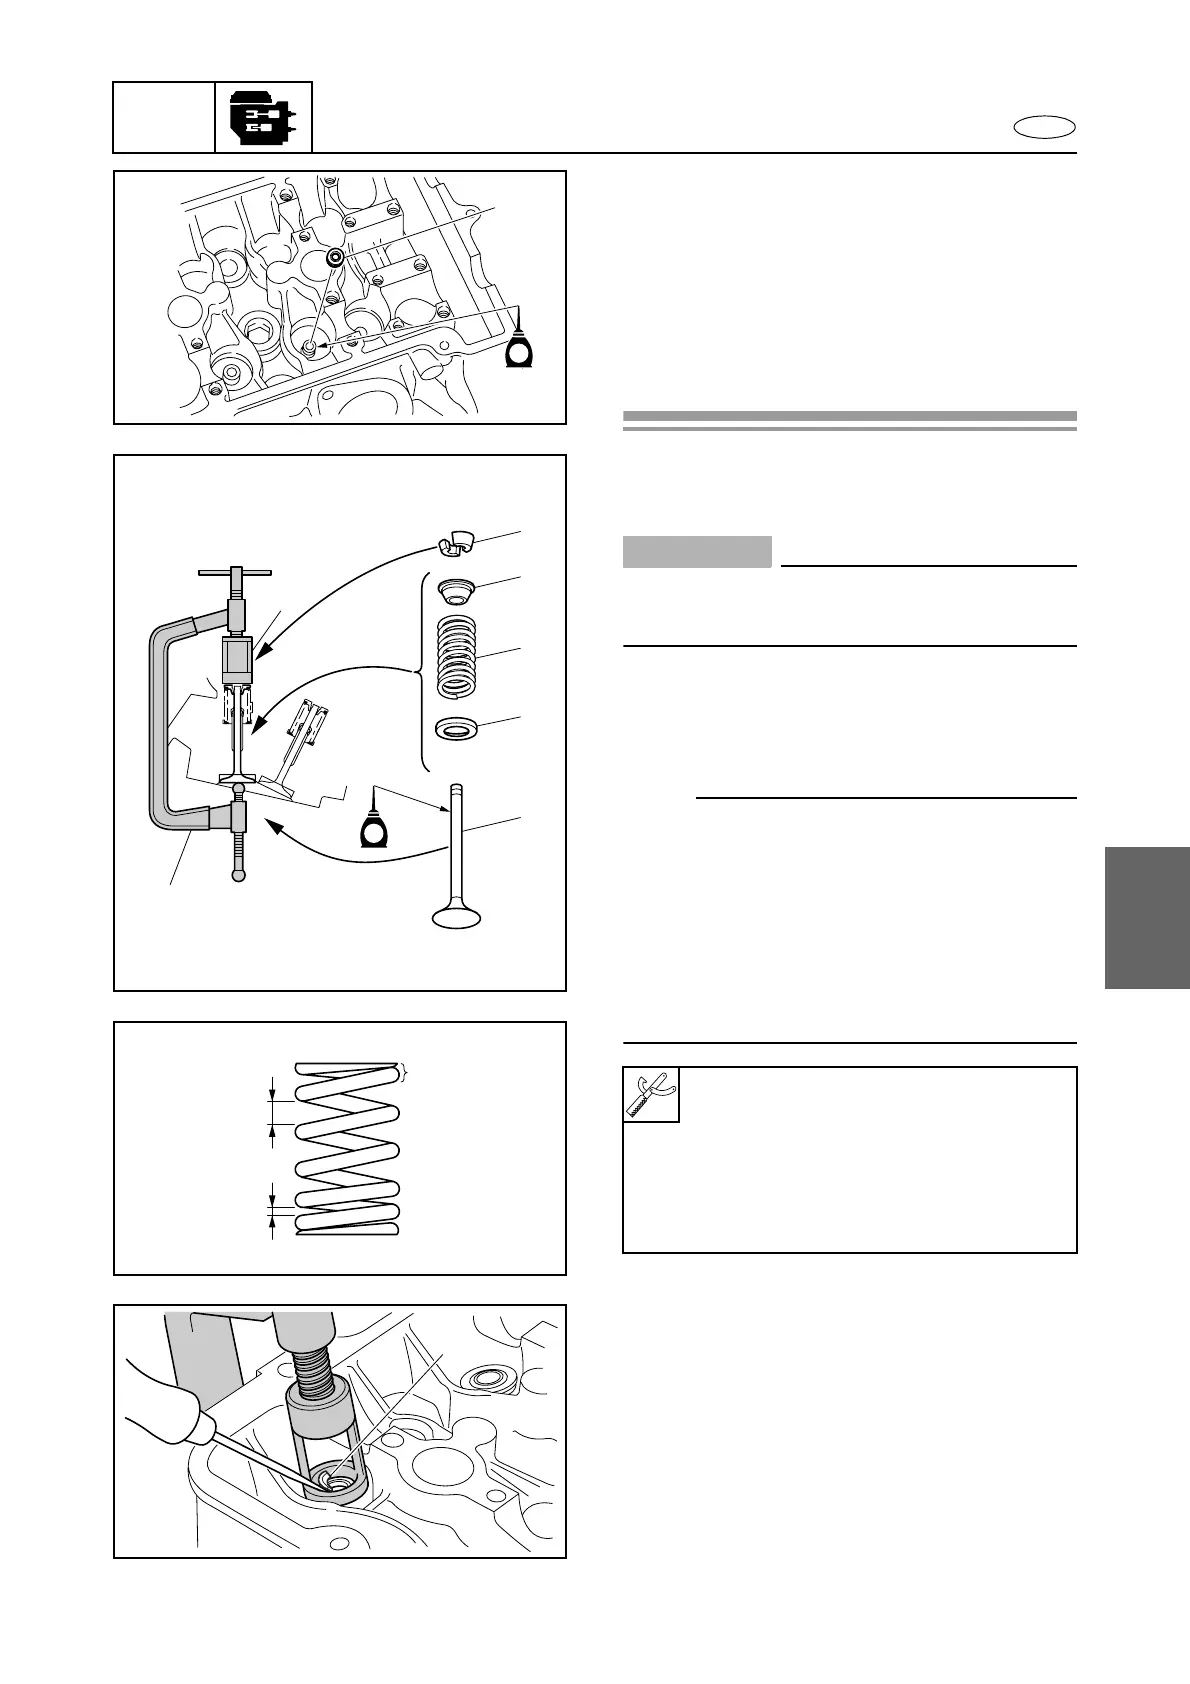
Valve installation
1. Install:
• Valve seal 1
• Valve 2
• Lower spring seat 3
• Valve spring 4
• Upper spring seat 5
• Valve cotters 6
Installation steps:
1. Install a new valve seal 1 onto the valve
guide.
CAUTION:
Do not reuse the valve seal, always replace
it with a new one.
2. Install the valve 2, lower spring seat 3,
valve spring 4, and upper spring seat 5
in the sequence shown, and then attach
the special service tools 7 and 8.
NOTE:
• When installing a new valve, always replace
the valve guide and valve seal with new
ones.
• Install the valve spring with the larger pitch
a toward the camshaft and the smaller pitch
b toward the combustion chamber.
• The end c of the valve spring with the larger
pitch is painted red.
Valve spring compressor 7:
YM-04019/90890-04019
Compressor adapter 8:
YM-04114
Valve spring compressor attachment
8:
90890-04114
1
E
8
7
2
3
4
5
6
E
a
c
b
3. Compress the valve spring, and then
install the valve cotters 6.
6
Cylinder head
 Loading...