11. Lenses and Lens holder
11.4 Lens installation
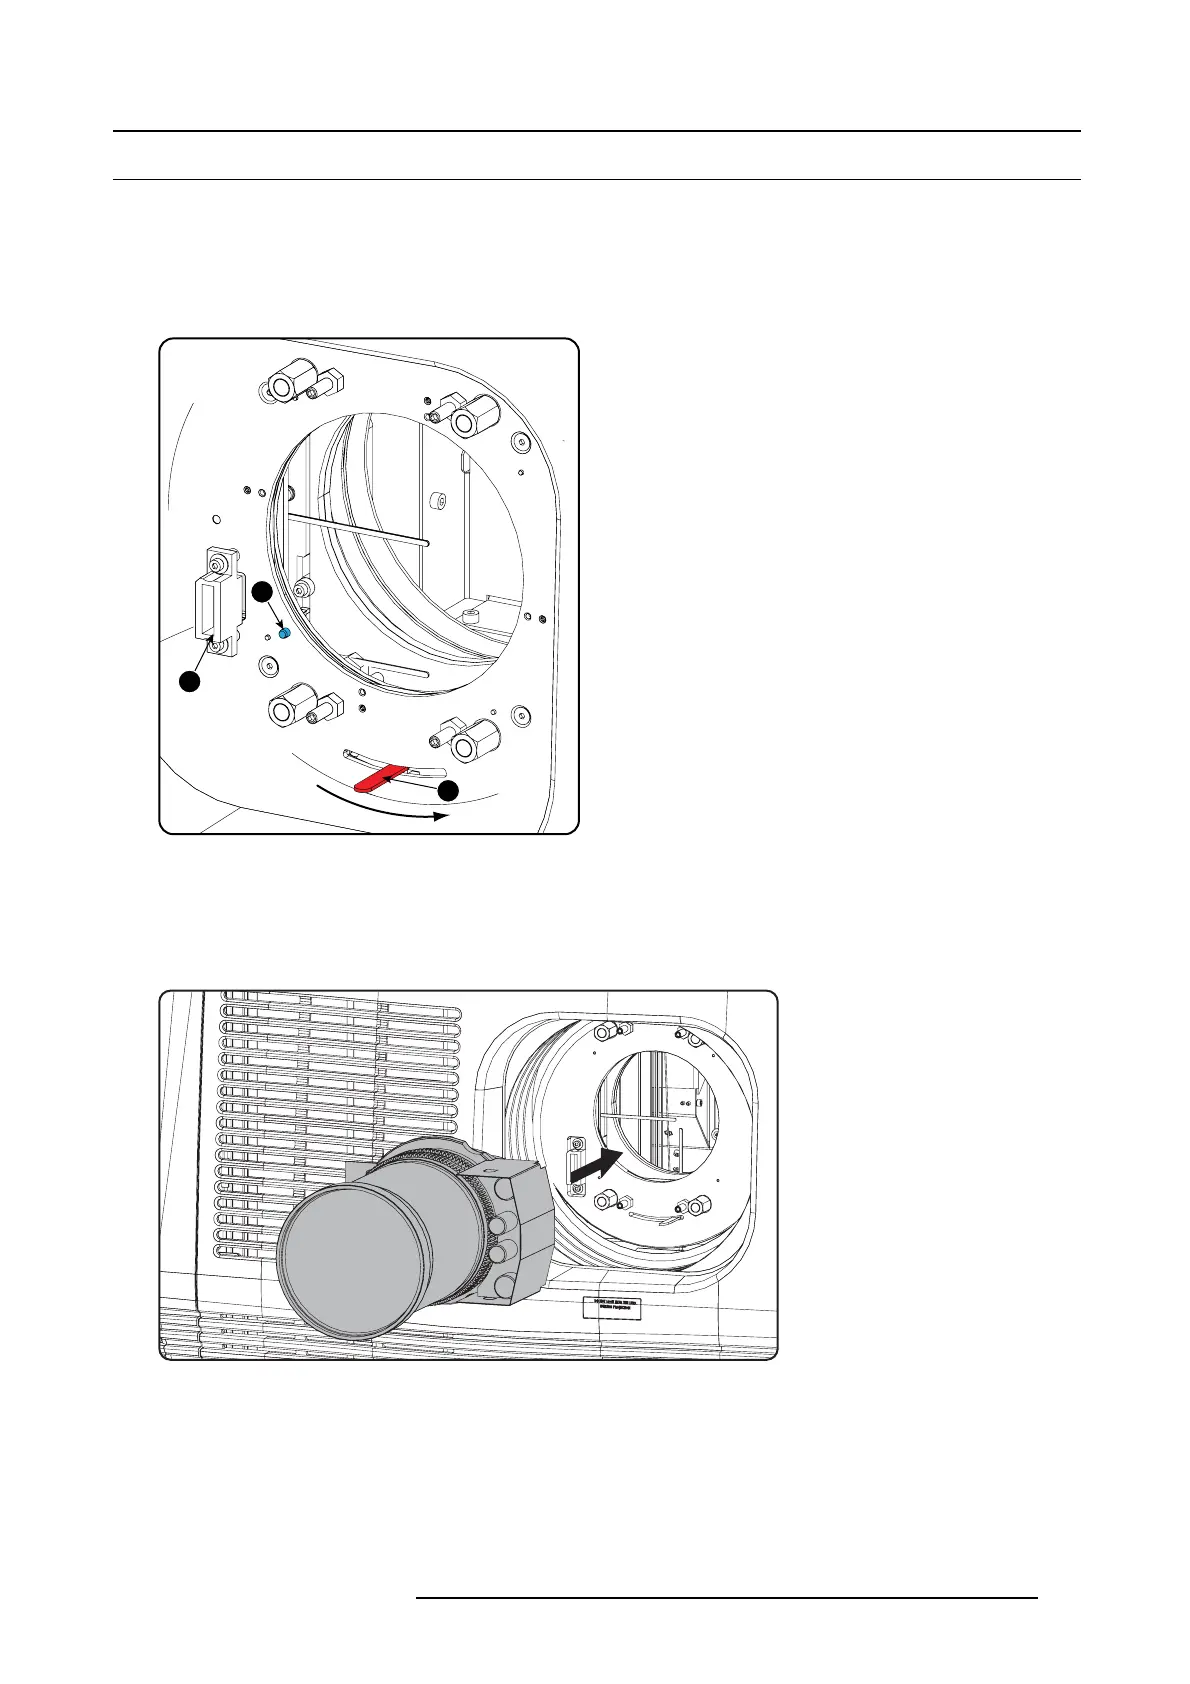
How to install a lens into the projector lens holder ?
1. Remove the foam rubber in the opening of the lens holder if not rem oved yet.
2. Take the lens assembly out of its packing m aterial and remove the lens caps on both sides.
3. Close the lens locking mechanism pr ior to lens insertion (1). Lens locking mechanism is closed by pushing the lens lock to the
right.
1
2
3
Image 11-9
1 Lens holder lock
2 Power connector lens
3 Alignment pin
4. Ensure that the lens holder stands in the On-Axis position (horizontal and vertical m id position).
Note: The lens holder is placed de fault in the On-Axis po sition at factory.
5. Gently inse rt the lens in such a way that the lens connector m atches the so cket (B).
Image 11-10
6. Insert the lens until the connector seats into the s ocket.
Warning: Do not release the Lens yet, as the L ens m ay fall out of the Len s Holder.
A clear “click” should be heard wh en the retainer springs en gage into the slot provided on the lens. B esides the clear click, the
springs actually help to guide the lens into pos ition and hence prevent jamming.
7. Check if the lens is really secured by trying to pull the lens out of the lens holder.
R5905043 DP2K-12C/11CX 19/02/2018
183
 Loading...


