15. Power input
15.3 Replacement of the mains ON/OFF switch
This procedure assumes that the M ains Inpu t comp onents a re accessible.
Necessary tools
• 2,5 mm Allen wrench.
• Flat blade screw driver.
How to replace the mains ON/OFF switch
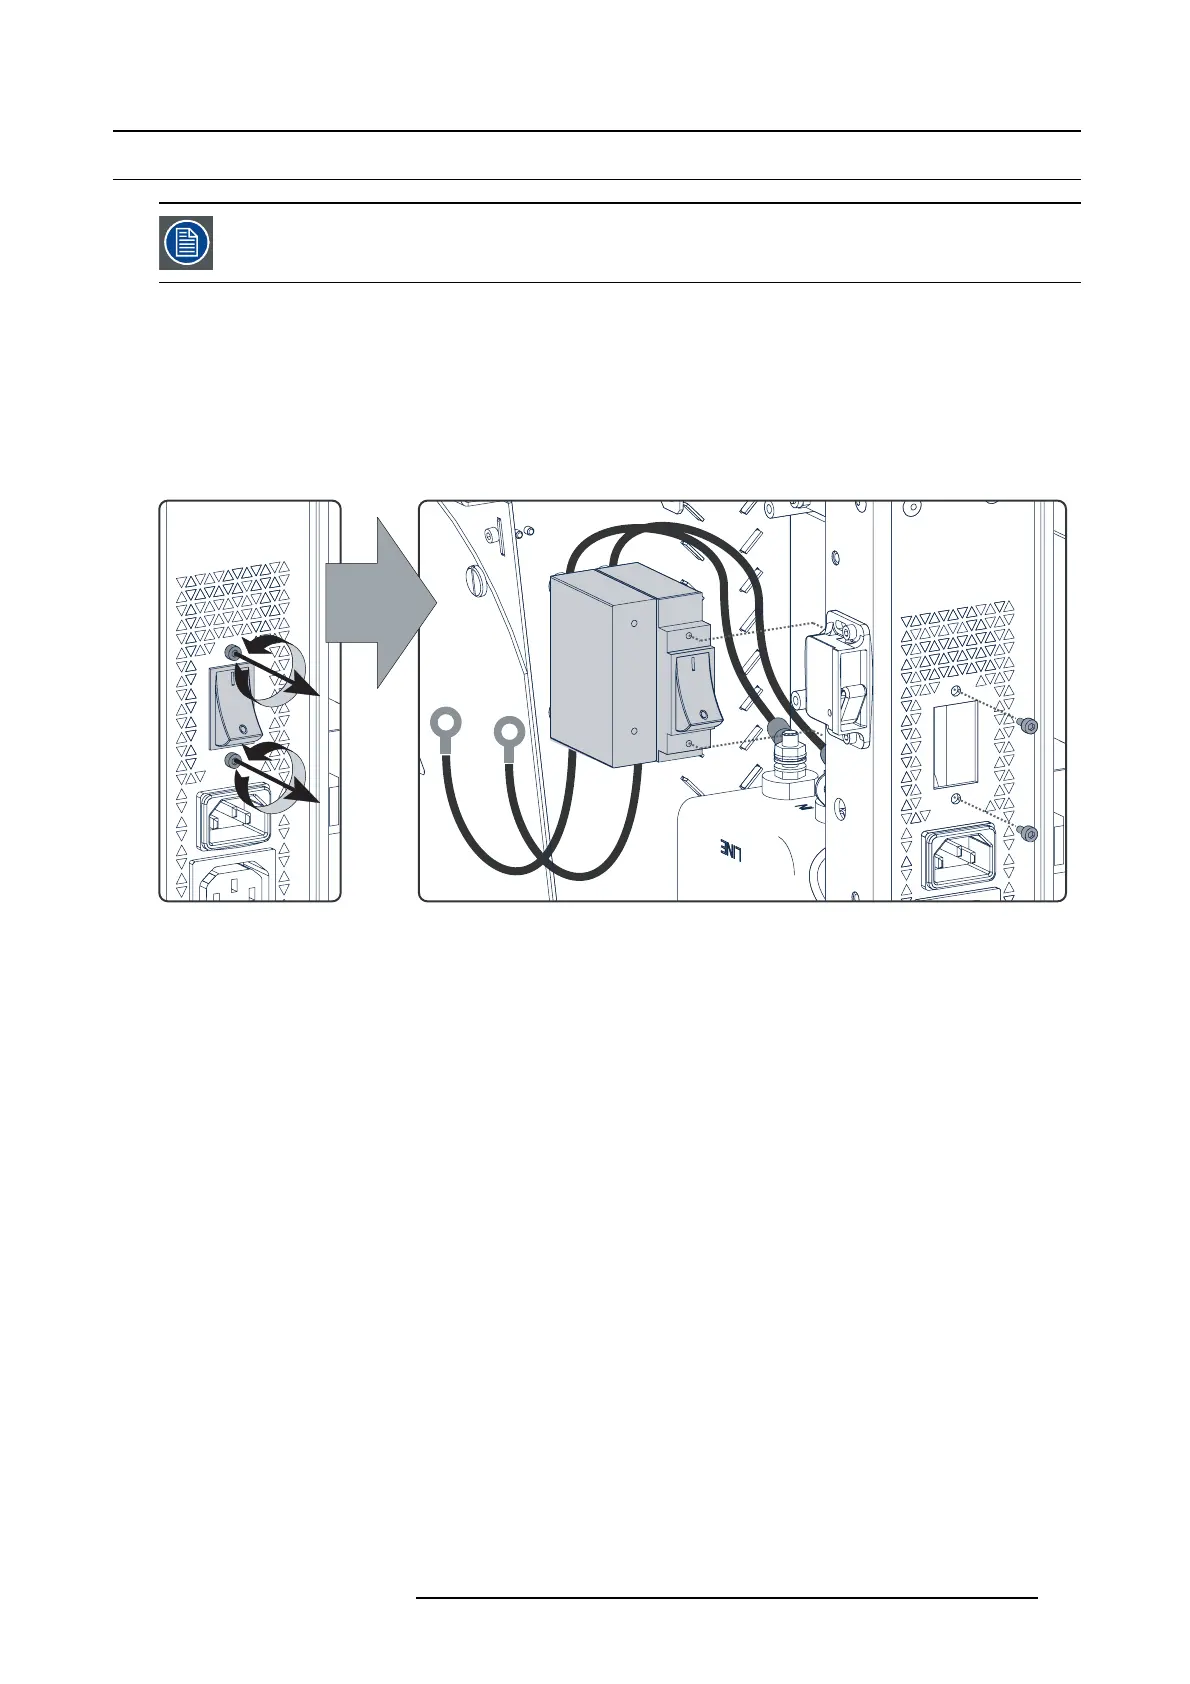
1. Remove the two hex agon s ocket head cap screws which s ecuring the ON/OF F switch. Use a 2,5 mm Allen wrench. Note that
the O N/OFF switch is still connected with the mains input filter. Once the switch is detached from the projector chassis it w ill be
easier to disconnect the wires as described in the next step.
Image 15-5
ON/OFF switch assembly removal
2. Remove the connection screws at the back side of the ON/OFF switch and slide off the eye connectors. Do not drop the washers
inside the projector. Us e a flat blade screw dri
ver.
3. Connect the two w ires from the m ains filter (reference 3 image 15-6) with the two upper pins of the ON /OF F switch. Slide a lock
washer fo llowed by a w asher ov er the screw and then the eye connector of the wire. Turn in the screw a nd tighten completely.
Note: The top s ide of the ON/OFF s witch is the upper side when holding the ON/O FF switch vertically with the indication “1”
(reference 1 image 15-6) points to the top of the projector.
4. Connect t he two loose wires (reference 2 image 15-6) with the two lower pins of the ON/OFF switch. S lide a lock washer followed
by a wa sher over the sc rew and then the eye connector of the wire. Turn in the screw and tighten completely.
R5905043 DP2K-12C/11CX 19/02/2018
271
 Loading...


