3. Physical installation
3.3 Connecting the projector with the p ower net
WARNING: The total electrical installation should be p rotected by an appropriate rated and readily accessi-
ble disconnect switch, circuit breakers and ground fault current interrupters. The installation shall be done
according to the local electrical installation codes.
CAUTION: AL L POW ER CONNE CTIONS to the DP2K -20C projector are made to the three-terminal strip lo-
cated in a sealed com partmen t behind the rear cover of the projector.
CAUTION: The cross-sectional area of the conductors in the Power Supply Cord s hall be not less than 4 mm
2
or AWG 10
Necessary tools
• Flat screw driver.
• Phillips screw driver P H2.
Necessary parts
• Two cable ties.
•Certified AC p ower supply cord 4.0 mm², 10AWG, min. 300V.
How to connect the main AC power with the DP2K-20C projector?
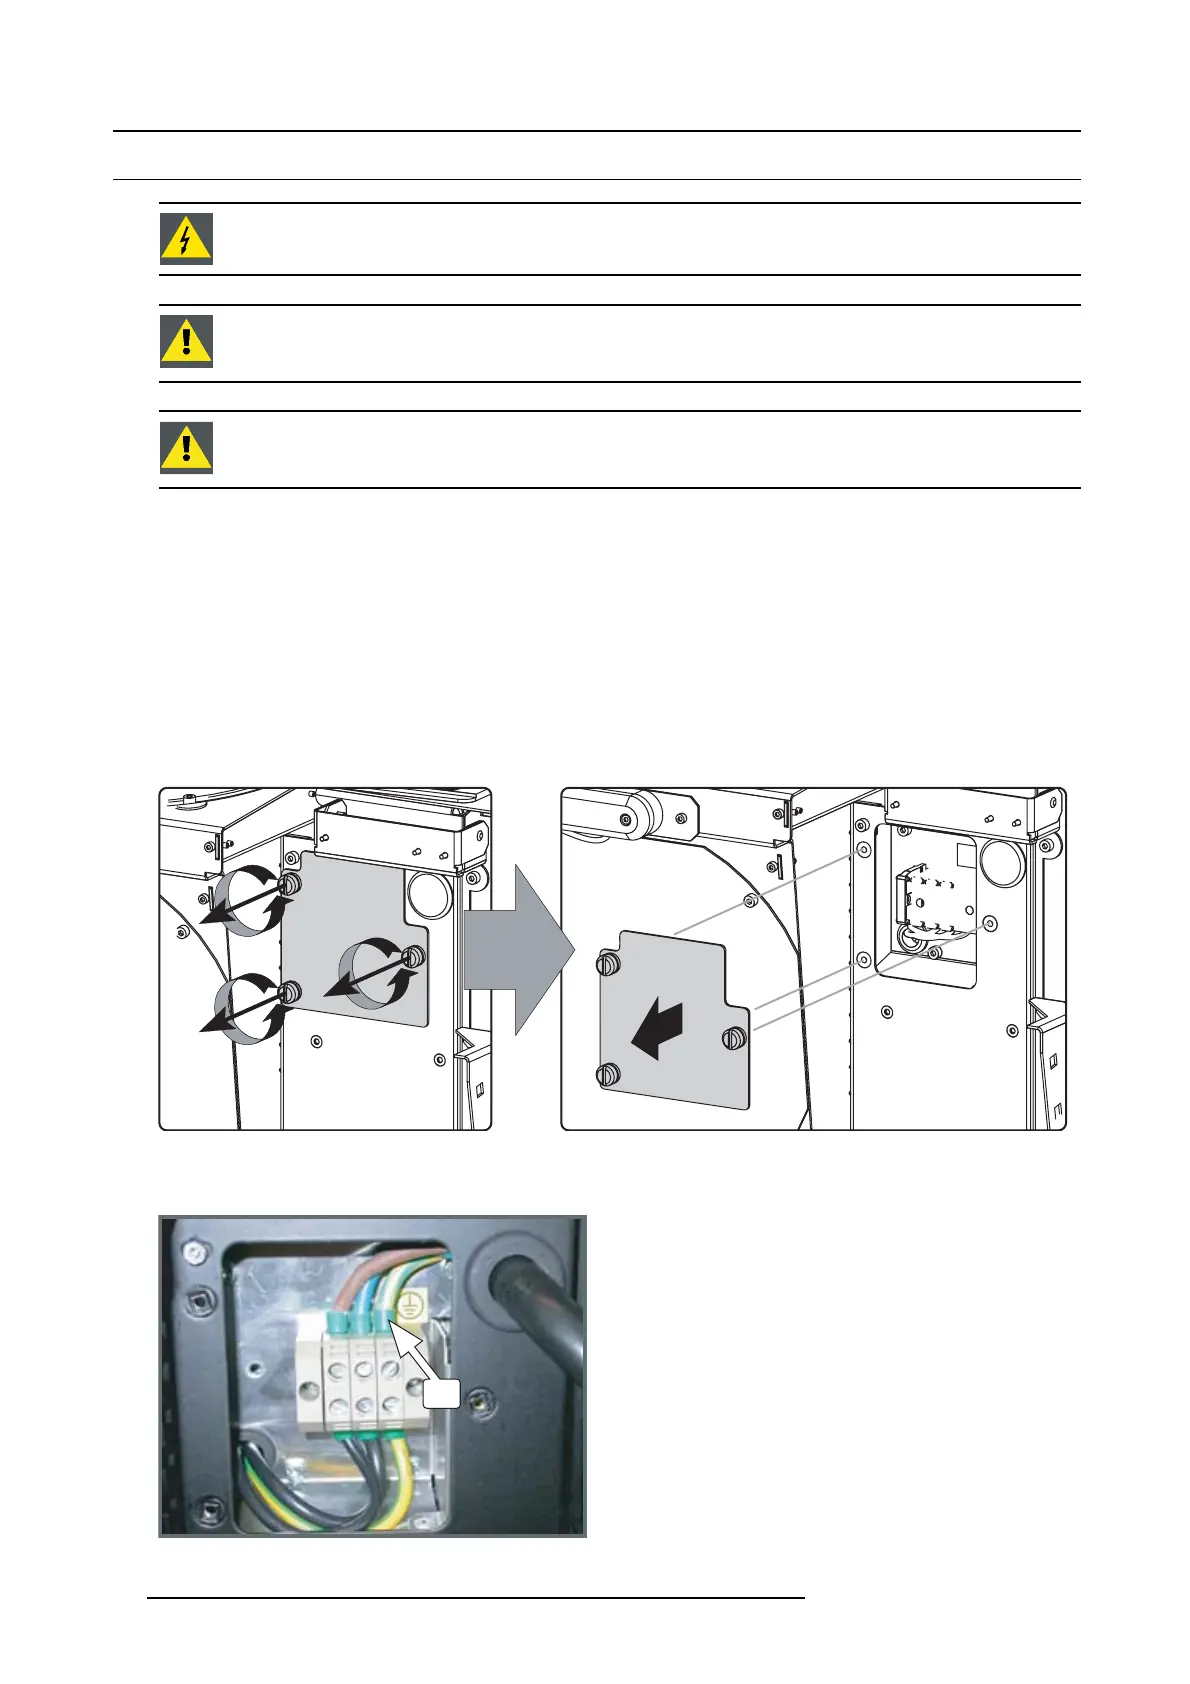
1. Remov e the rear c over an d lamp cover of the projector.
2. Remov e the cover of the main AC com partment by releasing the three ca ptive thumb screws.
Image 3-6
3. Guide the A C pow er cord through the cable gland and connect the wires to the 3-terminal strip as illustrated.
Warning: Always connect first the P E wire.
PE
Image 3-7
20 R59770351 DP2K-20C 02/02/2010
 Loading...


