3. Physical installation
3.4 Power loop through to the projector electronics
This procedure explains how to provide the projector electronics with power in case no UP S u nit is used.
Note that the projector is by default configured for use w ithout UPS . So, the short po w er link cab le is already
installed.
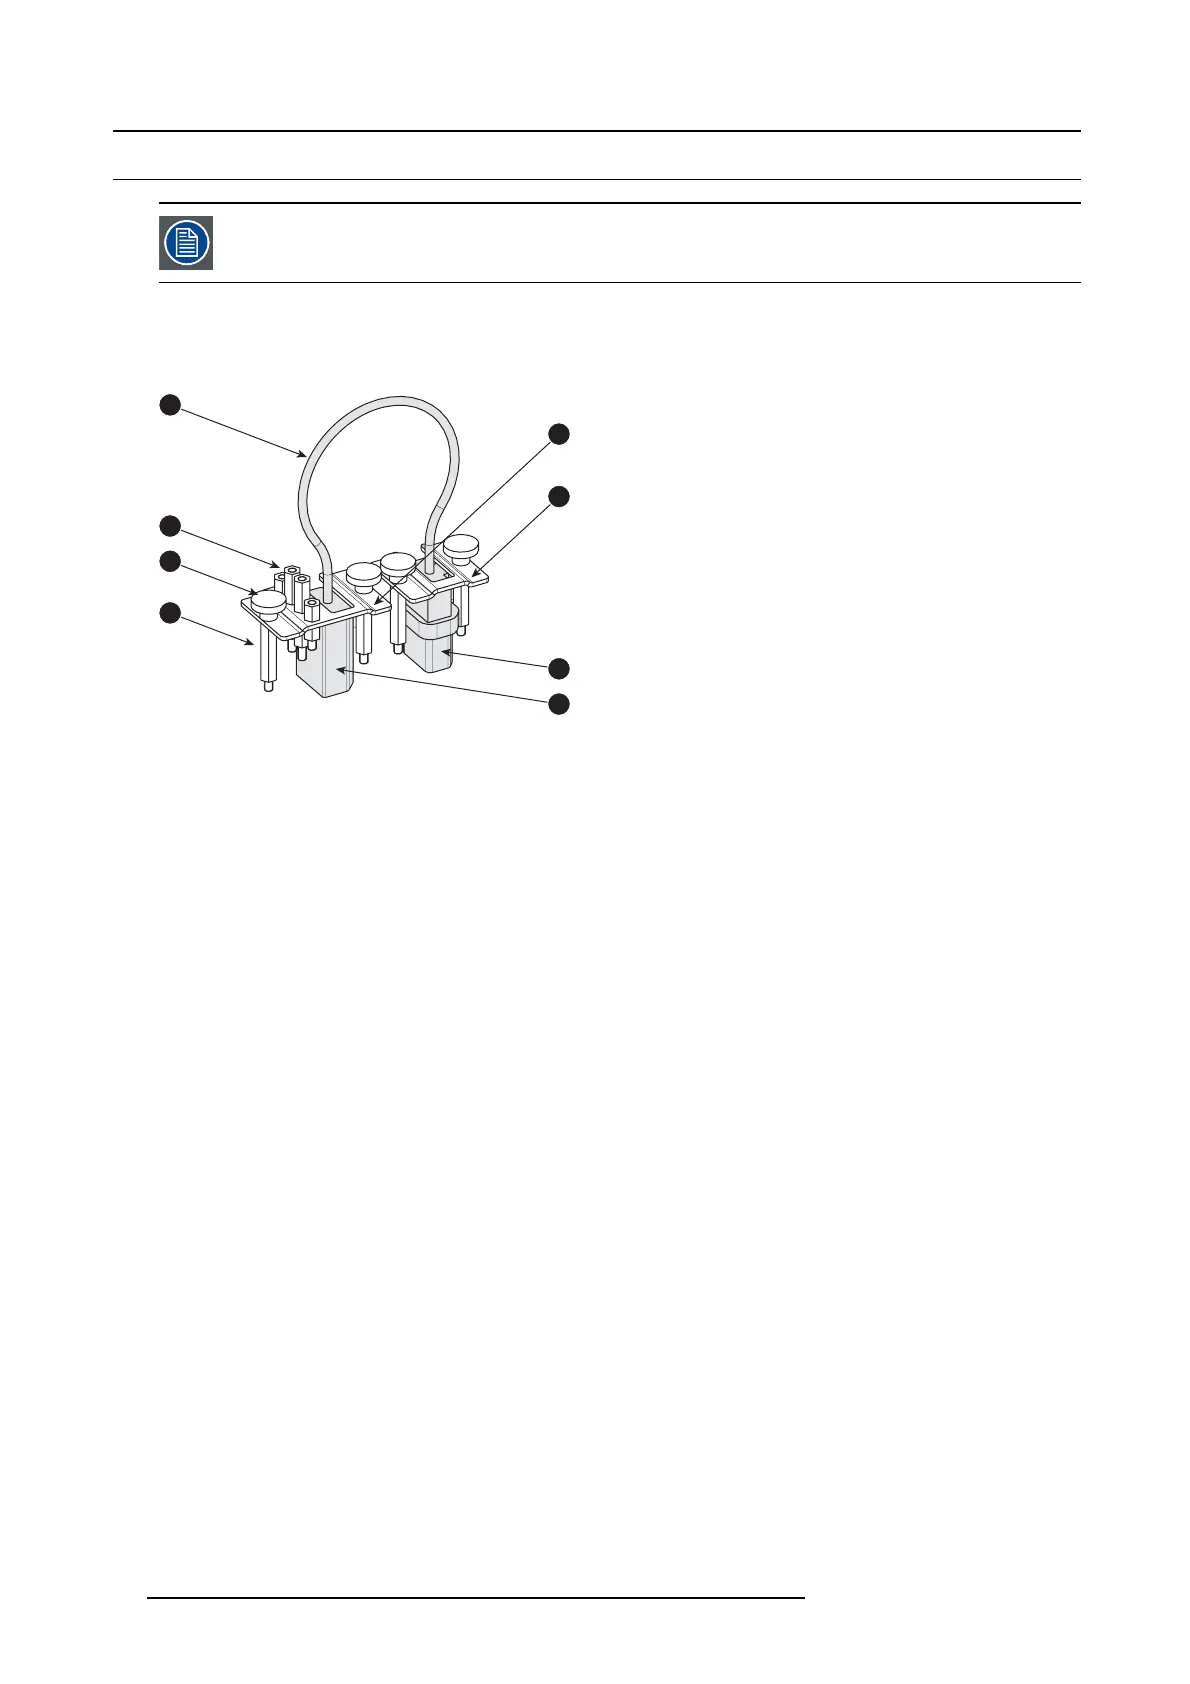
INLET/OUTLET fixation accessories
The plugs of the power cable which are inserted in the power INLET or OUTL ET socket of the projector have to b e s ecured. The
projector is equipped with fixation access ories a s illustrated below.
1
2
3
4
7
8
5
6
Image 3-10
1 Short power link cable (loop through).
2 Spare spacers with different length.
3 Thumbscrews.
4 Long spacers.
5 Fixation bracket for the female plug (OUTLET).
6 Fixation bracket fo r the male plug (INLET).
7 Male plug.
8 Female plug.
Necessary parts
Short power link c able with p lug type C13/C14
.
How to loop through the power to the p
rojector electronics?
1. Make sure that a long s pacer (reference 1) is mounted above and below eac h power socket (reference 2 &3).
2. Plug in the short pow er cable (reference 4) which was delivered with the projector.
Warning: Always use the Barc o short power cable w hich is d elivered with the projector.
3. Secure both plugs of the shor t power cable with a fixation plate. Use two thumbscrews (reference 5) per fixation plate. Note
that the smallest fixation plate (reference 7) h as to be used upon the upper s ocket (INLET, reference 2). The large fixation plate
(reference 6), w hich holds the spare spacers, has to be mounted upon the lower socket (OU TLET, reference 3).
22
R59770351 DP2K-20C 02/02/2010
 Loading...


