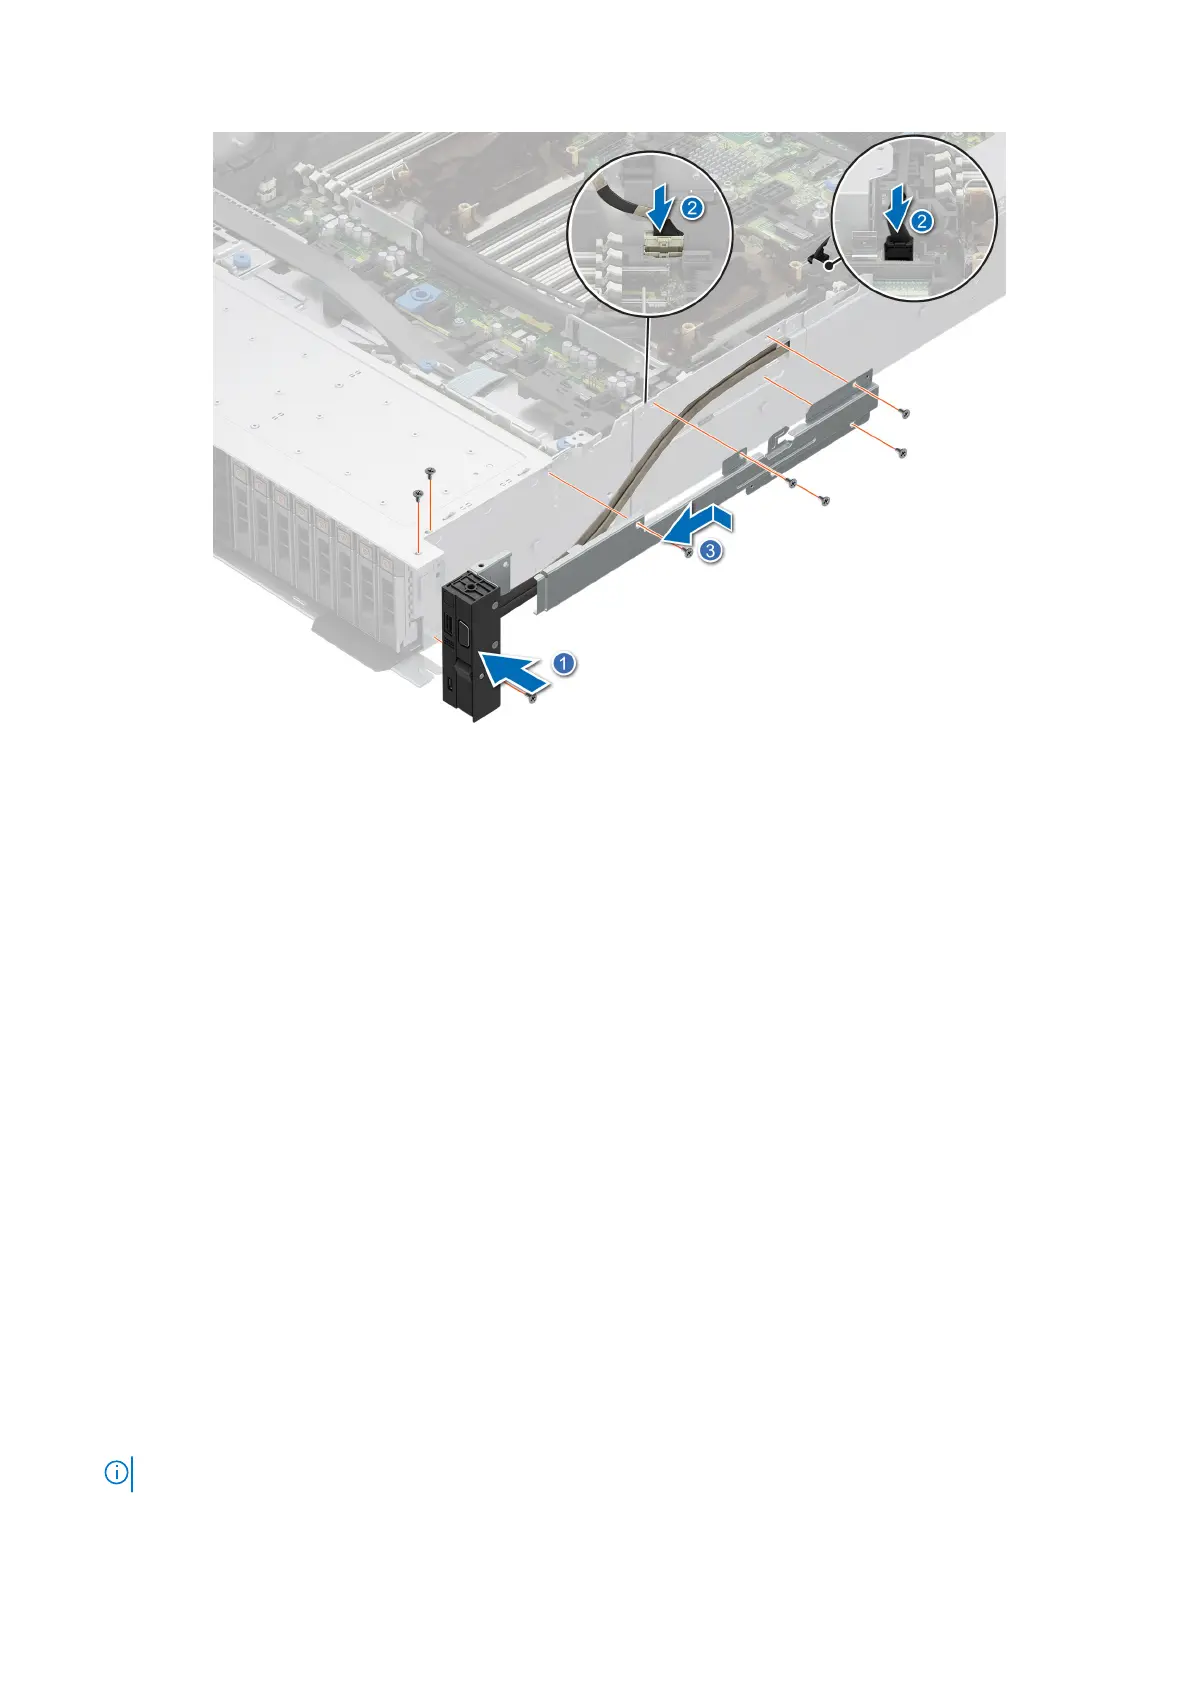
Figure 254. Installing the right control panel
Next steps
1. Install the side wall bracket.
2. Install the cooling fan cage assembly.
3. Install the drive backplane cover.
4. If removed, install the air shroud or install the GPU air shroud
5. Follow the procedure listed in After working inside your system.
Removing the left control panel
Prerequisites
1. Follow the safety guidelines listed in the Safety instructions.
2. Follow the procedure listed in the Before working inside your system.
3. Remove the drive backplane cover.
4. If installed, remove the air shroud or remove the GPU air shroud.
5. Remove the cooling fan cage assembly.
6. Remove the side wall bracket.
Steps
1. Using the Phillips #1 screwdriver, remove the screws that secure the left control panel and the cable cover to the system.
2. Remove the cable cover away from the system.
3. Disconnect the control panel cable from the connector on the system board.
4. Holding the cable, slide the left control panel out of the system.
NOTE: Observe the routing of the cable as you remove the left control panel from the system.
Installing and removing system components 303
 Loading...


