SC-S30600 Series Revision B
ADJUSTMENT CR Related Adjustments 243
Confidential
4.10.8 PG Adjustment
REQUIRED TOOL
Thickness gauge
STANDARD VALUE
2.55 pass
2.65 stop
PROCEDURE
1. When any paper is loaded, remove it.
2. Unlock the CR Unit, and move the unit to the center of the platen. (P. 82)
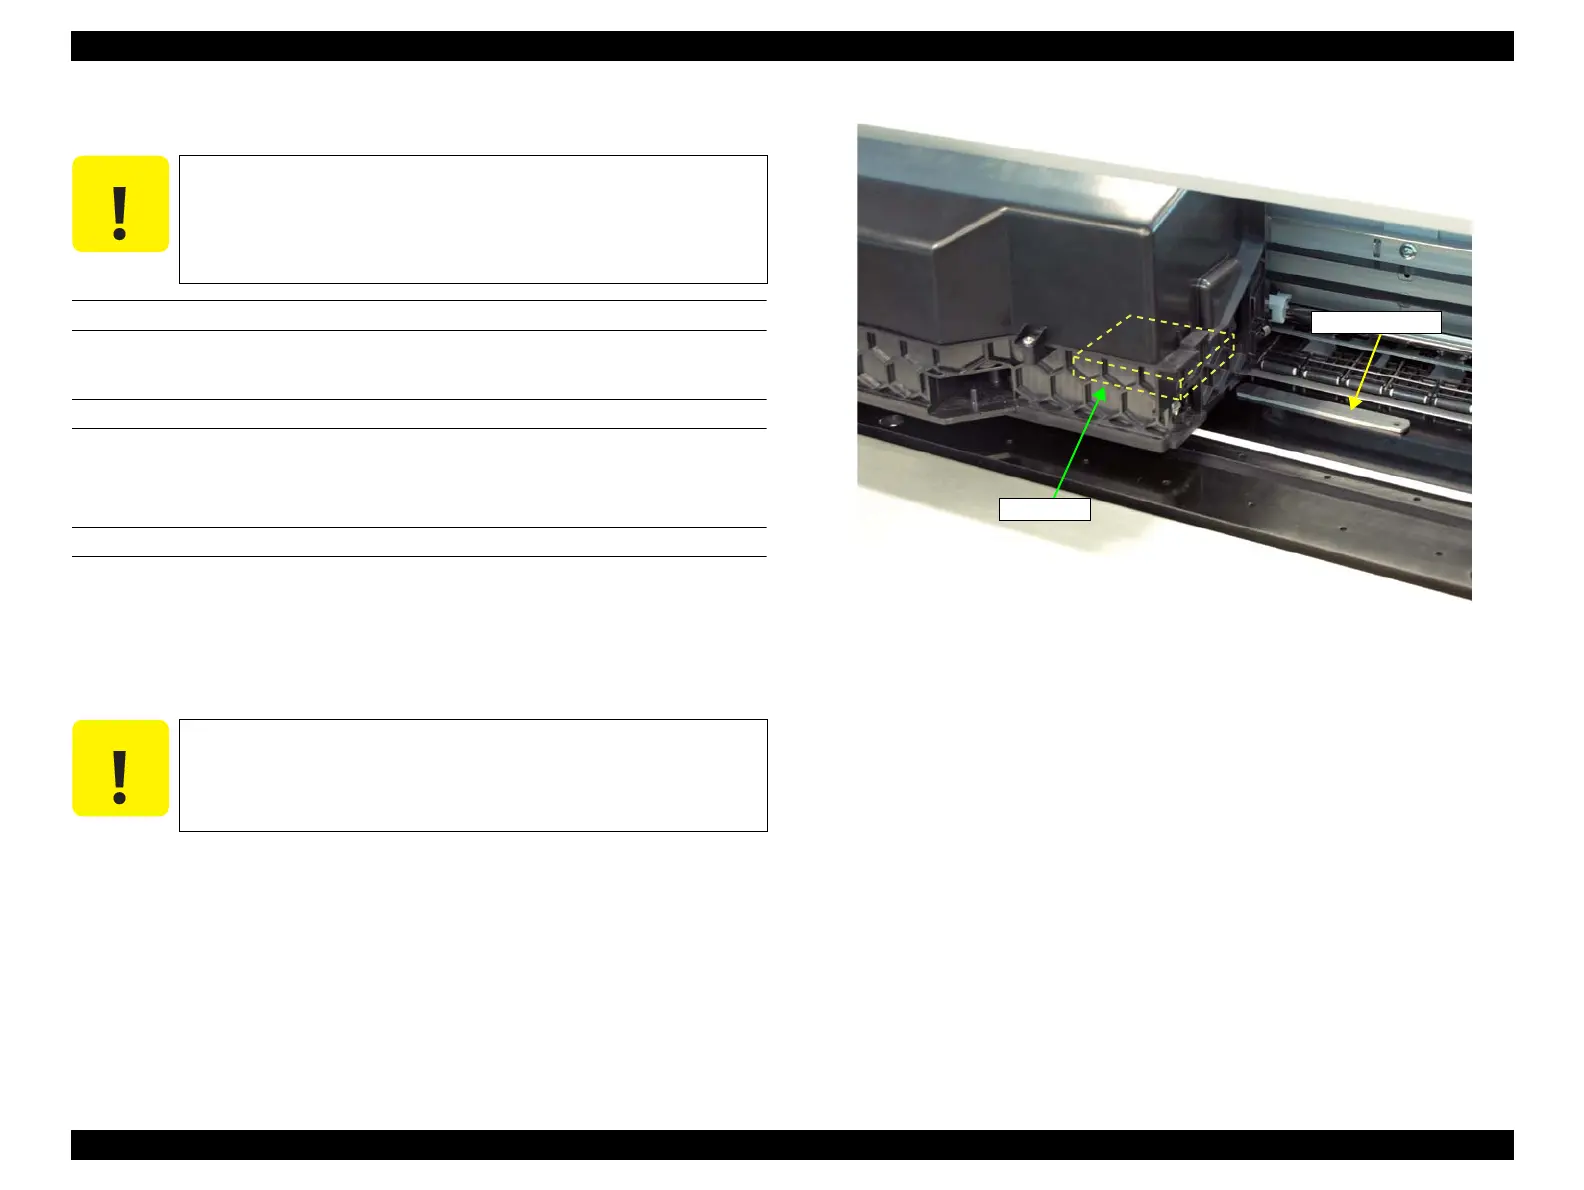
3. Place the thickness gauge on the platen right to the CR Unit, and slowly move the
unit over the platen.
Figure 4-28. Placing the Thickness Gauge
4. Measure the height of the CR Unit to see if it is within the standards.
(Measure at the both left and right of the CR Unit.)
Within the standards: Cap the Print Head and end the adjustment.
Out of the standards: Go to Step 5.
This adjustment adjusts the gap between the Print Head and the
platen. Because the platen expands with heat of the heaters, the
accurate gap cannot be measured immediately after turning off the
printer. Wait until the platen cools down before starting the
adjustment.
Carefully move the CR Unit so that it does not contact with the
nozzle surface of the Print Head.
Thickness gauge
Print Head
 Loading...