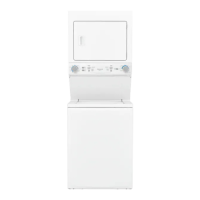
107
Step: 2
Loosen the 2 screws (See Fig. 2) that are fixed with the left
and right panel of the dryer to remove the entire Front
Panel Assembly.
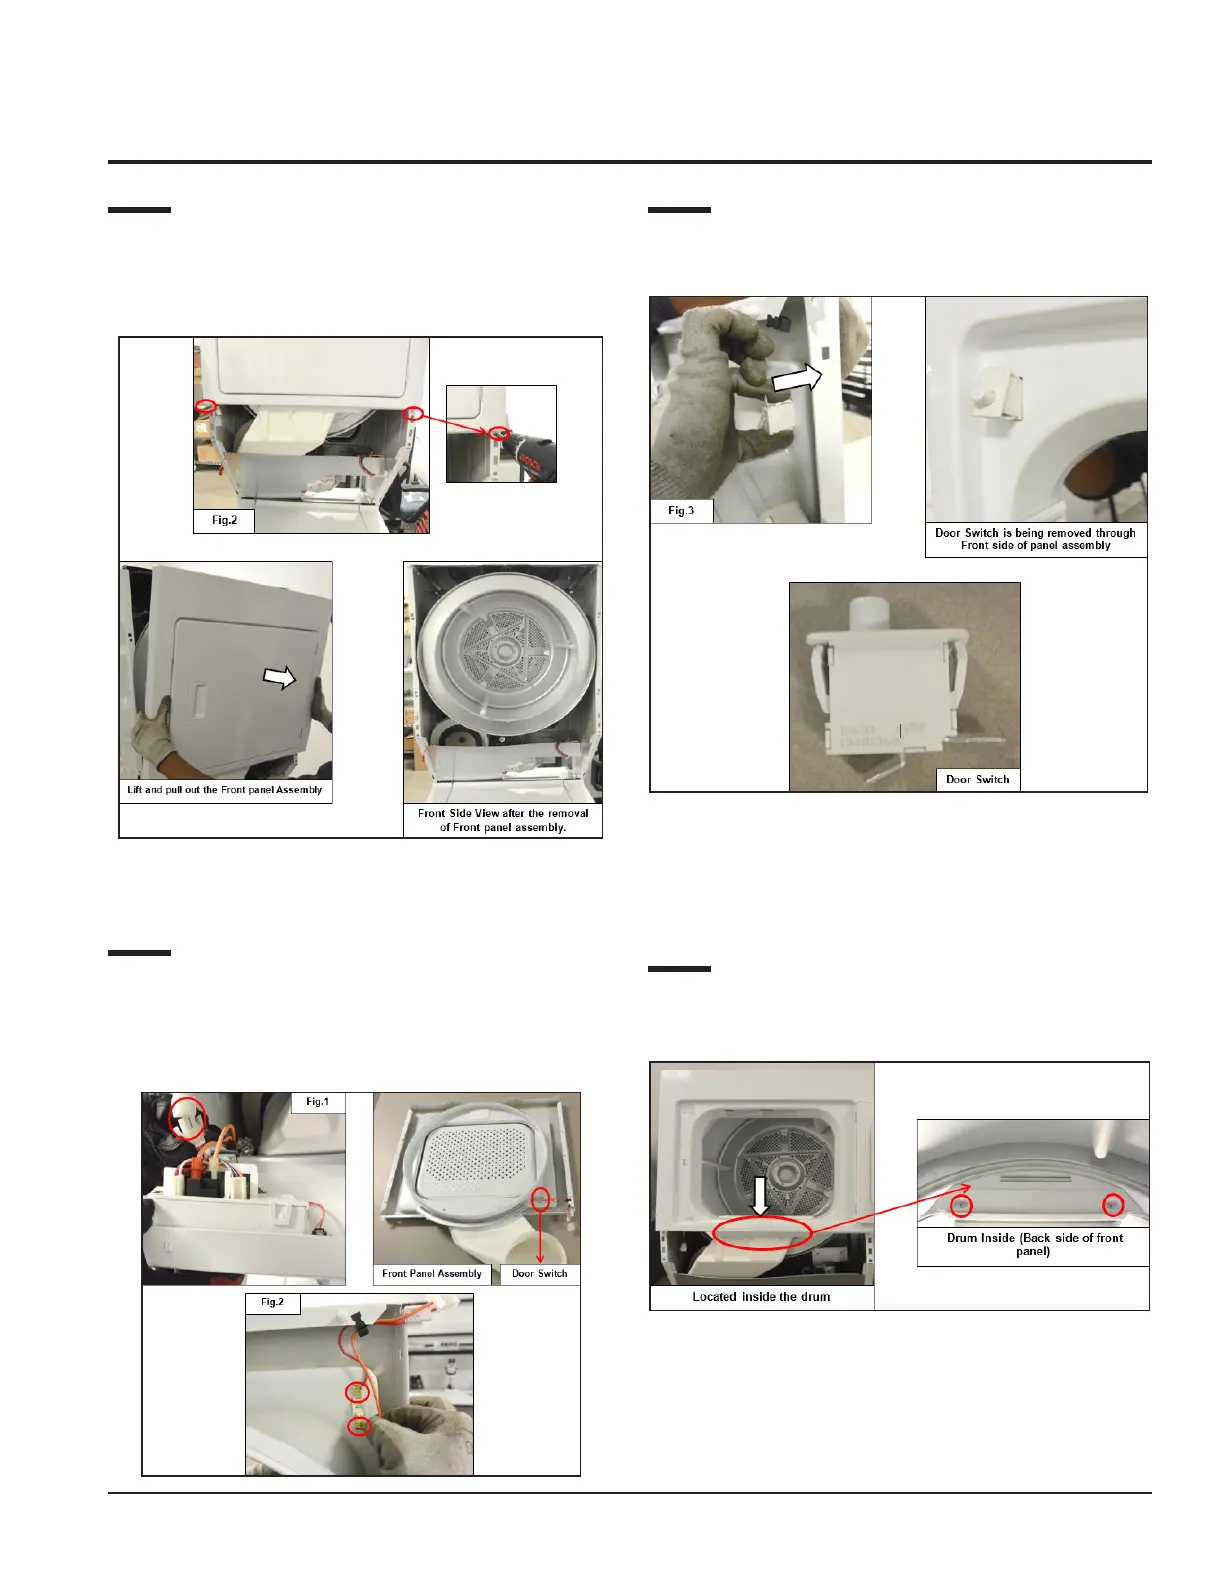
11.4 Door Switch Accessibility
Step: 1
Detach the connector (See Fig.1) from the Electronic
Control Board to remove the Front Panel Assembly and
then detach the terminals (See Fig. 2) of the Door switch.
Step: 2
Press the snaps (See Fig. 3) and pull it out from the front
side of the panel assembly to remove the Door Switch.
11.5 Moisture Sensor
Accessibility
Step: 1
Loosen the Moisture sensor screws (2) that fits with the
Back side of the Front Panel Assembly (Drum inside).
 Loading...