• Badge hold (3 beeps) - a proximity card is held near the proximity reader for longer
than the time set in Scan Time.
You can set the badging action, selecting the appropriate Feature Select menu option. The following
example explains how to change the badging action on the proximity reader 113 to the legacy mode.
1. Navigate with the ½¾ keys to NX-1701E>Prox Reader 113 and press OK.
2. Scroll to Feature Select>Card Scan Mode> Single/Double/Hold and press OK.
3. The keypad beeps once to accept the change and returns to Card Scan Mode.
In order to select the default mode, scroll to Feature Select>Card Scan Mode>1/2/3 Beeps and press
OK.
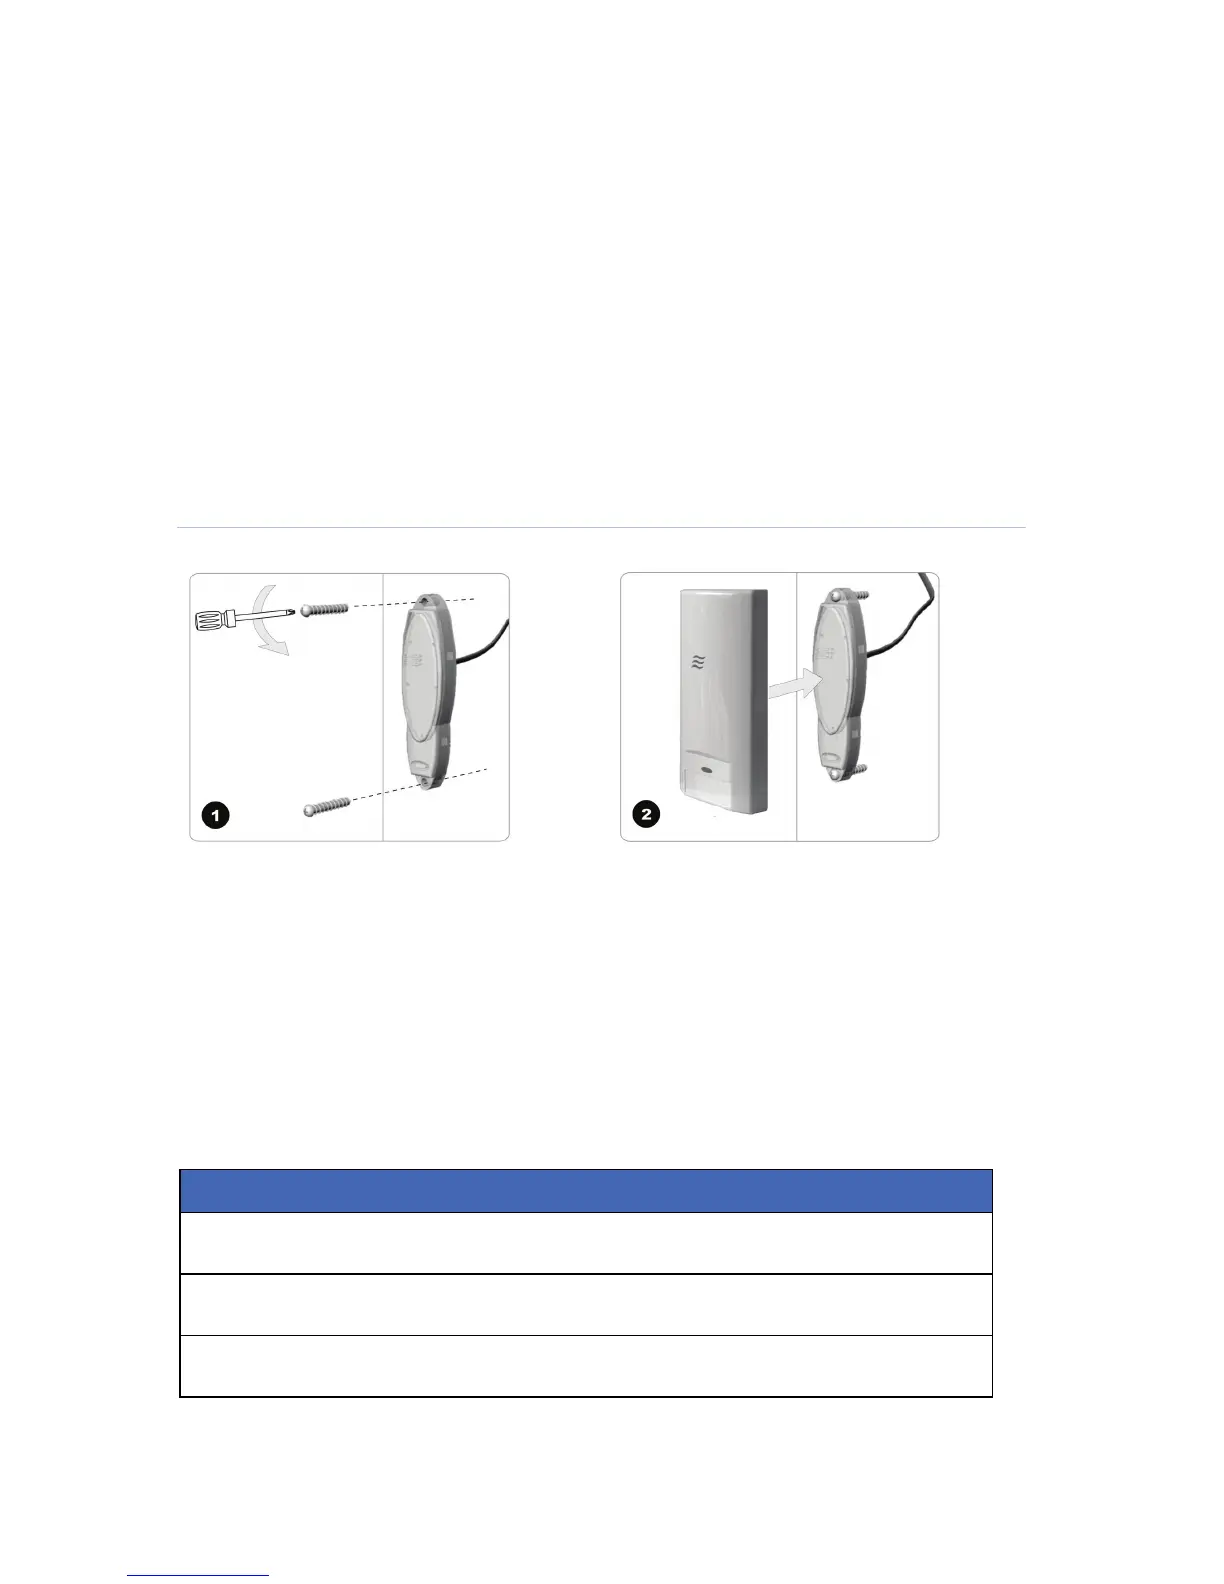
Installing the NX-1701E proximity reader
Figure 3. Installation of the NX-1701E
1. Place the screws in the screw holes of the NX-1701E proximity reader. Attach to the door.
2. Place the cover on the NX-1701E proximity reader.
Wiring the NX-1701E proximity reader
Table 2. NX-1701E proximity reader terminal connections
Wire Description
Green (data) Connect to the control panel DATA terminal. This wire is the data-signalling terminal to
all the devices on the bus.
Black (com) Connect to the control panel COMMON terminal. This wire supplies the common side of
the power to the NX-1701E proximity reader.
Red (pos) Connect to the control panel POS terminal. This wire supplies power to the NX-1701E
proximity reader.
 Loading...