Adding and deleting user cards
Only a master user can add or delete users. To add or delete cards, you must enter information at the
keypad and then scan the cards. Before a card can be added, one NX-1750 proximity reader on the
system must be programmed to enable user card programming. It is recommended that only one
reader on the system is enabled to do this and that this reader is located near a keypad. This NX-1750
proximity reader transfers information to all other NX-1750 proximity readers in the system once
programming is finished. The following example enables user card programming on proximity reader
113.
Note: The proximity reader recognizes pre-defined card serial numbers. It is not recommended to change these
serial numbers.
1. Navigate with the ½¾ keys to NX-1750 Proxpad>Proxpad 192 and press OK.
2. Scroll to Feature Select>User Card Programming>Enabled and press OK.
3. The keypad beeps once to accept the change and returns to User Card Programming.
4. Enter a master user code to enter the user menu. Choose from one of the procedures outlined
below.
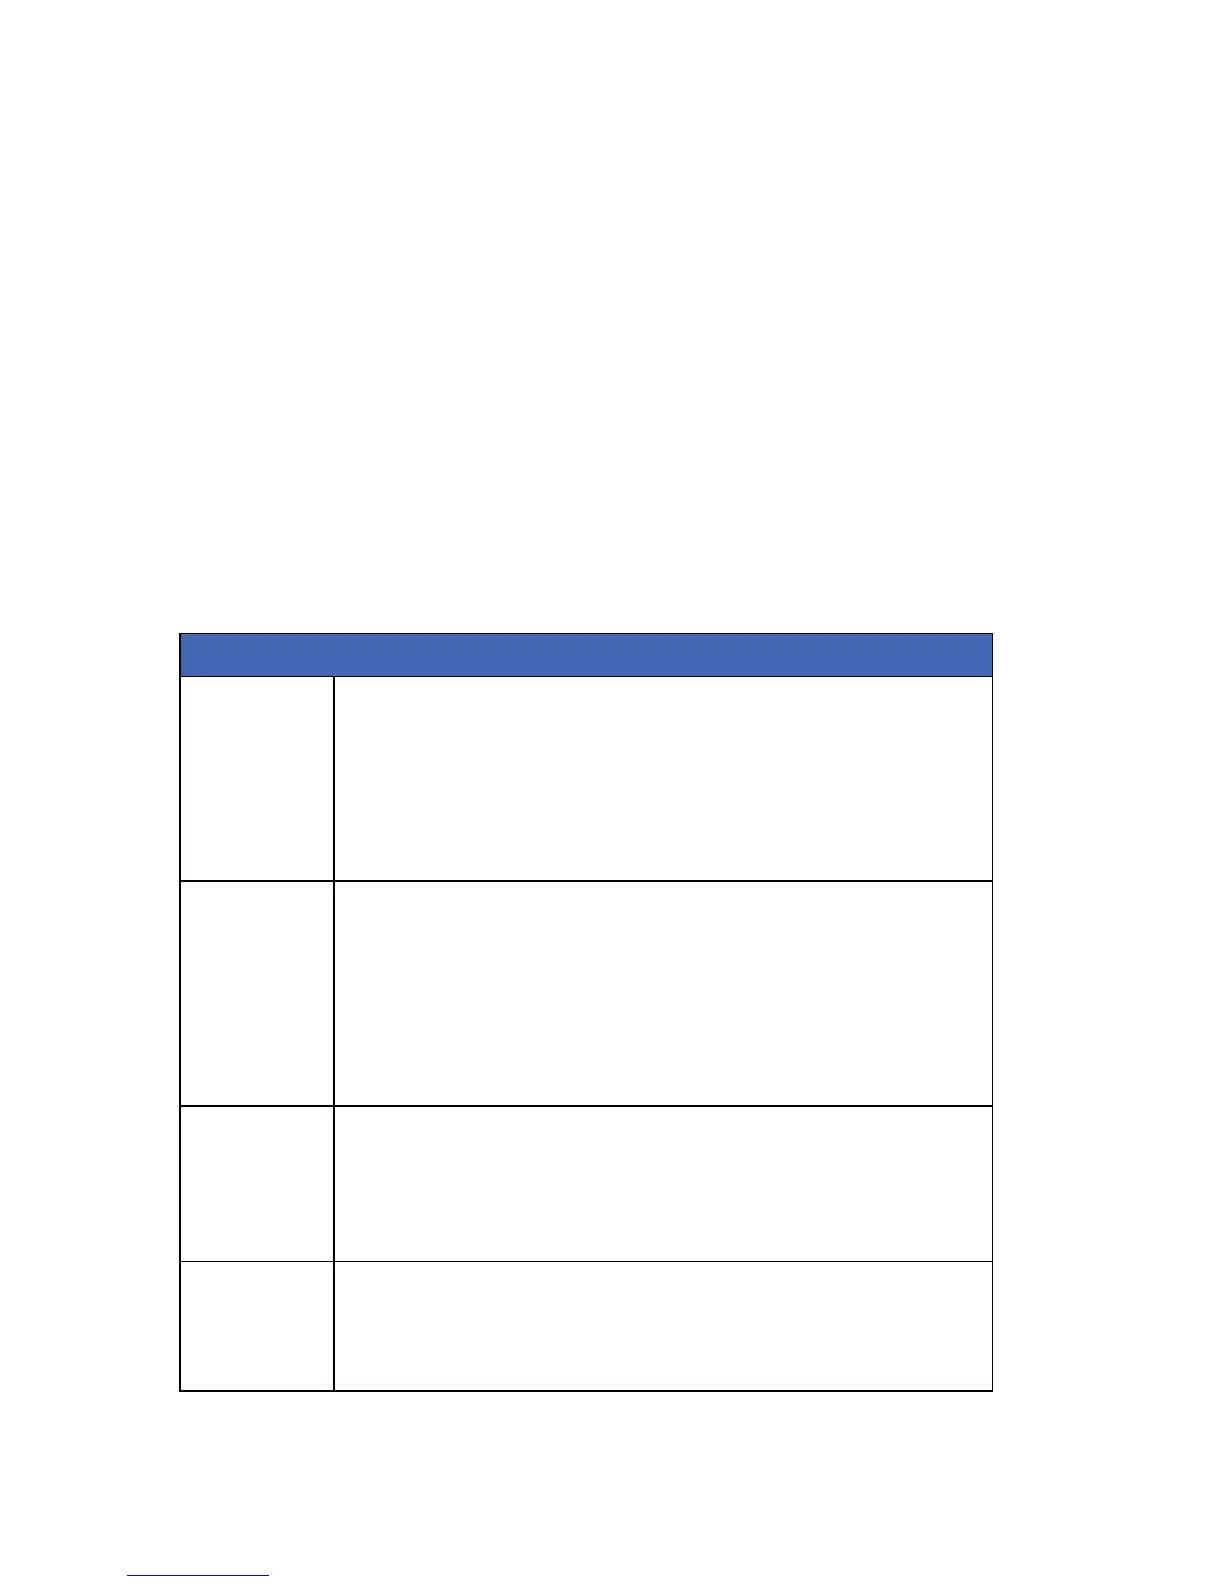
Table 6. NX-1750 tasks
Task Steps
Add one card
1. Select User Menu>NX-17xx Readers>Add One Card.
2. Enter the user number to be assigned to the card and press OK.
3. OK LED on any enabled readers begins to flash.
4. Scan the card designated for the entered user. If the user card is not already in the
system, it is added and OK LED stops flashing. If the card is already in the system, the
reader triple beeps and OK LED continues flashing.
5. 40 seconds after you have finished scanning, all the readers in the system are updated
with the new user card information.
Add multiple
users
1. Select User Menu>NX-17xx Readers>Add Multiple Cards.
2. Enter the user number to be assigned to the card and press OK.
3. OK LED on any enabled readers begins to flash.
4. Scan the card designated for the entered user. If the user card is not already in the
system, it is added and OK LED continues flashing indicating that the next user card can
be scanned. If the card is already in the system, the reader triple beeps and OK LED
continues flashing.
5. 40 seconds after you have finished scanning, all the readers in the system are updated
with the new user card information.
Delete one user
1. Select User Menu>NX-17xx Readers>Delete One Card.
2. Enter the user number assigned to the card and press OK.
3. Badge a card at the reader.
4. The user card information for the entered user number will be cleared and OK LED
stops flashing. After about 40 seconds, all the readers in the system are updated with the
new user card information.
Activate a card
1.Select User Menu>NX-17xx Readers>Activate Card.
2.Enter the user number assigned to the card and press OK.
3.The user card information for the entered user number will be activated and OK LED
stops flashing. After about 40 seconds, all the readers in the system are updated with the
new user card information.
 Loading...