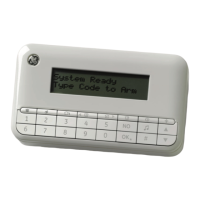
8. Press the relevant keys to include partition 2 in the alarms report and press OK.
9. The keypad beeps once to accept the change and returns to Alarms.
10. Navigate with the ½¾ keys to Options>Reporting>Report Format and select the format
relevant for your central station receiver.
11. The keypad beeps once to accept the change and returns to Report Format.
12. Navigate with the ½¾ keys to E-mail Reporting>E-mail Server>Domain Name and
press OK.
13. Enter the domain name of the server to which reports are sent and press OK.
14. The keypad beeps once to accept the change and returns to Domain Name.
15. Scroll to E-mail Server>IP Address and press OK.
16. Enter the IP address of the server to which reports are sent and press OK.
17. The keypad beeps once to accept the change and returns to IP Address.
Configuring reporting options
The NX-590E TCP/IP module can send primary, backup and dual reports. The following steps
explain how to configure each type of report.
1. Navigate with the ½¾ keys to NX-590E>Options>Reporting and press OK.
2. To use another NX-590E receiver as backup, select Receiver 2 as Backup>Enabled and
press OK.
3. To use the control panel as backup:
• Select Control Panel is Backup>Enabled and press OK.
• Enable autotest report on the control panel phone events and panel system events.
• Ensure the reporting format used by the control panel is the same as that set in Report
Format.
4. To configure dual reporting:
• Select Receiver 2 as Backup>Disabled and press OK.
• Select Control Panel is Backup>Disabled and press OK.
• Enable all event categories on the control panel.
Configuring upload/download
To enable upload/download, you must configure the session initiation settings on the NX-590E
TCP/IP module and specify the PC IP address and port. The upload/download access code is set on
the control panel. The following example enables download sessions during test calls. The calls are
initiated from a central station (IP address 192.37.57.3) using the TCP/IP alarm port.
1. Navigate with the ½¾ keys to NX-590E>Up/Download and press OK.
2. Scroll to Remote Initiated>Enabled and press OK.
3. The keypad beeps once to accept the change and returns to Remote Initiated.
4. Scroll to IP Address and press OK.
5. Enter 192.37.57.3 and press OK.

 Loading...