HYDROSTATIC POWER TRAIN
4181384 First Edition 5-25
5
NOTICE
Inspection
• Keeping parts in assembly order, clean and air dry
each item for inspection.
• Inspect for worn or defective parts.
• Look for metal chips or slivers during cleaning (an
indication of damage to pump or other hydraulic
component.)
• Inspect all parts for cracks, nicks, burrs, and
excessive wear. Inspect for scoring, galling, and
scratches on surfaces. Replace parts as necessary.
Assembly Notes
• Assemble the pump by reversing the order of
disassembly.
• Install new O-rings and seals. Use clean grease to
keep seals in position.
Front Wheel Motor
Removal and Installation
See Figures 5-27 through 5-30.
1. Park the mower safely. (See “Park Mower Safely” on
page 1-7.)
2. Remove the front cutting unit on the side where the
motor is being removed.
3. Remove front wheel. (See “Front Wheels” on
page 9-19.)
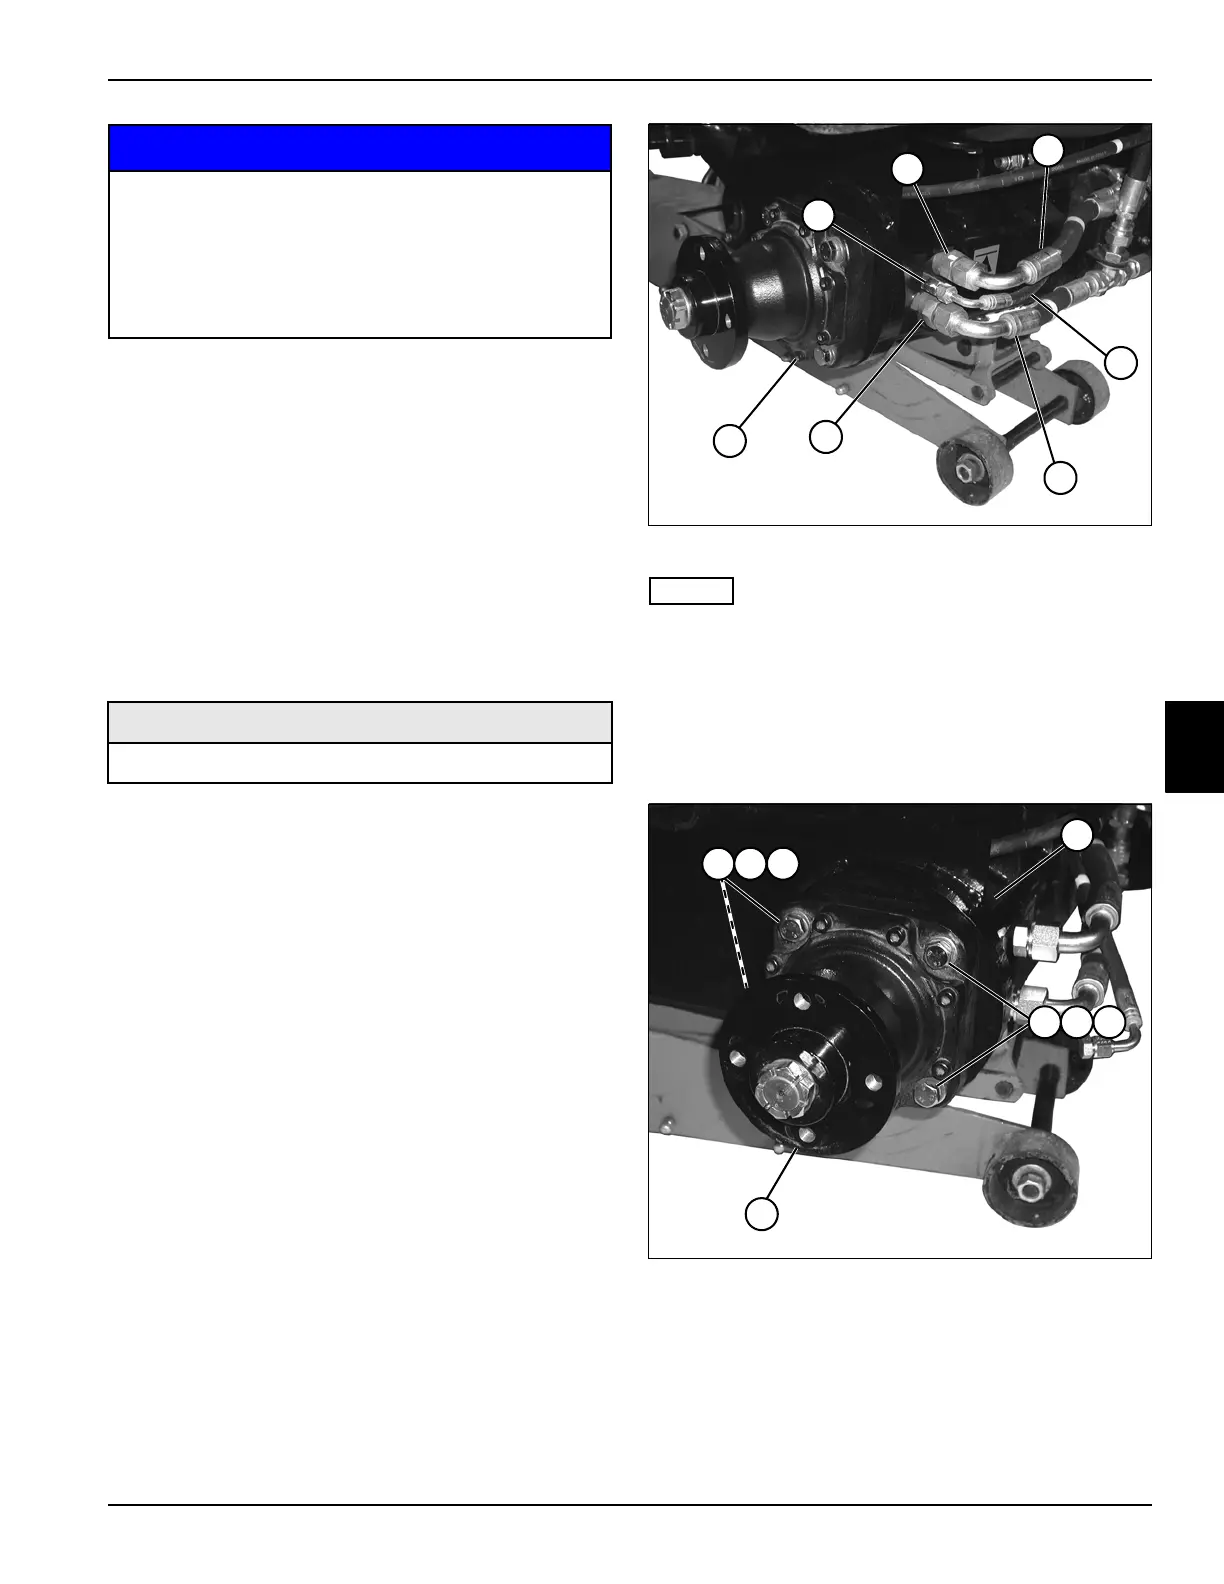
Figure 5-27
NOTES
• Label all hydraulic hoses before disconnecting to
ensure correct installation.
• Plug hydraulic hoses after disconnecting to prevent
the loss of hydraulic oil.
4. Disconnect hoses (3, 4, and 5).
5. Remove hydraulic fittings (1, 2, and 6) from motor (7).
Figure 5-28
6. Remove four screws (8), lock washers (9), and flat
washers (10).
7. Remove motor (12) from axle (11).
It is important that all components are absolutely
clean, as contamination can result in serious
damage and/or improper operation.
Never use shop towels or rags to dry parts after
cleaning, as lint may clog passages. Dry parts
using compressed air.
Required Materials
Overhaul Seal and Gasket Kit
TN1288
1
2
3
4
5
6
7
TN1304
8 9
10
8 9
10
~
11
12
 Loading...