CUTTING UNITS
4181384 First Edition 8-29
8
Front Deck Yoke
Removal and Installation
See Figures 8-9 through 8-11.
1. Park the mower safely. (See “Park Mower Safely” on
page 1-7.)
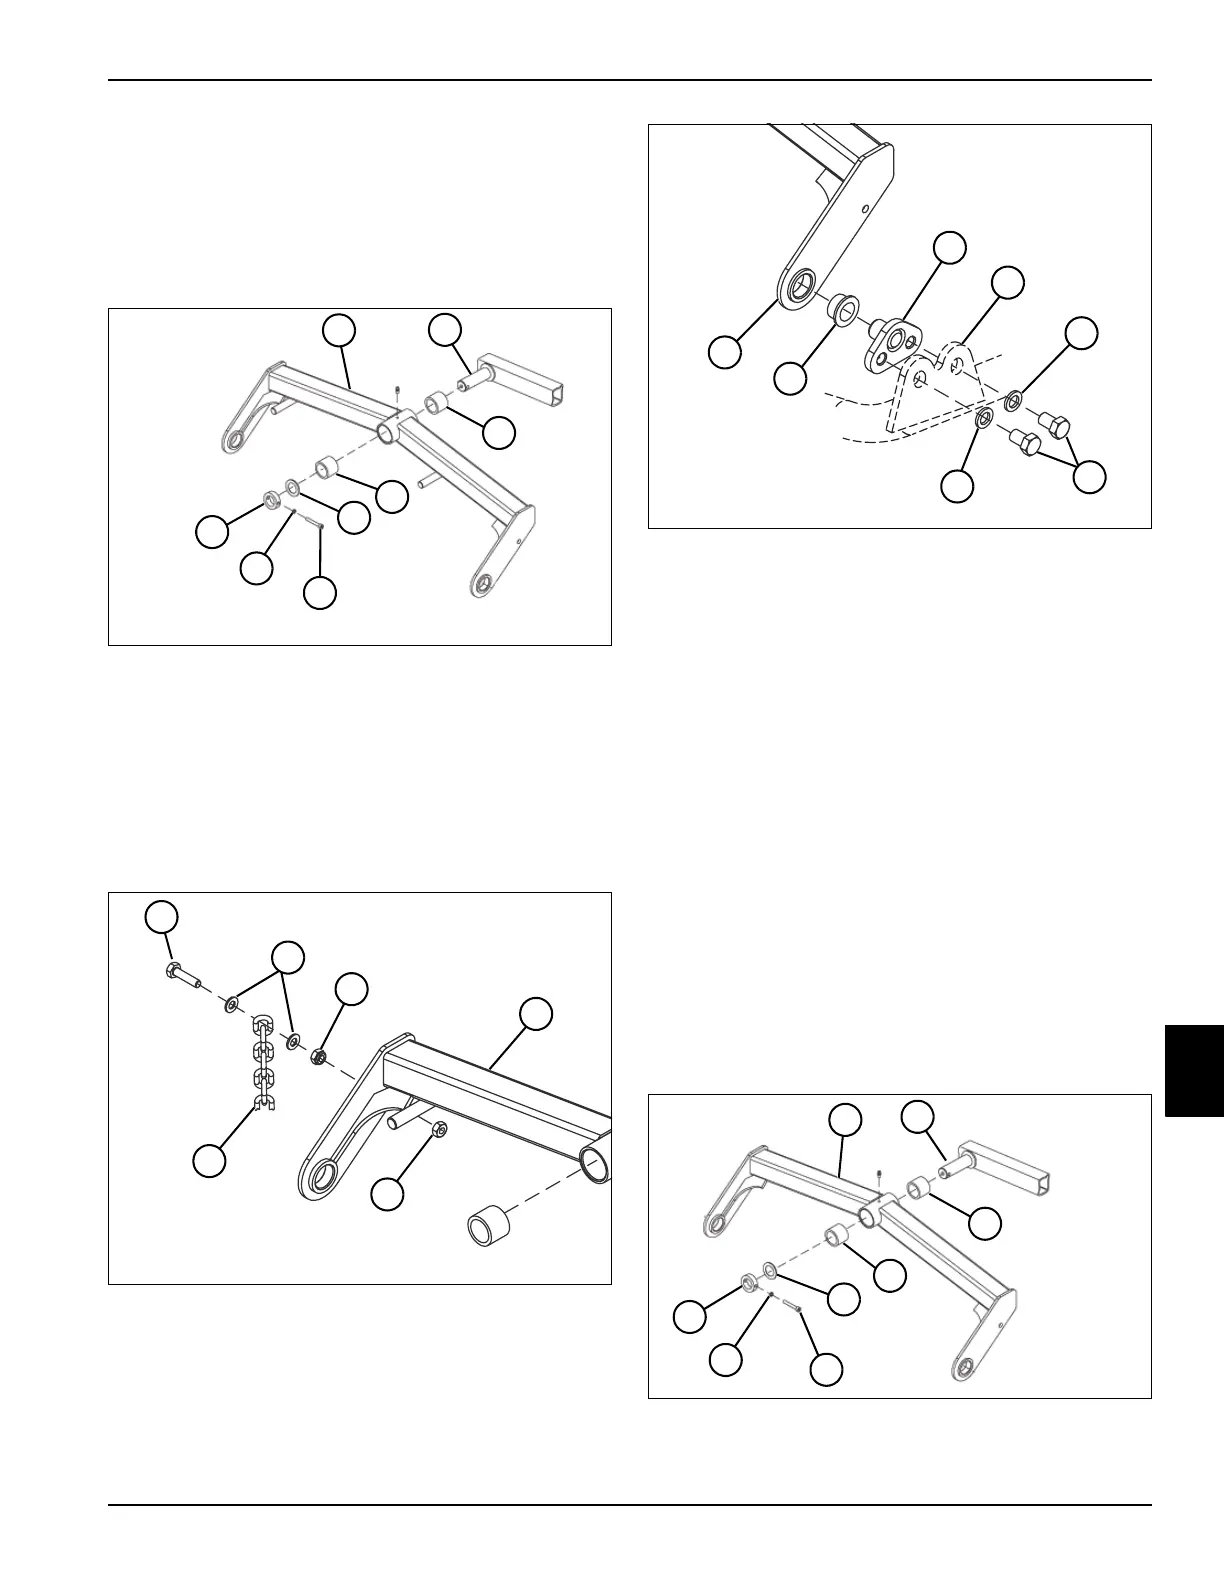
Figure 8-9
2. Remove socket-head screw (5), lock washer (6), flat
washer (not shown), collar (7), and washer (4) from
lift arm pivot shaft (2).
3. Inspect lift arm shaft bushings (3). Remove only if
replacement is required.
4. Roll the cutting unit forward until the deck yoke (1)
clears the lift arm pivot shaft (2).
Figure 8-10: Outer Side of Cutting Unit
5. Remove lock nut (12), nut (10), two washers (9),
screw (8) and chain (13) from the deck yoke (11) and
the outer side of the cutting unit frame.
Figure 8-11: Inner Side of Cutting Unit
6. Remove screws (19), flat washers (18), deck pivot
(16), and bushing (15) from frame bracket (17) from
inner side of the cutting unit frame (17).
7. Remove yoke (14) from cutting unit frame (17).
Installation Notes
• Install the front deck yoke by reversing the order of
removal.
• Apply grease on lift arm pivot shaft bushings (3) and
lift arm pivot shaft (2) before installation. (Refer to
“Safety, Operation, and Maintenance Manual” for
grease specifications.)
Rear Deck Yoke
Removal and Installation
See Figures 8-12 and 8-13.
1. Park the mower safely. (See “Park Mower Safely” on
page 1-7.)
Figure 8-12
TN1244
3
2
7
3
6
5
1
4
12
8
10
9
11
13
TN1196a
TN1196A
17
14
15
16
18
19
18
TN1244
3
2
7
4
6
5
1
3
 Loading...