Rev. 2.0
Maintenance Guide
22-2
22-2. Replacing the EPV61/62
The LNC61 is used when the optional placement monitor for the KE-3010 is mounted while the
LNC62 is used when the placement monitor for the KE-3020V/3020VR is mounted.
<Procedure>
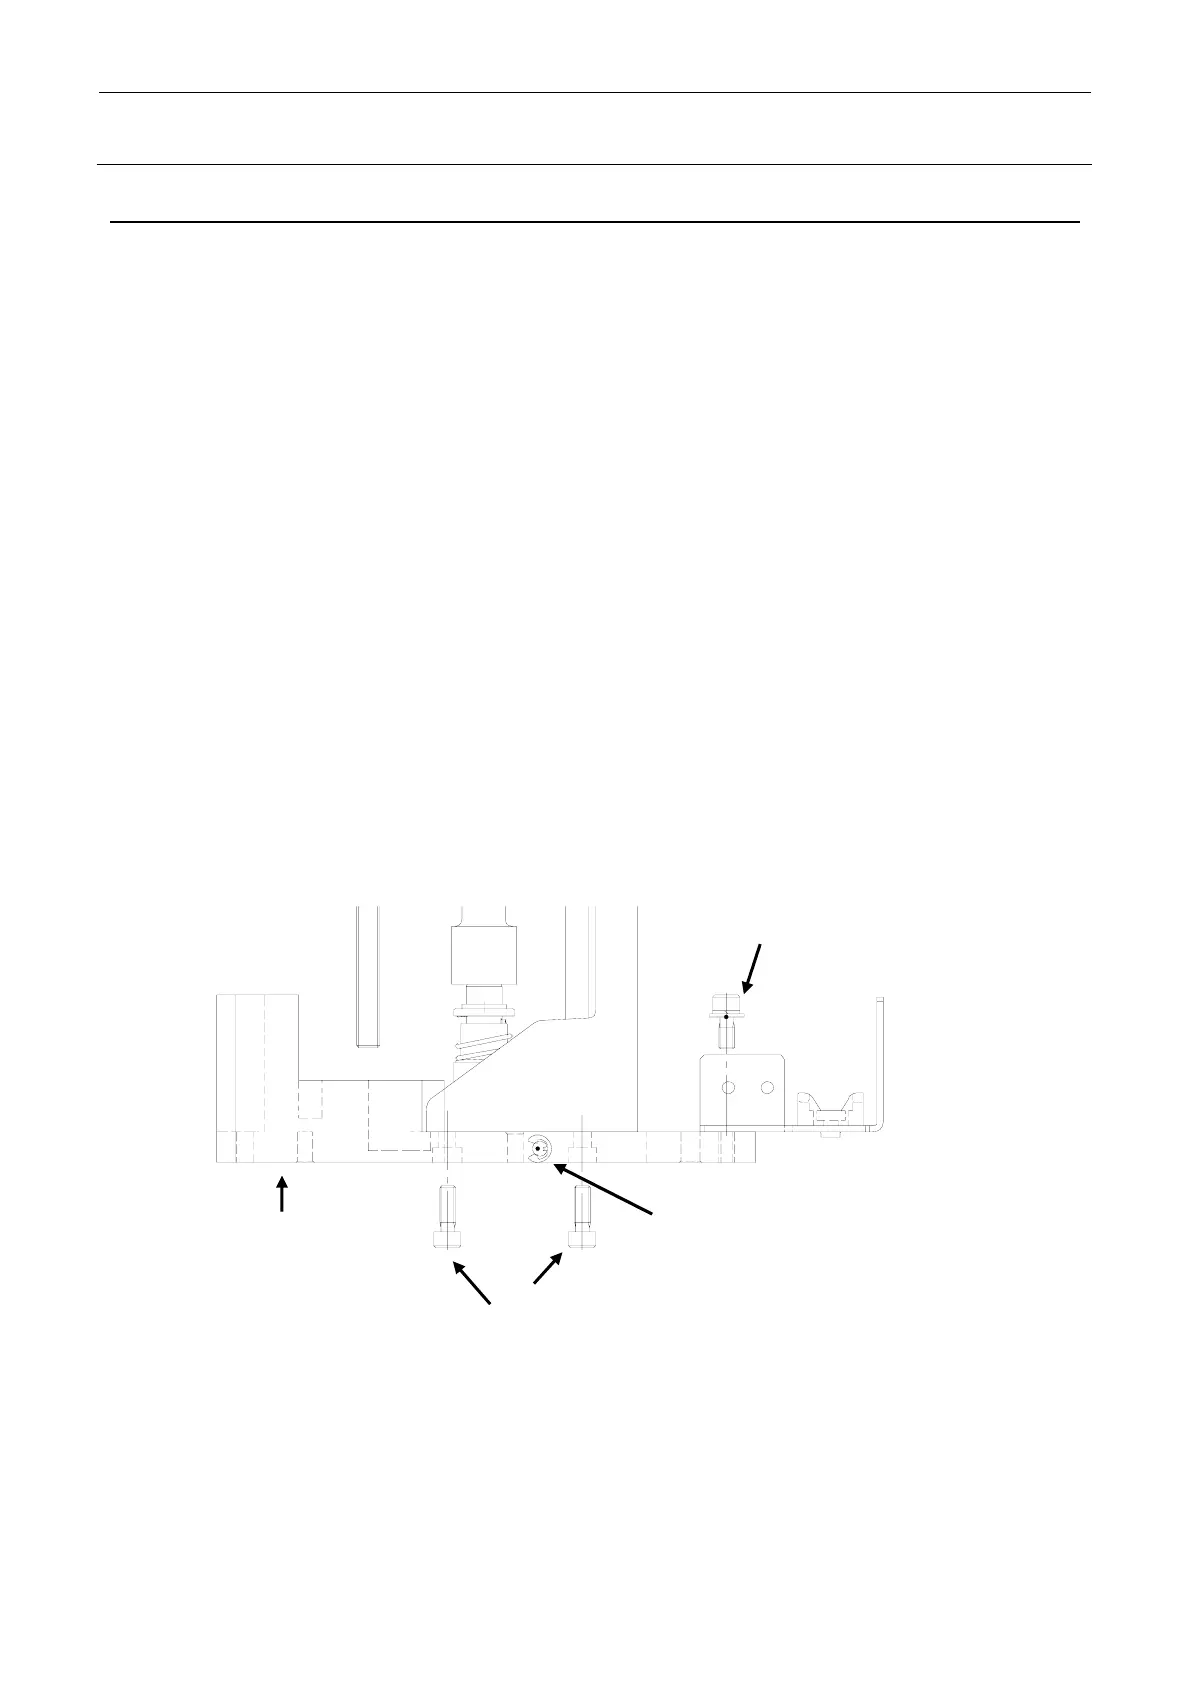
1) After the LNC61/62 has been detached using the procedure stated in section 22-1,
disconnect the connectors (encoder and IEEE1394) from the front of the EPV61/62 and
remove the mounting screws c (2 pcs.) to detach the bracket that secures the EPV61/62.
2) Remove the mounting screws d (4 pcs.) that secure the EPV61/62 to detach the
EPV61/62.
3) Remove the E-ring from the shaft e mounted on the EPV61/62 and pull out the shaft.
4) Mount a new EPV61/62 in the reverse order of disassembly. At this time, when assembling
the shaft e, use a new E-ring.
5) After that, mount the LNC61/62 using the procedure stated in section 22-1.
∗ Before mounting a new EPV61/62, remove the Loctite solidified on the sensor bracket as
much as possible.
∗ Before mounting the sensor, put the sensor pin in the positioning hole in the bracket and
secure it after positioning.
∗ After the Loctite 242 has been applied to the sensor mounting screws c and d, secure them
with a tightening torque of 2.6 Nm.
∗ After replaced, clean the camera lens and illumination part of the EPV sensor with a clean
cloth rag.
d (4 pcs.)
Figure 22-2-1
EPV61/62
c (2 pcs.) SL6040892TN
e Shaft
E-ring
SM6041002TN
RE0300000K
 Loading...


