7-9
7-9. Replacement of X-axis ejector
Detach the X cover and replace the ejector.
When the replacement is finished, make adjustment as described below.
Set the air pressure to 0.5 MPa.
While the head L keeps vacuuming (test mode, head picking valve), turn the pressure setting
trimmer to the L-side until it comes to a position where the LED lights up (vacuum pressure is the
lowest around the point of LED going out).
In addition, turn it to H-side while blocking the tip of the pad of head L. and a point will be found at
which the LED goes out.
Set the pressure setting trimmer to the midpoint between the points of LED turning ON and
turning OFF.
Do the same way also for head R.
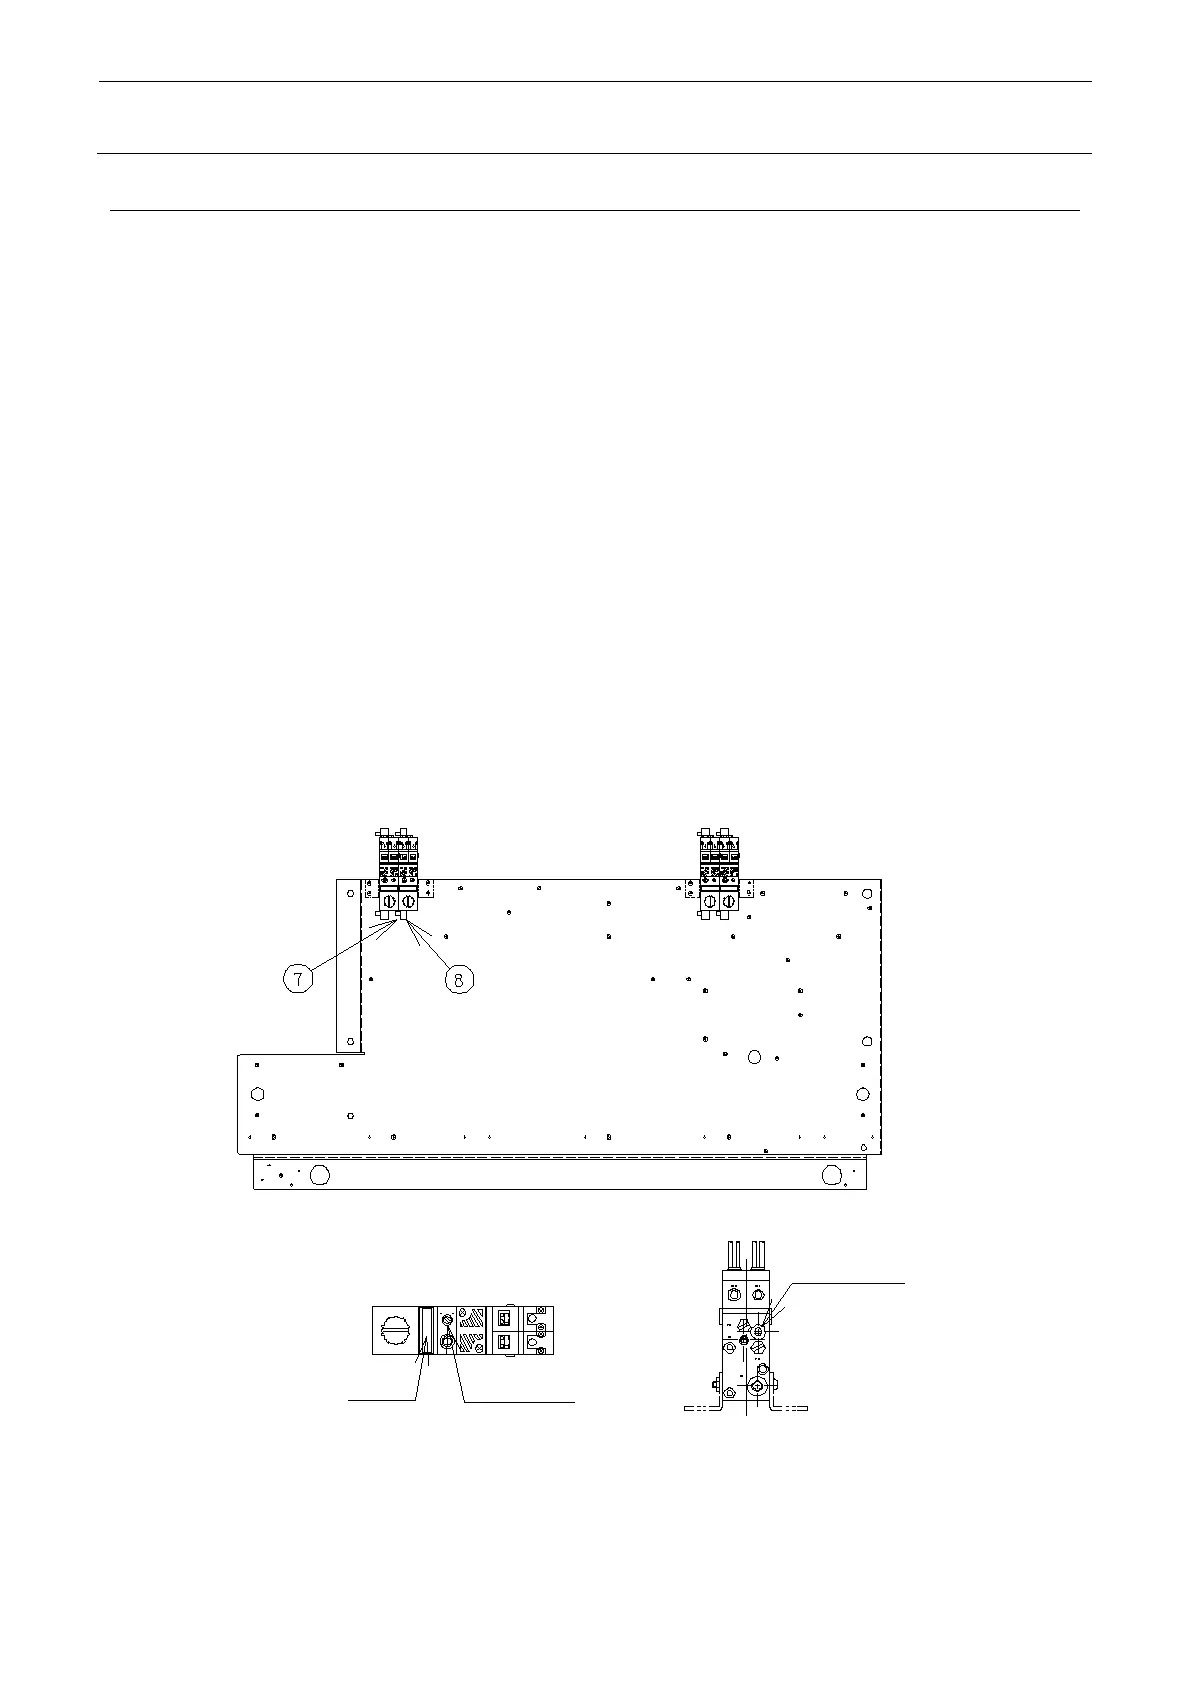
Adjustment of breaking flow rate of Head ejector
While the head keeps blowing, clockwise turn the breaking flow rate adjustment needle until the
head stops blowing. From this point, turn it counterclockwise by 45° to finish adjustment.
Head L ejector (part No.: 40045132)
Head R ejector (part No.: 40045133)
trimmer
 Loading...


