11.2
Section 11
Reassembly
NOTE: In steps 3 and 4 that follow, position
the oil seals with the manufacturer’s
identifi cation marks visible and facing
you.
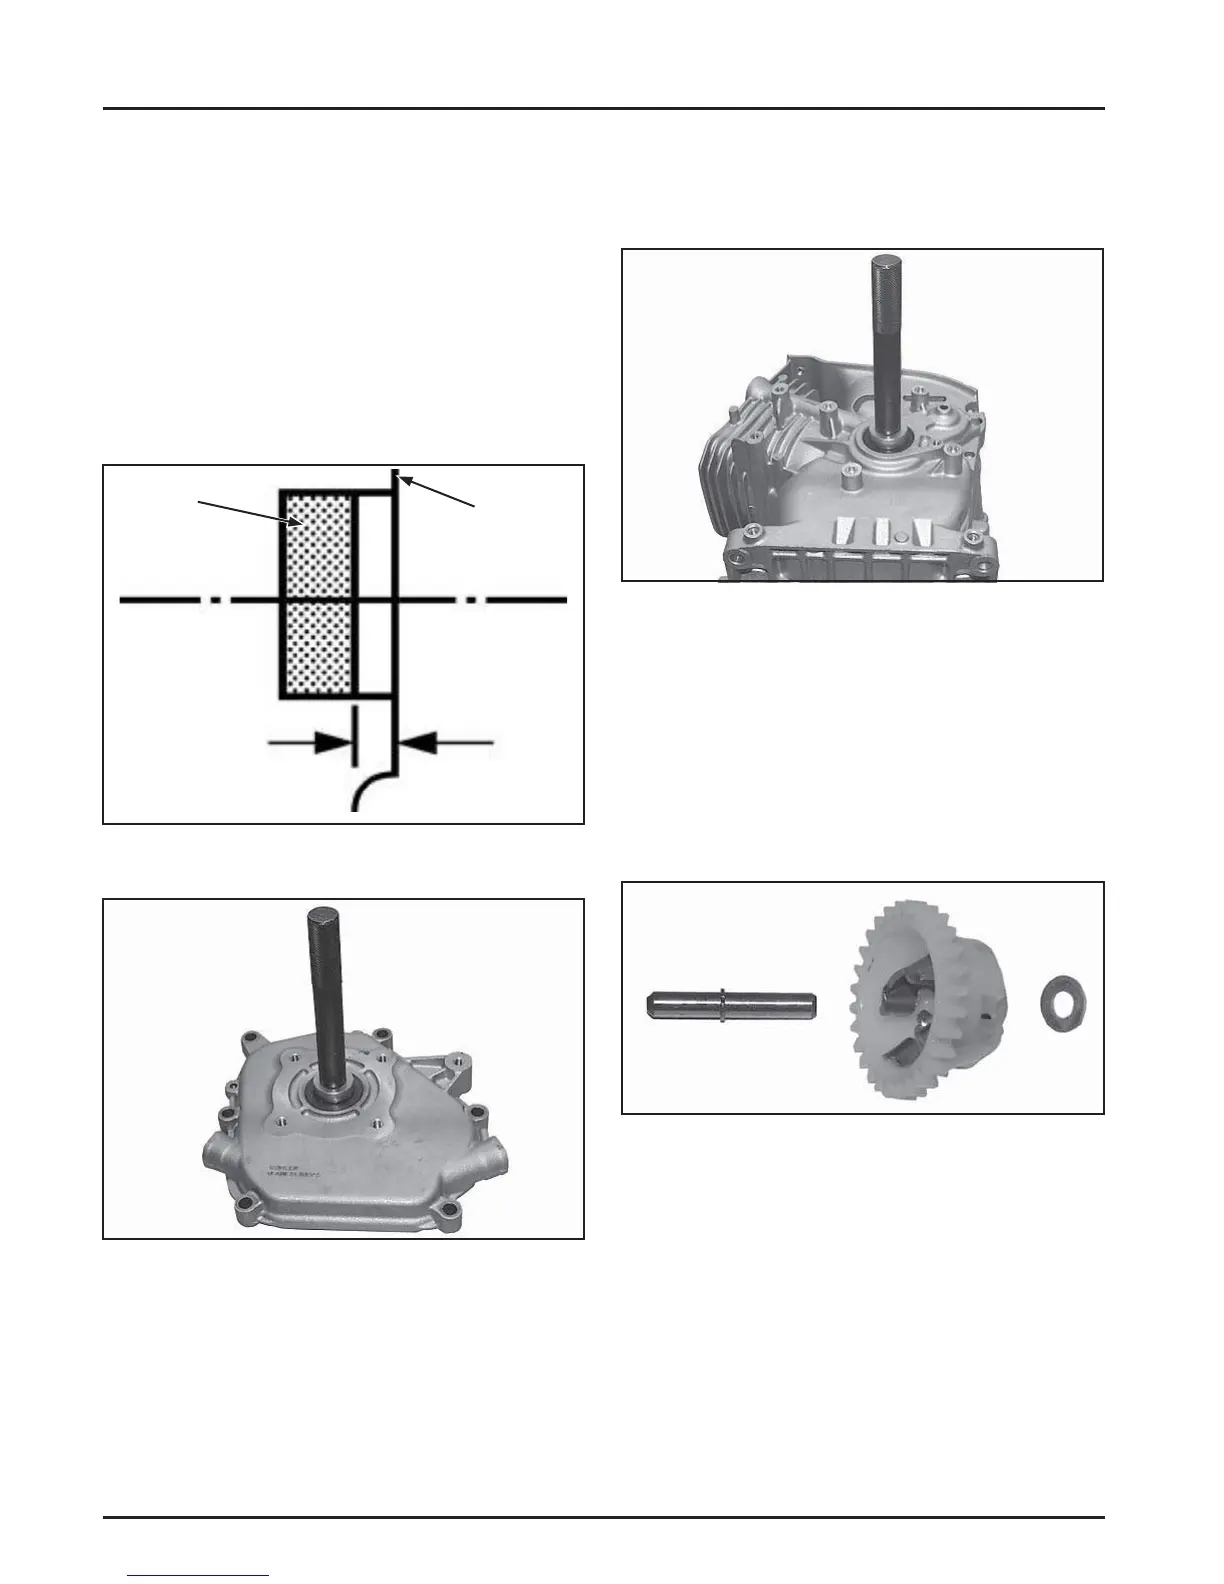
3. Using an appropriate seal driver, install the oil
seal into the closure plate to the depth specifi ed
below. See Figures 11-3 and 11-4.
Install to a depth of:
CH270 5.5 mm (0.217 in.) from the outer surface
CH395 7.0 mm (0.276 in.) from the outer surface
CH440 8.2 mm (0.323 in.) from the outer surface
Figure 11-5. Install Crankcase Oil Seal.
5. Apply a light coating of lithium grease to seal lips
a er installing.
Install Governor Assembly
CH270
1. Install the governor sha through the gear and
add the thrust washer to the sha . See Figures 11-6
and 11-7.
Depth
Seal
Outer
Surface
Figure 11-3. Closure Plate Oil Seal Installation
Depth.
Figure 11-4. Install Closure Plate Oil Seal.
4. Using an appropriate seal driver, install the oil
seal into the crankcase to the depth specifi ed
below. See Figure 11-5.
Figure 11-6. Governor Gear Assembly.
2. Install governor gear assembly into the crankcase
using a press, or a dri with light taps, until the
tip of the sha is 78.862 mm (3.105 in.) below the
machined gasket surface of the crankcase. See
Figures 11-6 and 11-7. Install the washer and cup
on the sha .
Install to a depth of:
CH270, CH440 0.0-1.0 mm (0.0-0.039 in.) from the
outer surface
CH395 2.0 mm (0.079 in.) from the outer surface
 Loading...


