5.3
Section 5
Fuel System and Governor
5
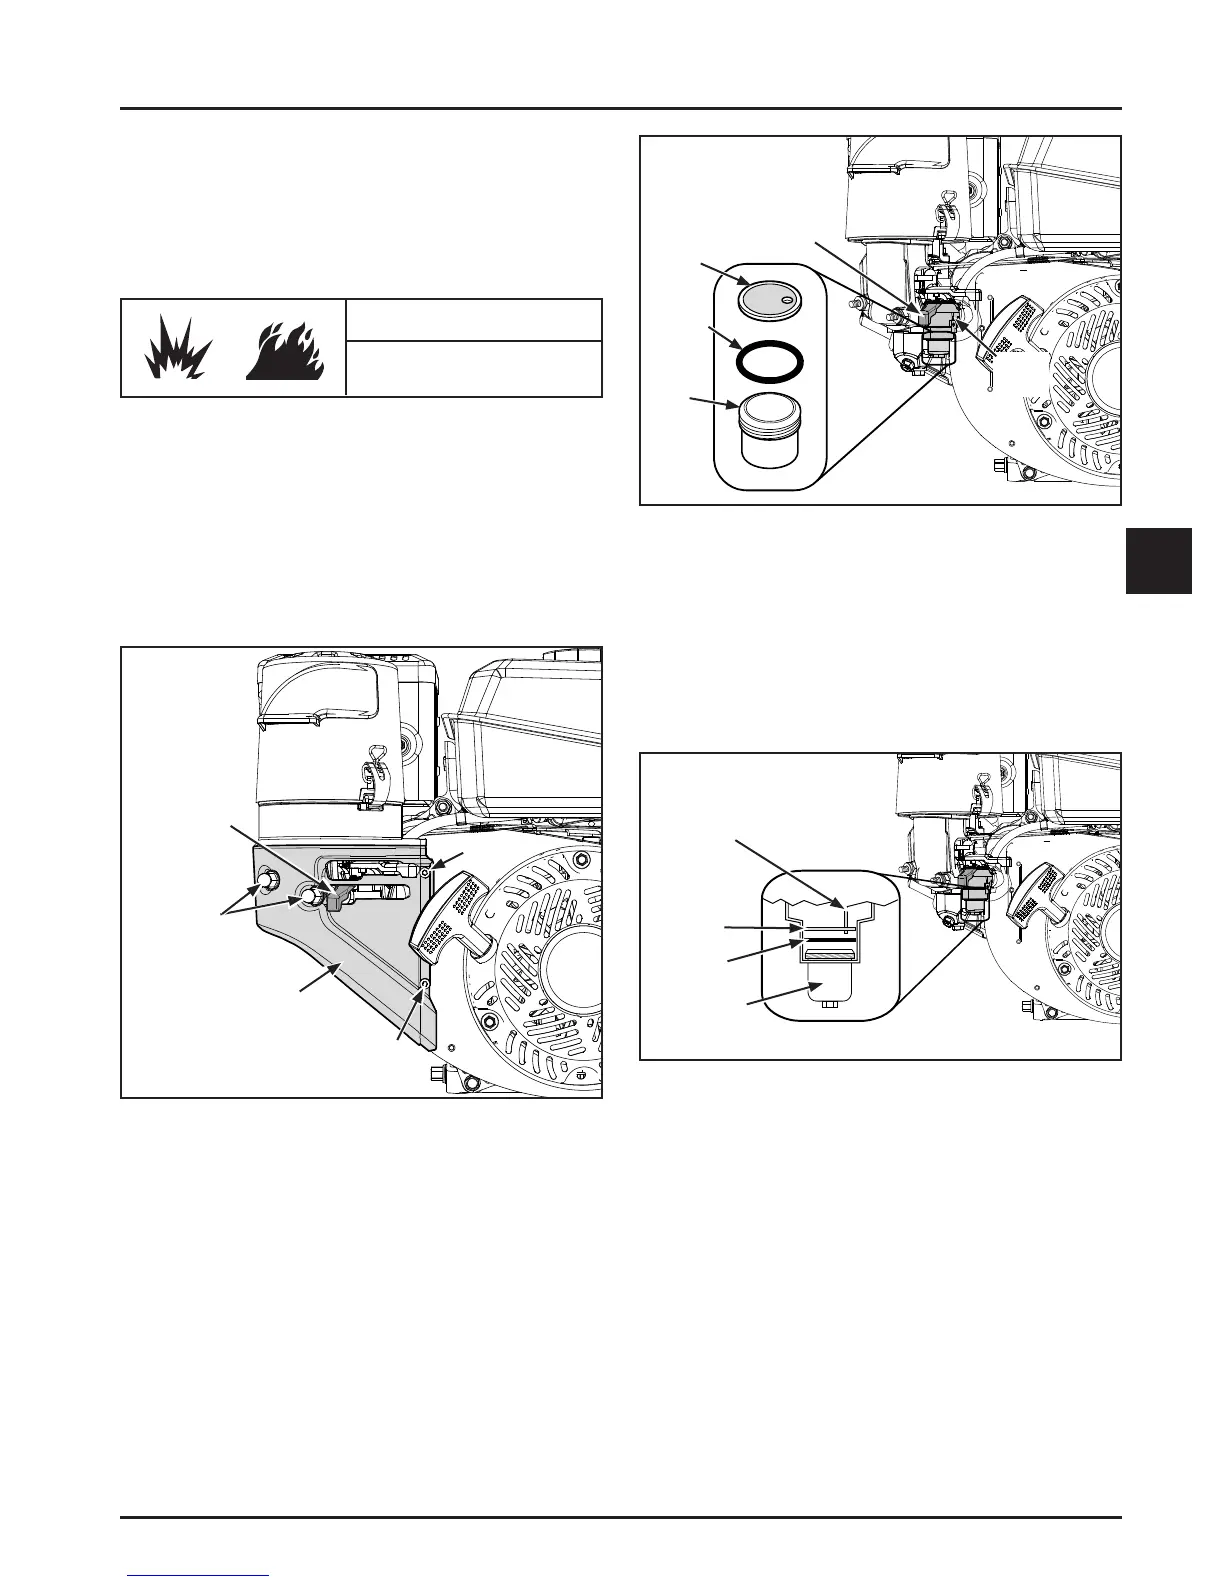
Figure 5-5. Fuel Valve Cup, O-ring, and Screen.
5. Clean the fuel valve cup with solvent and wipe it
off .
6. Check the O-ring, replace if damaged. Check
the screen for blockage or damage, replace if
necessary. The new screen must be located on the
pick-up tube as shown in Figure 5-6.
NOTE: Models with a low-profi le air cleaner do not
have the fuel valve.
Every 100 hours of operation clean fuel valve cup
of any accumulated debris. If the screen becomes
clogged or damaged replace it.
WARNING
Explosive Fuel can cause
fi res and severe burns.
Gasoline is extremely fl ammable and its vapors can explode
if ignited. Store gasoline only in approved containers, in
well ventilated, unoccupied buildings, away from sparks or
fl ames.
1. Stop the engine.
2. Remove the securing hardware and the
carburetor cover panel. See Figure 5-4.
Cover
Nuts
Screw
Screw
Fuel
Valve
Lever
Figure 5-4. Carburetor Cover Panel.
3. Turn the fuel valve lever to the OFF position.
4. Remove the fuel valve cup. See Figure 5-5.
Fuel
Valve
Lever
Screen
O-ring
Fuel
Valve
Cup
Fuel
Valve
Pick-Up
Tube
Screen
O-ring
Fuel
Valve
Cup
Figure 5-6. Pick-up Tube and Screen Orientation.
7. Place the O-ring on the screen followed by the
fuel valve cup. Rotate the fuel valve cup until it
is fi nger tight. Turn with a wrench 1/2 to 3/4 turn.
See Figure 5-6.
8. Turn the fuel valve to the ON position and check
for leaks. If fuel valve cup leaks repeat Step 7.
9. Reinstall the carburetor cover panel, using the
hardware removed in Step 2 to secure.
 Loading...


