9.13
Section 9
Disassembly
9
2. Pull the grommet assembly from the crankcase
on the inside.
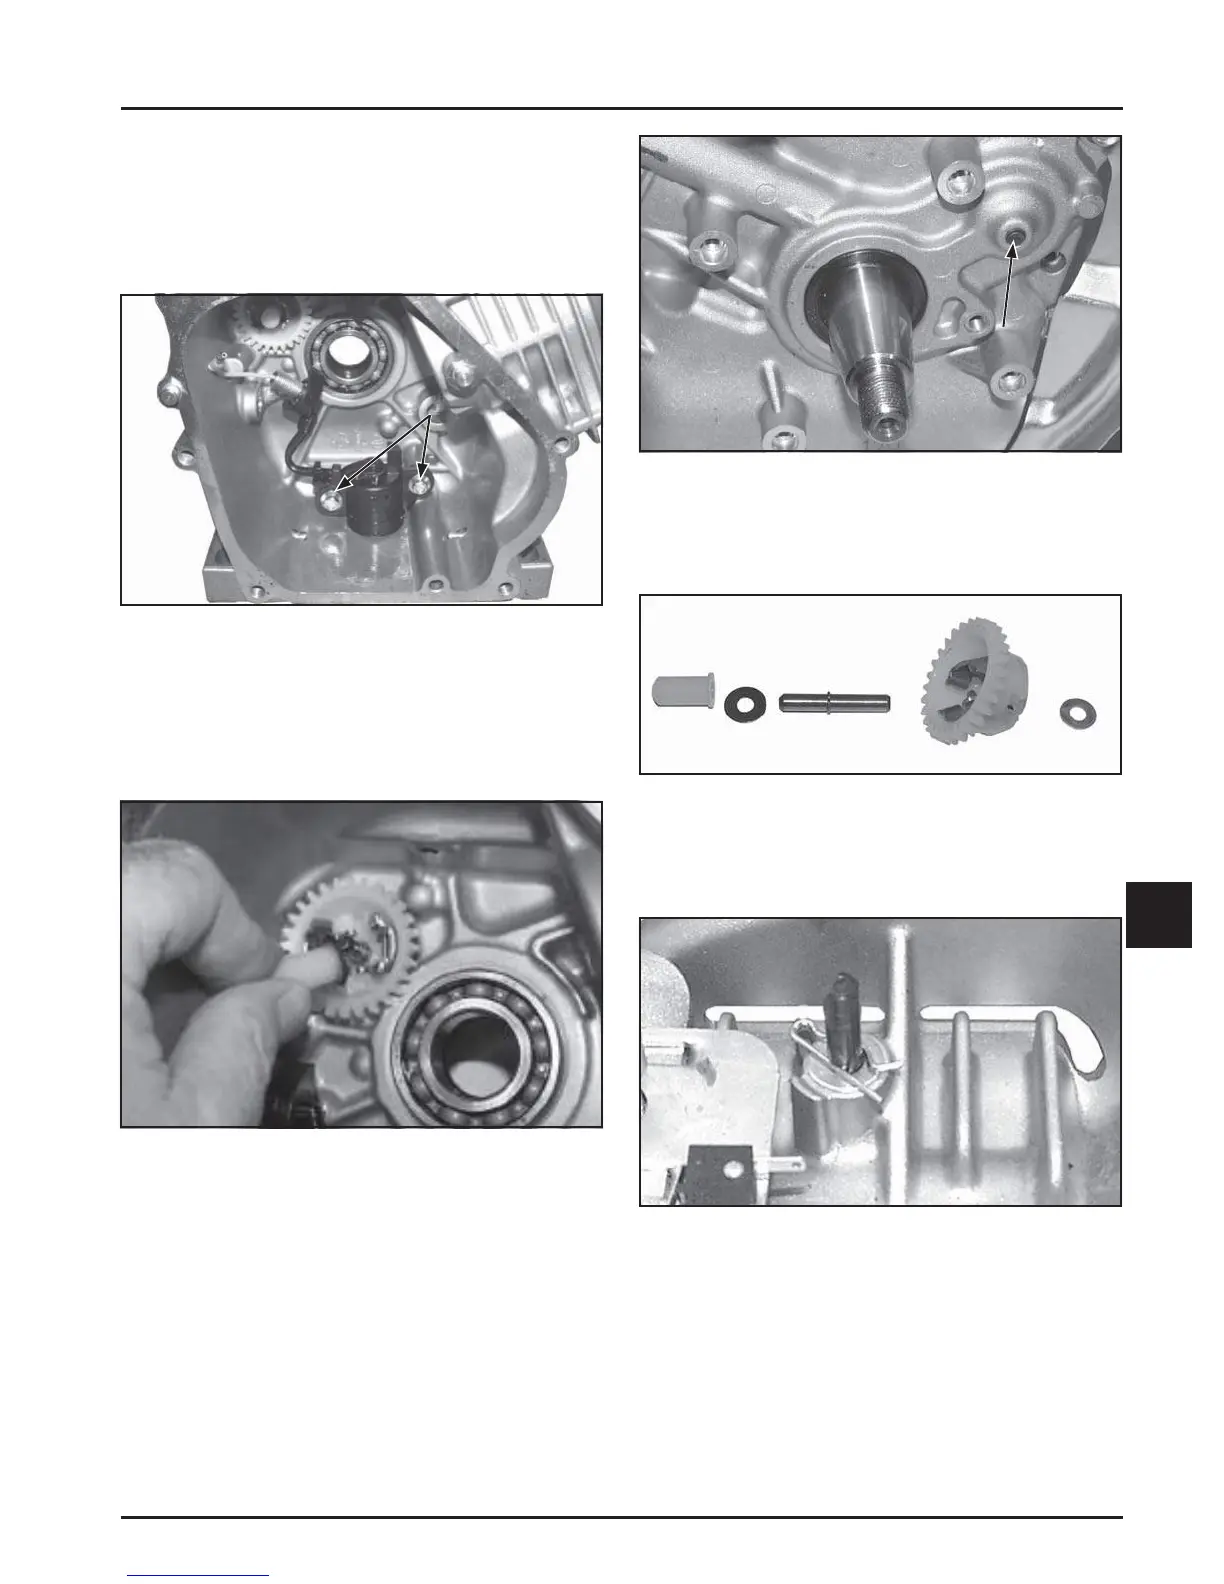
3. Remove the two hex screws securing the Oil
Sentry™ fl oat switch to the crankcase. Remove
the fl oat switch assembly. See Figure 9-53.
Hex
Screws
Figure 9-53. Removing Oil Sentry™ Float Switch.
Remove Governor Assembly
CH270 Governor Gear Assembly
1. Remove the cup and washer from the governor
gear. See Figure 9-54.
Figure 9-54. Removing Governor Assembly Cup
and Washer.
2. Using a suitable dri , drive the governor gear
sha from the crankcase. See Figure 9-55.
Governor
Shaft
Figure 9-55. Remove Governor Gear Shaft.
NOTE: Mark the orientation of all parts as the
governor assembly is removed. See Figure
9-56.
Figure 9-56. CH270 Governor Assembly
Components.
3. Remove the hitch pin and washer from the
governor cross sha . See Figure 9-57.
Figure 9-57. Removing Governor Cross Shaft
Hitch Pin.
4. Remove the cross sha from inside the crankcase.
CH395 Governor Gear Assembly
1. The governor gear is located in the closure plate.
To remove the governor gear, pull the governor
gear off the sha . See Figure 9-58.
NOTE: The governor gear sha is pressed into the
closure plate, and should not be removed.
 Loading...


