MMX8x4-HT series – User's Manual 65
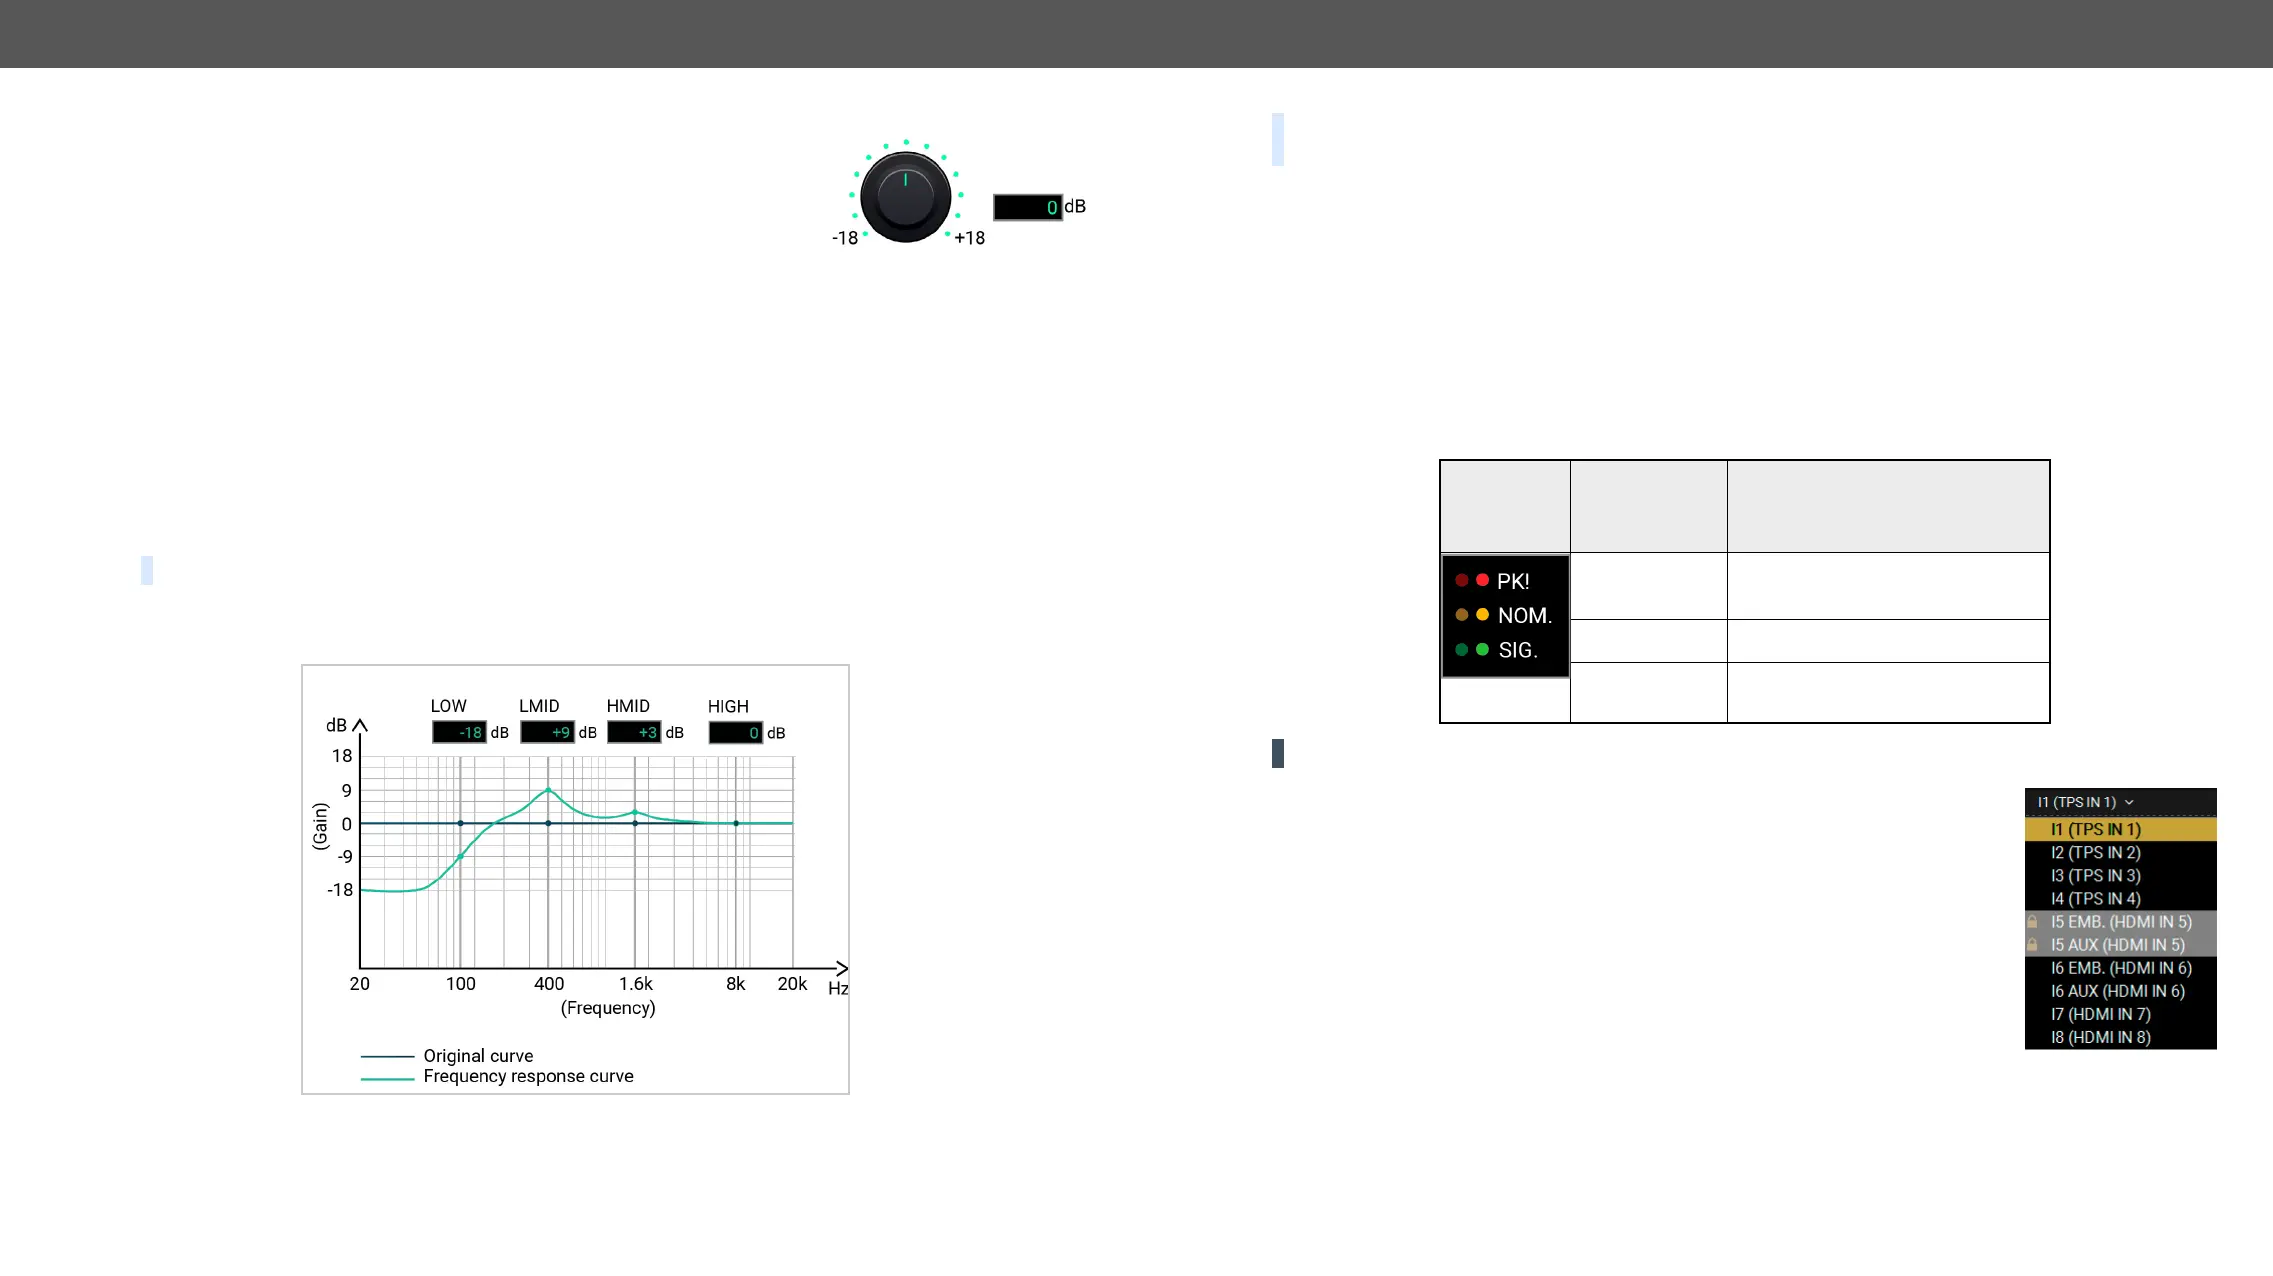
See the advanced layout to reach all adjustable properties.
HIGHHIGH-MID
▪ Click on the knob and keep pressed the left button. Move the cursor up or down to set the lower or
higher value.
▪ Press + or - buttons to increase or decrease the value. Steps: 3dB.
▪ Type the value into the text field (between -18 and +18).
TIPS AND TRICKS: Double click on the knob
▪ -18 dB was set for the frequencies;
▪ +9 dB was set for the frequencies;
▪ +3 dB was set for the HIGH-MID frequencies;
▪ 0 dB was set for the HIGH frequencies;
TIPS AND TRICKS:
Signal Indicator Chart
This section gives a feedback about the actual level of the audio signal:
▪ In microphone input and advanced analog audio input channel, the displayed status depends on the
actual level of the input signal and the gain setting.
▪ In the embedded audio channel, it depends on the actual level of the input signal.
▪ In case of the advanced analog output, it depends on the actual level of the three audio signals (mic in,
advanced audio input, embedded audio), gain settings, and the input volume settings.
Signal indicator lights up when the signal level is above:
Explanation Displays a recommended setting
PK! (Peak)
Take care that peak led (PK!) never
lights up!
NOM. (Nominal) Occasionally lights up.
SIG. (Signal)
Continuously lights (If it does not
light, signal level is too low.)
ATTENTION! Take care that peak led (PK!) never lights up!
Digital Audio Selector Menu
The drop-down menu can be seen in the layout of embedded input channel. This
is for selecting the digital audio channel. This setting affects to the crosspoint, it
connects the chosen input to the analog audio output (O5).

 Loading...