


Do you have a question about the Notifier AM2020 and is the answer not in the manual?
| Brand | Notifier |
|---|---|
| Model | AM2020 |
| Category | Fire Alarms |
| Language | English |
Overview of AM2020/AFP1010 capabilities, features, and system overview.
Details maximum intelligent addressable device capacity for AM2020 and AFP1010 systems.
Lists applicable NFPA and UL standards crucial for fire alarm system installation compliance.
Introduces the installation process and basic equipment packages for the system.
Lists the essential equipment components included in AM2020 and AFP1010 shipments.
Identifies supplementary documentation for a comprehensive understanding of system features.
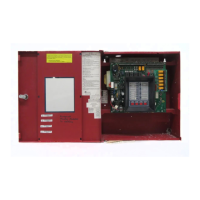
Covers cabinet selection, component installation, and mounting procedures for system hardware.
Describes available cabinet sizes (A-D) and optional trim rings or wire channels for mounting.
Details the procedure for mounting the backbox, including placement and height specifications.
Provides dimensional data and lists replacement parts for CAB-3 series backboxes.
Explains mounting the ICA-4L chassis, interconnecting units, and connecting power cables.
Guides component placement within cabinets, referencing placement guidelines and schemes.
Details mounting optional CHS-4/4L chassis in the cabinet below other assemblies.
Describes the Display Interface Assembly (DIA) and associated dress panels (DP-1, BP-3).
Outlines connecting the DIA to the system CPU and optional SIB or printer interfaces.
Details the system's power supply requirements, including AC input and battery backup.
Details requirements for connecting primary AC power, including dedicated circuits and conduit.
Describes the main power supply's capabilities, battery charging, and filtered outputs.
Guides the connection of primary AC power, secondary power, and system harness connections.
Explains the installation of the MPM-2 Main Power Meter on MPS-24A/MPS-24AE.
Details the CHG-120 charger capabilities and installation for various cabinets.
Describes the APS-6R auxiliary power supply and its mounting within CAB-3 series cabinets.
Explains the CPU's role as the system core, managing communications and module monitoring.
Covers signaling principles, including SLCs, loop interface boards, and wiring requirements.
Describes the LIB SLC for intelligent device communication and module functions.
Details LIB board functions, specifications, and SLC communication capabilities.
Outlines SLC loop wiring requirements per NFPA styles, including resistance limits and lengths.
Explains the ISO-X Loop Isolator Module's function in protecting the SLC from short circuit faults.
Describes MMX-1, MMX-2, and MMX-101 monitor modules for initiating device circuits.
Details the CMX control module for supervising and switching power to notification circuits.
Introduces various intelligent detectors like SDX, CPX, FDX, and IPX series for fire detection.
Covers installation of various detector bases and heads, including isolator and relay bases.
Covers serial communication options for connecting peripherals like printers and terminals.
Describes SIB-2048A and SIB-NET boards for system peripheral serial communication.
Details CRT-2 terminal features, including keyboard, display, and connection requirements.
Explains the use of PRN and Keltron printers for recording system status and reports.
Describes various annunciator modules like ACM, AEM, LDM, SCS, and SCE for system indication.
Outlines system requirements based on specific NFPA and UL standards.
Outlines requirements for NFPA 72 auxiliary fire alarm systems, including CMX and MBT-1.
Details monitoring supervisory contacts of an uninterruptable power supply using MMX-1.
Provides the correct procedure for applying and removing power to the fire alarm system safely.
Introduces system operation, features, and intelligent detector utilization.
Explains how intelligent detectors provide precise location and status information to the operator.
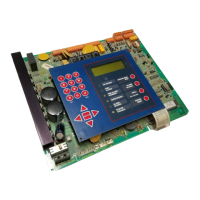
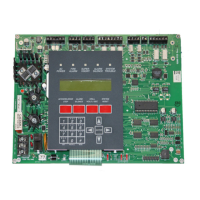
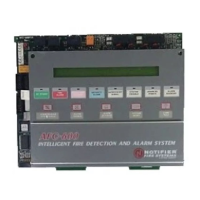
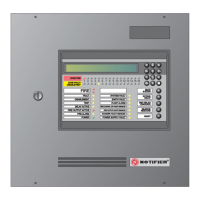
Details the Display Interface Assembly (DIA), its components, and operational modes.
Describes the normal display state and available keys when no alarms or troubles are active.
Allows the operator to view system status, including configuration and point details.
Explains the use of PRIOR, NEXT, and AUTOSTEP keys for navigating system conditions.
Covers special functions like generating reports and viewing the history file.
Details generating system configuration, point, and fire alarm reports.
Explains how to view and print the system's history file, including event ranges and statuses.
Describes how to acknowledge and manage fire alarm conditions within the system.
Describes the procedure for acknowledging fire alarm conditions and their clears.
Details how to identify, display, and manage various system trouble conditions.
Illustrates the format for displaying device trouble conditions, showing status and type.
Shows the format for displaying disabled zone trouble conditions, including type and address.
Explains the format for displaying system trouble conditions and specific trouble messages.
Shows the format for displaying trouble conditions with Annunciator Control System modules.
Describes the block acknowledge function for acknowledging multiple troubles simultaneously.
Explains acknowledging troubles in receiving unit mode when block acknowledge is disabled.
Details how to display acknowledged but not cleared alarms and troubles from system memory.
Covers the installation and use of optional remote peripherals like CRT terminals and printers.
Provides clarification for self-explanatory trouble messages displayed by the system.
Explains the software-based drift compensation for smoke detectors to maintain sensitivity.
Covers programming options, menus, passwords, and essential features like Backspace key.
Illustrates key sequences to reach specific programming menus.
Details access levels and default passwords for system programming.
Explains the multiple functions of the Backspace key during programming.
Describes the All Call activation signal from AMG and its effect on XP Transponders.
Discusses SIB-NET board usage for AM2020/AFP1010 with NOTI•FIRE•NET™ systems.
Provides a recommended basic procedure for initial programming and major system changes.
Accesses the main programming menu with options for system and point configuration.
Allows selective programming of system-wide functions like LIBs, AVPS, and signal settings.
Enables complete programming of system-wide functions including all device and zone parameters.
Allows selective alteration of parameters for SLC loop devices, zones, and annunciators.
Enables complete programming for addressable devices, zones, and annunciators.
Permits removal of SLC loop devices, zones, or annunciator points from panel memory.
Allows the programmer to assign custom Level One and Level Two passwords.
Allows the programmer to define a custom 40-character user label for the display.
Configures parameters for storing and managing system events in the history file.
Provides options for configuring system-wide functions like LIBs, power supplies, and signal settings.
Allows installation or removal of Loop Interface Boards (LIBs) from system memory.
Enables changing the NFPA style for SLC Loops in system memory.
Sets time delays for alarm verification, signal silence, and signal cut-out functions.
Configures local panel parameters including piezo sounder, LIB local mode, and battery settings.
Manages installation or removal of Intelligent Serial Interface Boards (SIBs) and related parameters.
Allows modification of operational parameters for SLC devices, zones, and annunciators.
Changes the Software Type ID for detectors, zones, and annunciator points.
Redefines Control-By-Event logic for detectors, modules, and software zones.
Enables or disables optional features per device, like signal silence and walk test.
Maps devices or software zones to annunciator points for remote annunciation.
Edits Cooperative Control-By-Event equations for reverse activated zones.
Enables complete programming for all addressable detectors, modules, zones, and points.
Configures parameters for storing and managing system events in the history file.
Provides options to modify device status, run diagnostics, and configure walk tests.
Allows disabling or enabling individual addressable devices or software zones.
Selects LIBs for walk test and generates walk test reports.
Defines Software Type IDs for identifying and configuring specific devices, zones, and points.
Lists Type IDs, display labels, and device types for addressable detectors.
Lists Type IDs, display labels, and device types for output modules like CMX and XPC.
Lists Type IDs, display labels, and device types for alarm initiation modules like MMX and BGX.
Explains how to program responses based on combinations of events and conditions.
Introduces Control-By-Event (CBE) programming for defining system responses to events.
Describes the 240 software zones, categorized as Forward-Activating (FZON) and Reverse-Activating (RZON).
Details the two methods for CBE programming: Lists for initiating devices and Equations for output devices.
Explains the OR operator, activating output if ANY operand is in alarm.
Explains the AND operator, requiring ALL operands to be in alarm for activation.
Explains the DEL operator for delayed activation based on duration and time.
Explains the SDEL operator for latched delayed operation until reset.
Explains the TIM operator for specifying activation on specific days or times.
Outlines requirements for installing and programming combined fire and security systems.
States suitability for Grade AA, A, or B Central Station and Proprietary Burglar Alarm systems.
Guides the selection and placement of security devices based on area sensitivity and type.
Lists common security devices for building perimeters and their application notes.
Lists common security devices for interior spaces and their application notes.
Provides rules and examples for assigning zone numbers using letter abbreviations for clarity.
Outlines circuit and device ratings, including wire requirements and distance limitations.
Details specific wire requirements based on circuit type, function, and distance.
Lists equipment certified by Underwriter's Laboratories (UL) for compatibility with the system.
Lists various optional system components and their associated modules for expanded functionality.
Contains programming worksheets and a glossary of terms and abbreviations used in the manual.
Defines technical terms and abbreviations used throughout the AM2020/AFP1010 documentation.
Details the manufacturer's warranty terms, conditions, and limitations for the product.