9-13
1. Remove the brush block mounting screws and
lift out the brush block.
2. Remove the brushes and springs from the
holder and replace with new parts (see Figure
9-11 on Page 9-12).
3. Push each brush into the brush holder and in-
sert a stiff wire through the small hole in the
base of the holder. See Figure 9-4 on Page
9-6. The wire holds the brushes off the slip
rings during assembly.
NOTE: Inspect slip rings before installing brush
block. See
Slip Ring Service
following.
4. Install the brush block in endbell but do not
tighten the mounting screws.
5. Remove the wire holding the brushes off the
slip rings. Adjust the brush block so that the
brushes are centered on the slip rings, then
tighten the mounting screws.
6. Follow
Generator Assembly
procedures on
Page 9-7 to reinstall the fan hub and remain-
ing generator components.
Slip Ring Service
Follow
Generator Assembly
procedures on Page
9-7 through fan hub assembly removal. Inspect
the slip rings for grooves, pits, or other damage. A
Scotch Brite pad can be used to remove light wear
and for surface finishing. If the slip rings are rough,
pitted, or out of round by more than 0.002 inches,
recondition them in a lathe with a commutator
stone. Use the following procedure to service:
1. Follow
Generator Disassembly
on Page 9-2
to remove the generator endbell and rotor.
2. Place the rotor in the machine lathe and center.
Turn the rotor and use a commutator stone
(Onan tool #420–0259) against the rotating slip
rings to clean and true the slip rings. Turn the
rotor until all grooves or roughness are
smoothed out. Rub out must be less than
0.0001 inch, and surface finish must be less
than 32 micro inch.
WARNING
Contact with rotating machin-
ery can result in severe personal injury.
Keep hands and fingers clear while servic-
ing slip rings.
CAUTION
Careless handling of rotor can
damage the insulation on the windings.
Place rotor on protected surface when set-
ting down.
3. Clean the rotor and prepare for reinstallation.
Follow
Generator Assembly
procedures on
Page 9-7 to reinstall the rotor and remaining
generator components.
ROTOR BEARING REPLACEMENT
The rotor bearing is pressed onto the rotor shaft.
This bearing must be replaced very carefully to
avoid damaging the collector ring assembly and the
rotor shaft. Use the following procedures to replace
the rotor bearing.
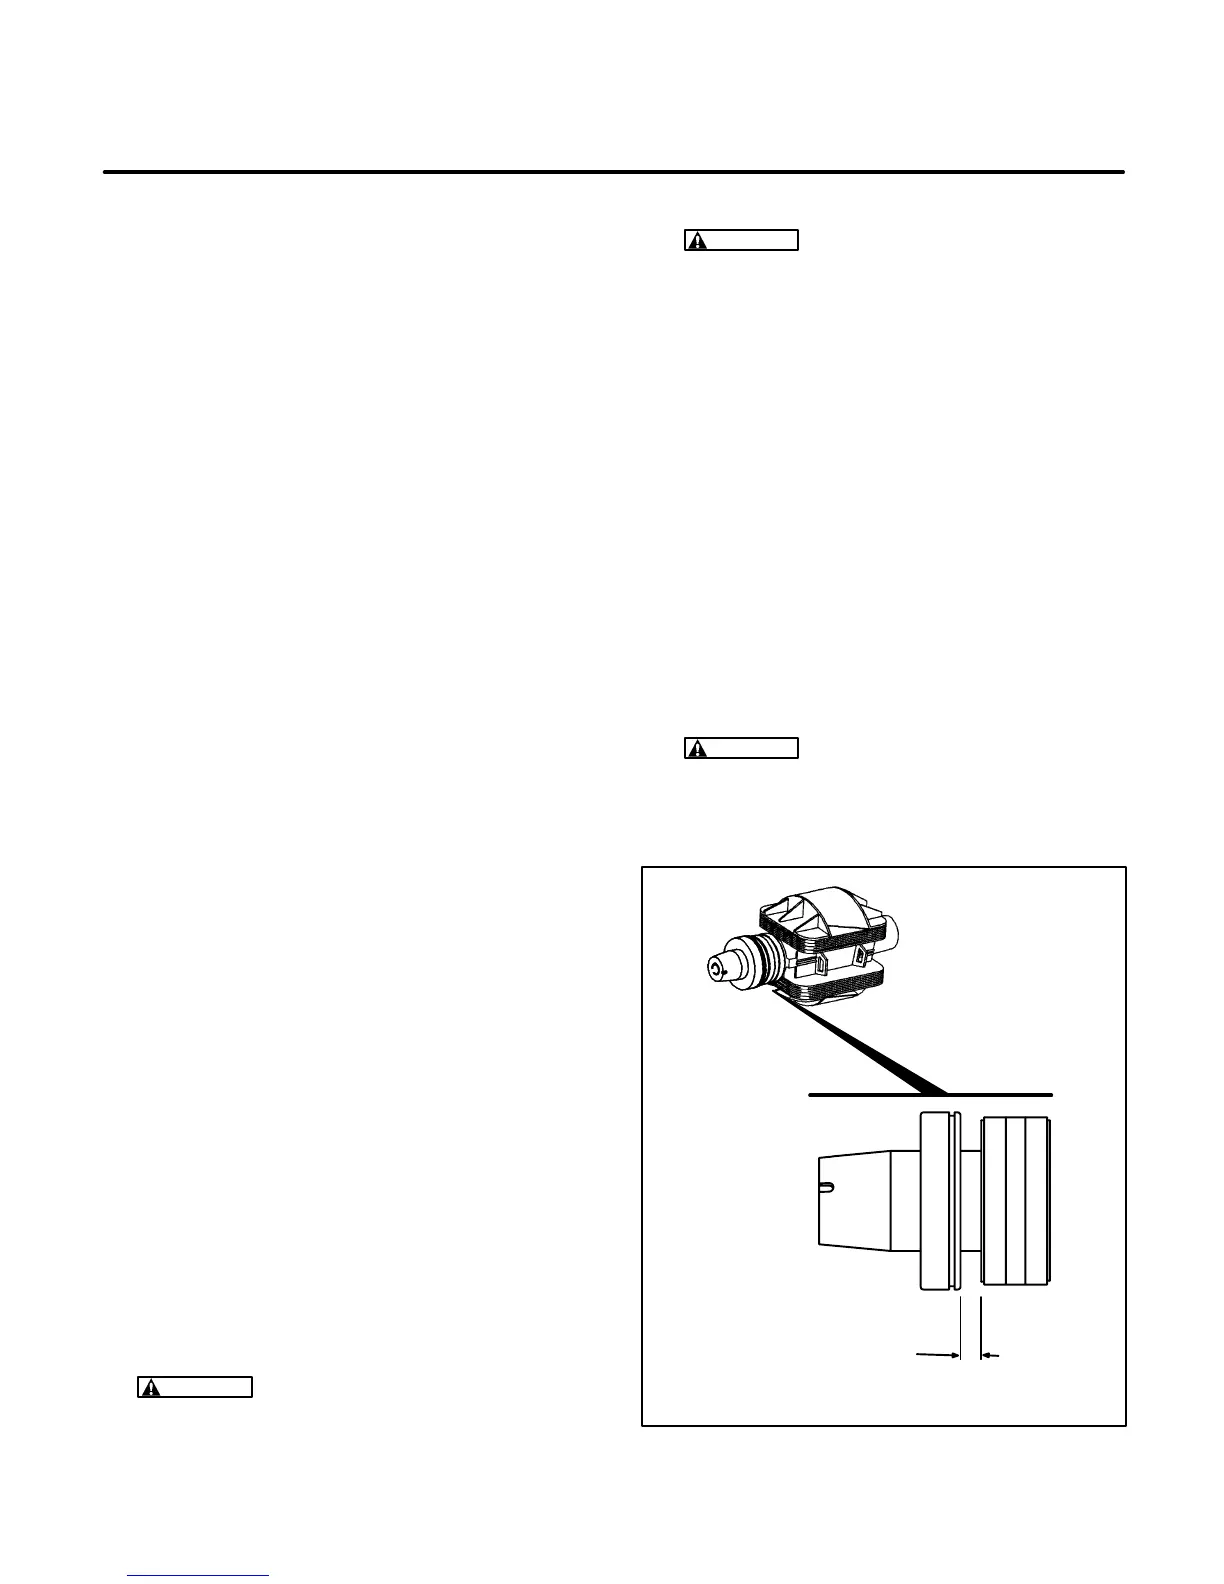
1. Measure and record the distance between the
bearing and the collector ring assembly. See
Figure 9-12.
CAUTION
Heating the rotor bearing for re-
moval or installation can cause damage to
the bearing and the collector ring. Do not
heat rotor bearing.
G1216-1s
MEASURE SPACE BETWEEN
BEARING AND COLLECTOR
RING ASSEMBLY
FIGURE 9-12. ROTOR BEARING SPACING
 Loading...

