8-29
Starter Re-assembly
Use this procedure to return the electric starter as-
sembly to service.
1. Wipe all of the dirt and oil from the starter com-
ponents with a clean cloth. Blow off dust with fil-
tered low-pressure compressed air.
CAUTION
Oil on the armature will damage
the starter. Do not immerse bearings in
cleaning fluid. Use a brush dipped in clean
engine oil to remove dirt from bearings.
Avoid getting oil on brushes or commuta-
tor.
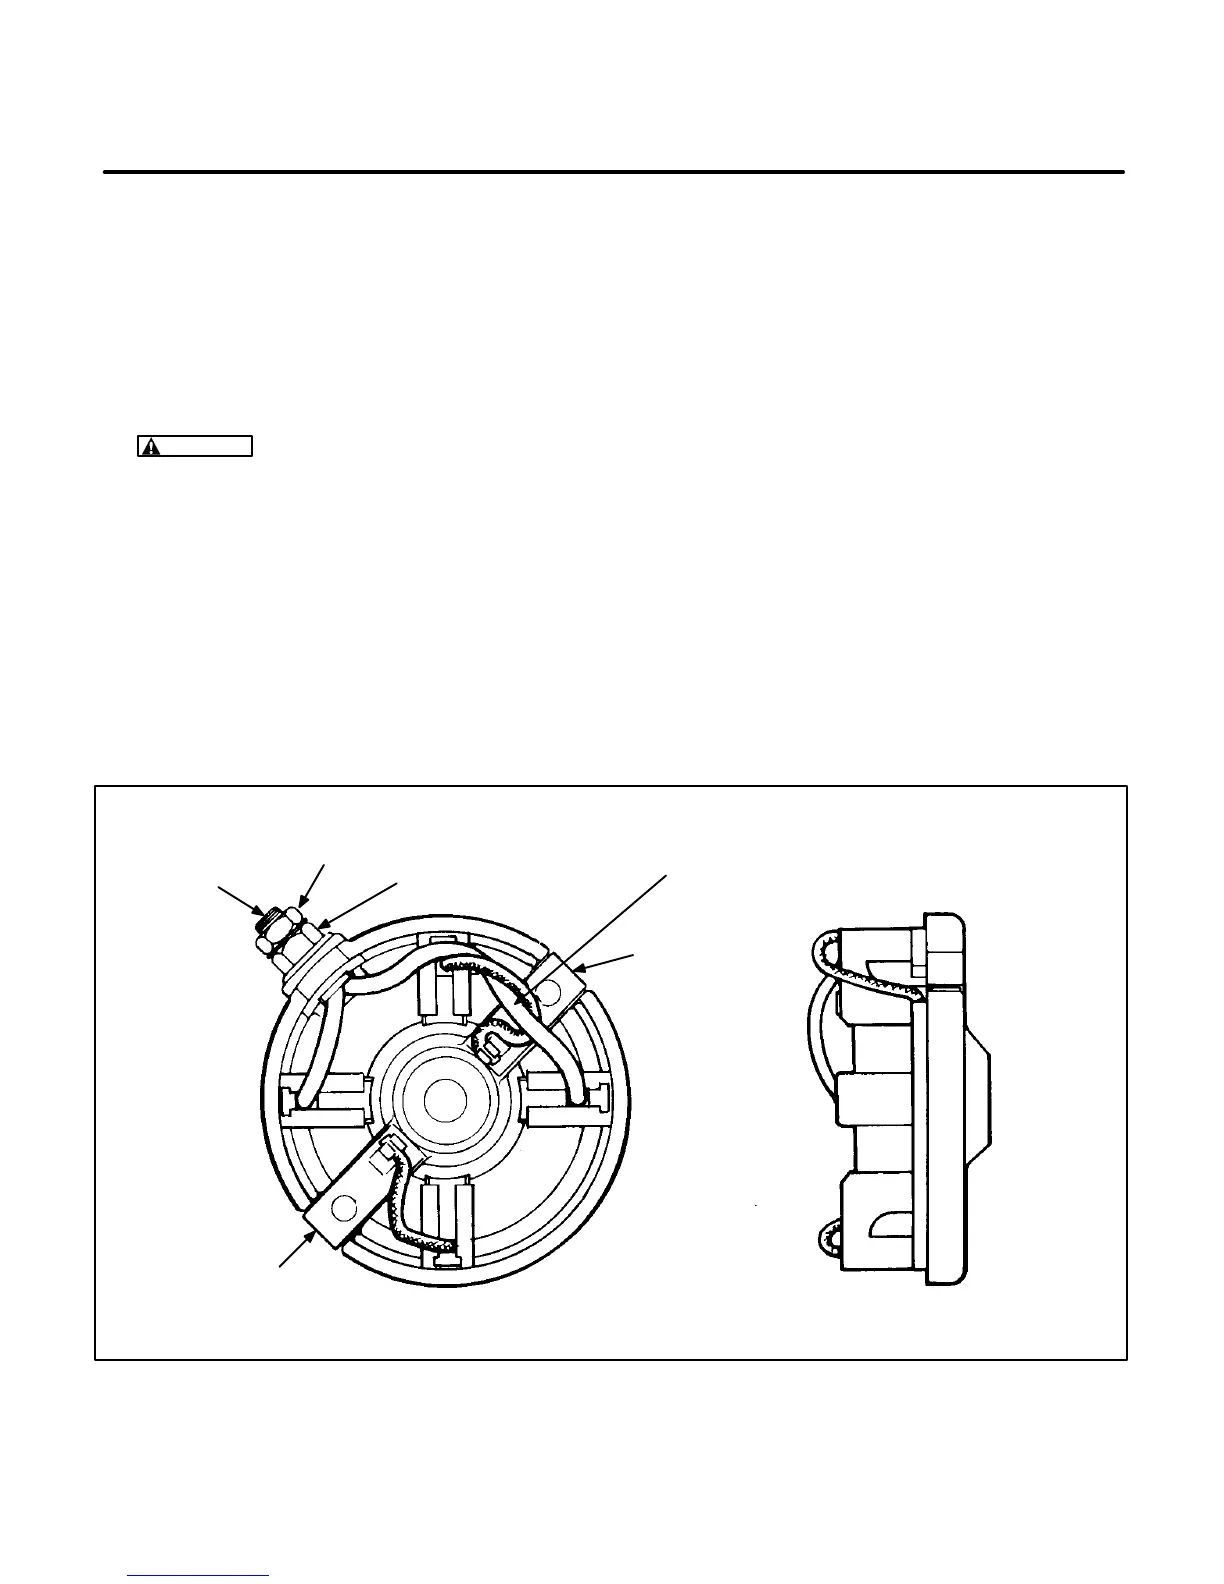
2. Push the negative brush terminals over the
through-bolt holes on the brush endcap (Figure
8-28).
3. Insert the positive brush stud into the hole, and
torque to 25-30 lb-in. (2.83 - 3.39 Nm).
4. Insert the brush springs into brush holders. In-
sert the brush tabs into the spring ends and
slide brushes into brush holders in endcap.
Make sure all brush wires are facing up.
5. Place a washer on the commutator end of the
shaft, then put the armature into the brush end-
cap. Push the four brushes toward the commu-
tator, make sure that the springs are correctly
positioned on the brushes.
NOTE: Replacement brushes are supplied
preassembled in the endcap. Remove the brush
retainers after installing armature.
6. Make sure that all brush wires are clear of the
commutator, and that uninsulated sections of
wires do not touch the inside of the housing, or
adjacent brush boxes.
7. Place the magnetic housing over the armature.
Hold down the armature and the end cap by
pressing a nut driver over the end of the shaft.
TORQUE TO 510 INLBS
(.571.13 N
•M)
TORQUE TO 2530 IN
LBS (2.833.39N
•M )
IMPORTANT! THIS INSULATED SHUNT MUST
BE ROUTED THROUGH UNINSULATED SHUNT
AS SHOWN TO PREVENT CONTACT WITH
COMMUTATOR IN FINAL ASSEMBLY.
NEGATIVE BRUSH
TERMINAL
POSITIVE
BRUSH
STUD
NEGATIVE BRUSH
TERMINAL
ES-1612-2s
FIGURE 8-28. BRUSH ENDCAP
 Loading...

