10-18
Crankpin Clearance
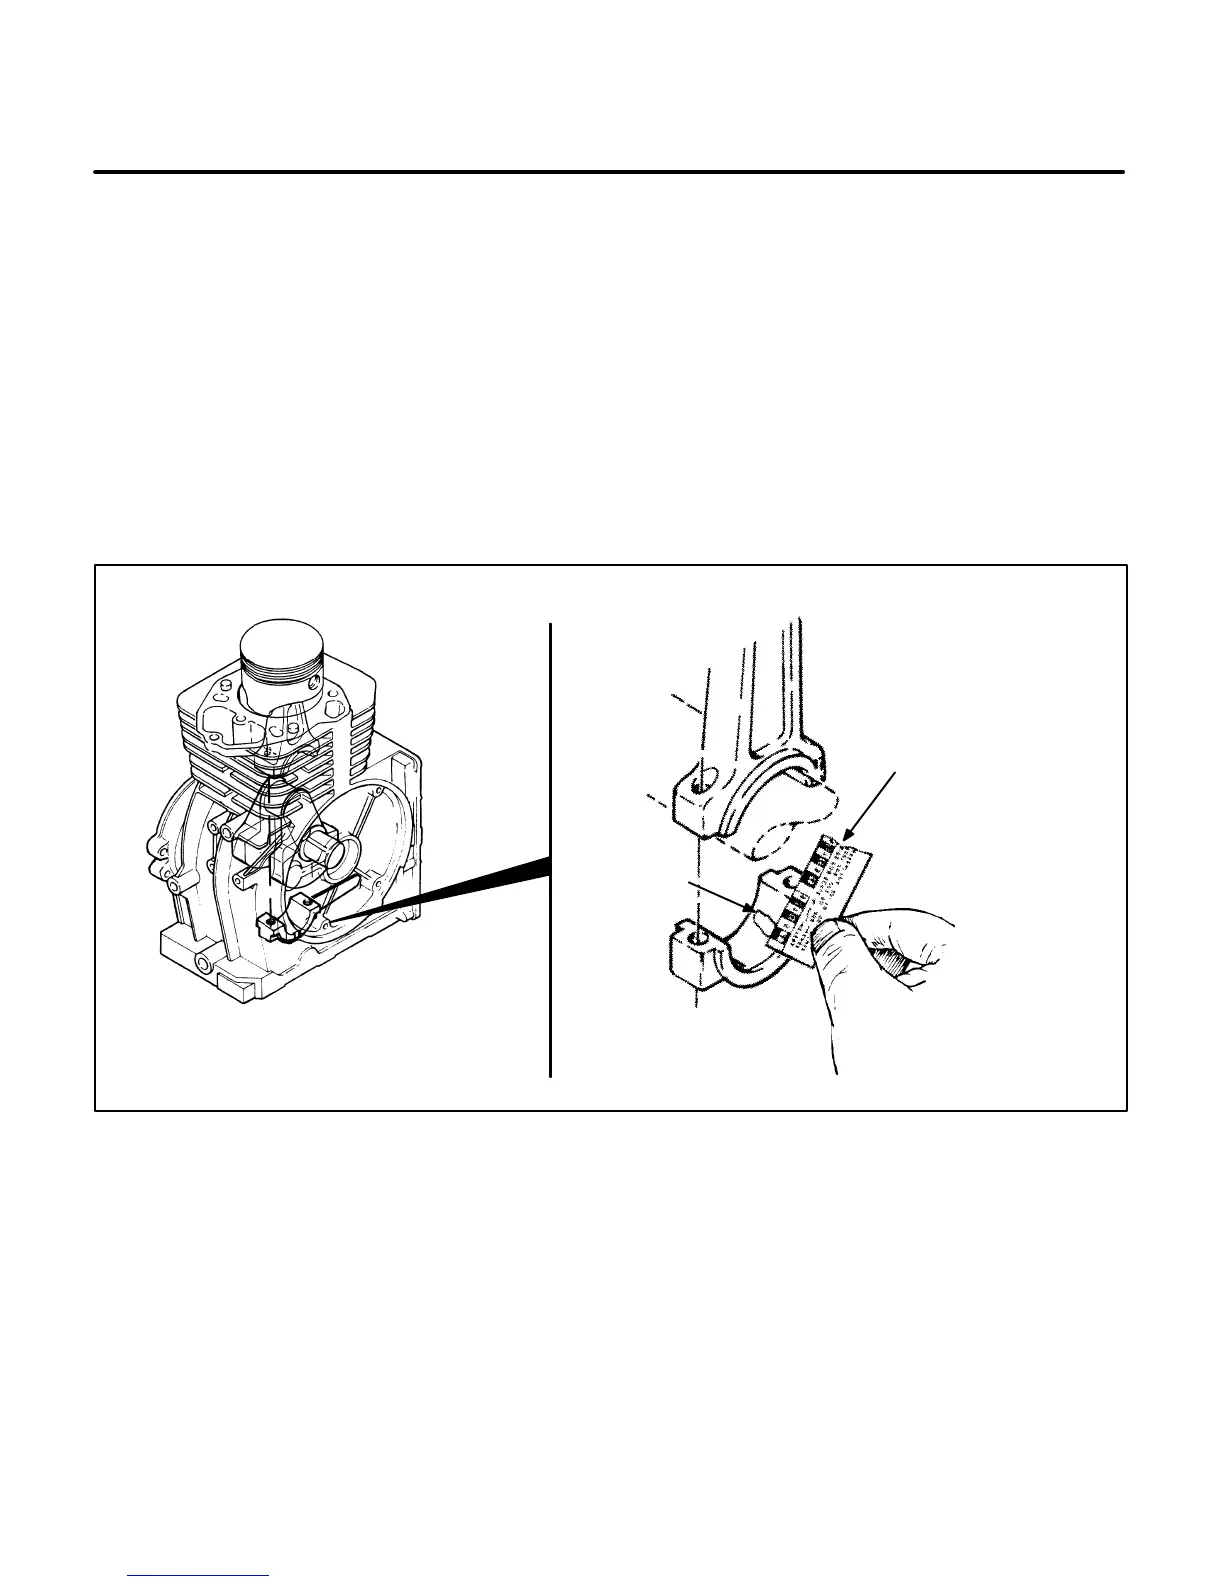
1. Wipe the oil off the rod cap and crankpin.
2. Place a piece of the correct size Plasti-gage
across the full width of the rod cap about 1/4
inch (6 mm) off center (Figure 10-36).
3. Install the rod cap and tighten to the specified
torque. Do not rotate crankshaft after the rod
cap is in place.
4. Remove the rod cap and leave the flattened
Plasti-gage on the part to which it adheres.
Compare the widest point of the flattened Plas-
ti-gage with the graduations on the envelope to
determine the crankpin clearance.
5. Remove the Plasti-gage. Lubricate the rod
crankpin and cap. Install the connecting rod
cap. The rod cap must be tapped several times
to properly align it with the connecting rod.
Tighten the connecting rod bolts to the speci-
fied torque.
6. Crank the engine several times to see that the
crankshaft turns freely.
CT1092-1s
ENVELOPE
GRADUATION
SCALE
PLASTIGAGE
FIGURE 10-36. MEASURING CRANKPIN CLEARANCE
 Loading...

