10-2
TABLE 10-1. LEAK DOWN CHECK POINTS
AIR LEAKAGE AT: PROBABLE CAUSE
1. Dipstick hole or 1a. Broken Ring
Breather valve 1b. Worn cylinder
bore/rings
2. Carburetor throat 2a. Intake valve stuck
2b. Broken intake valve
2c. Damaged intake valve
seat
3. Muffler/Exhaust 3a. Exhaust valve stuck
pipe outlet open
3b. Damaged exhaust valve
3c. Damaged exhaust valve
seat
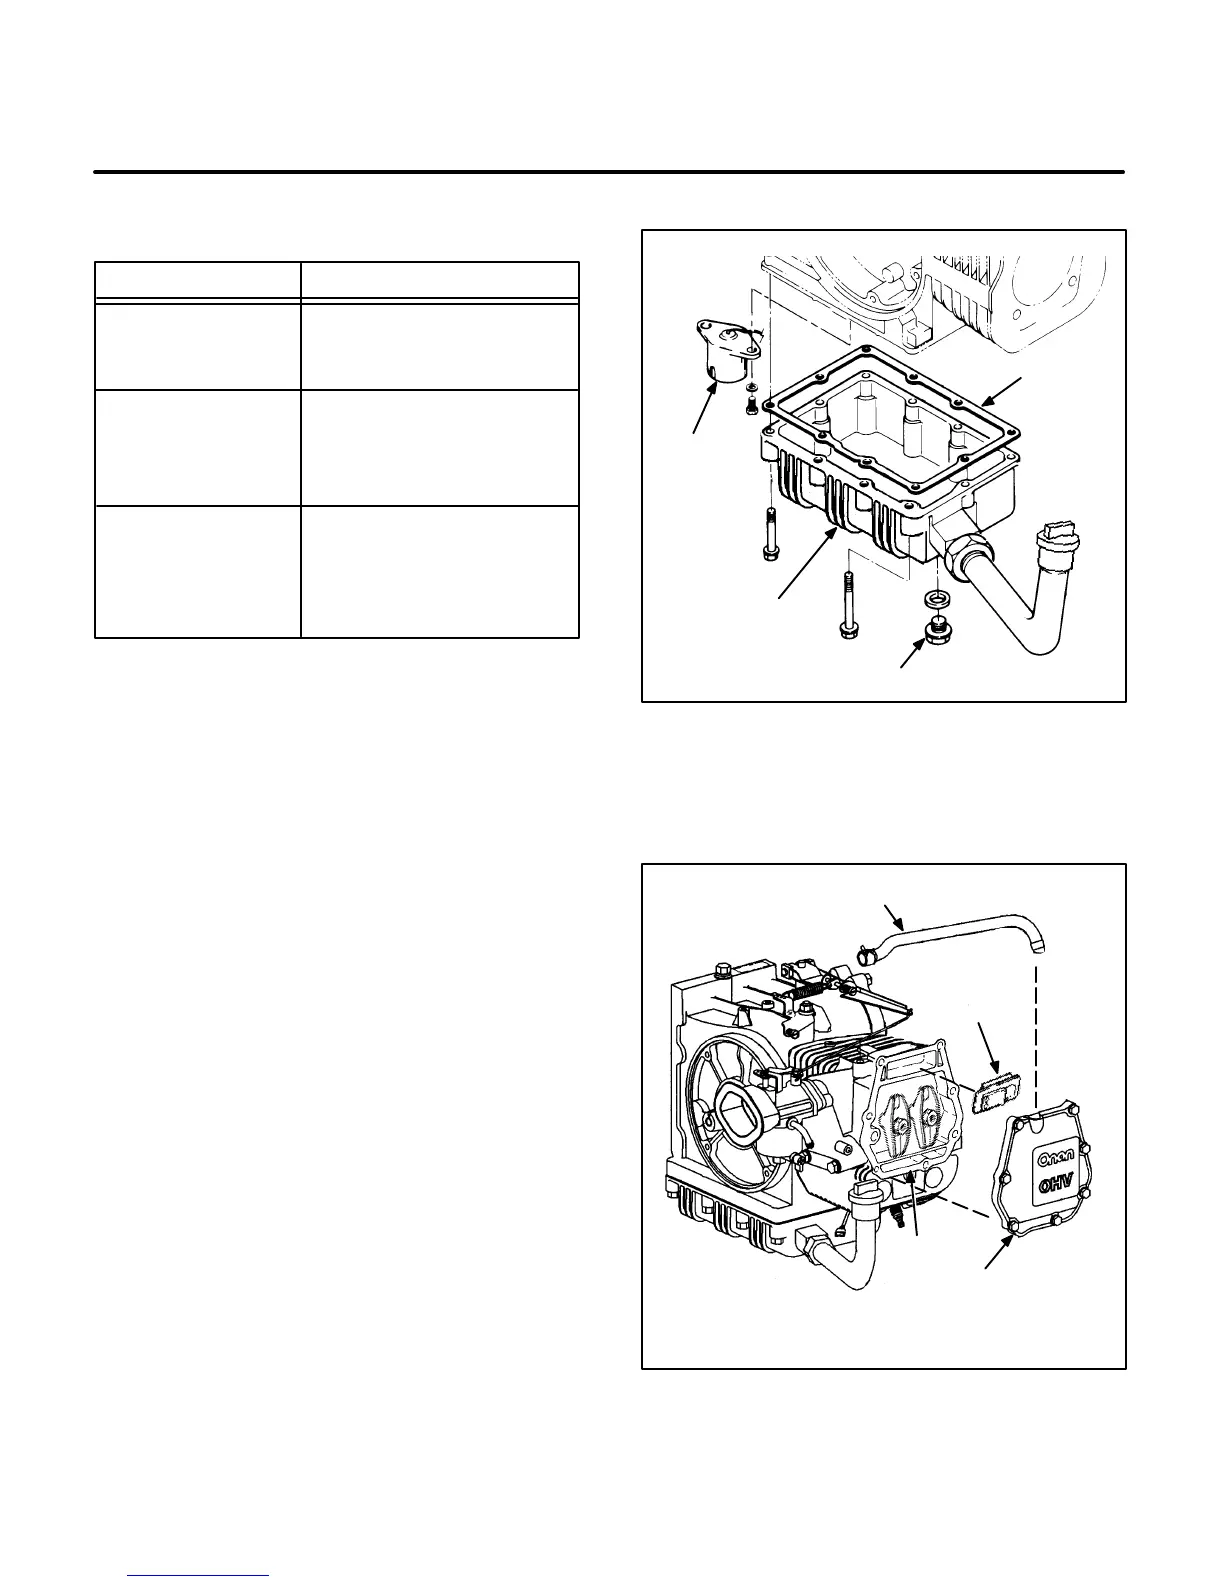
OIL PAN AND OIL LEVEL SWITCH
Remove the oil plug and drain the crankcase oil.
Remove the oil pan mounting bolts and pan (Figure
10-2). Remove the oil level switch mounting bolts
and switch assembly (Spec A-F only, if applicable).
Clean the oil pan and use a new gasket when rein-
stalling. Torque all mounting bolts to the specified
torque (see Section
4:
Torque Specifications
).
HEAD COVER
Remove the head cover to gain access to the cylin-
der head, breather assembly and valve system.
1. Remove the head cover mounting bolts and
pull off the head cover (Figure 10-3).
2. Clean the head cover. Be careful not to dam-
age the surface of the cover where the gasket
mounts.
3. Clean the cylinder head and cover thoroughly
in the cover gasket mating area. Make sure the
breather assembly is correctly seated in the
cylinder head cavity.
4. Install a new head cover gasket.
5. Place the head cover in position and install the
mounting bolts. Torque all of the bolts in a star
pattern until they are tightened to the specified
torque.
OIL LEVEL
SWITCH
OIL PLUG
GASKET
OIL PAN
FIGURE 10-2. OIL PAN REMOVAL (SPEC A
SHOWN)
BREATHER
HOSE
HEAD
COVER
BREATHER
ASSEMBLY
GASKET
FIGURE 10-3. HEAD COVER REMOVAL
 Loading...

