Orbit Reader 20 – User guide Version 1.8
Orbit Research Confidential and Proprietary Information 51
21.2 Install Software
TO upgrade Orbit Reader 20, we require the following:
• Orbit Reader 20 Unit.
• Standard-A to Micro-B USB cable.
• A PC running Windows XP or later.
• Orbit Reader 20 Upgrade Utility file found in the Orbit Reader 20 folder.
• Orbit Reader 20 release bin file found in the Orbit Reader 20 folder.
To upgrade the firmware, follow these steps:
1. Make sure the Orbit Reader 20 is turned off.
2. Connect the Orbit Reader 20 to the PC using the USB cable.
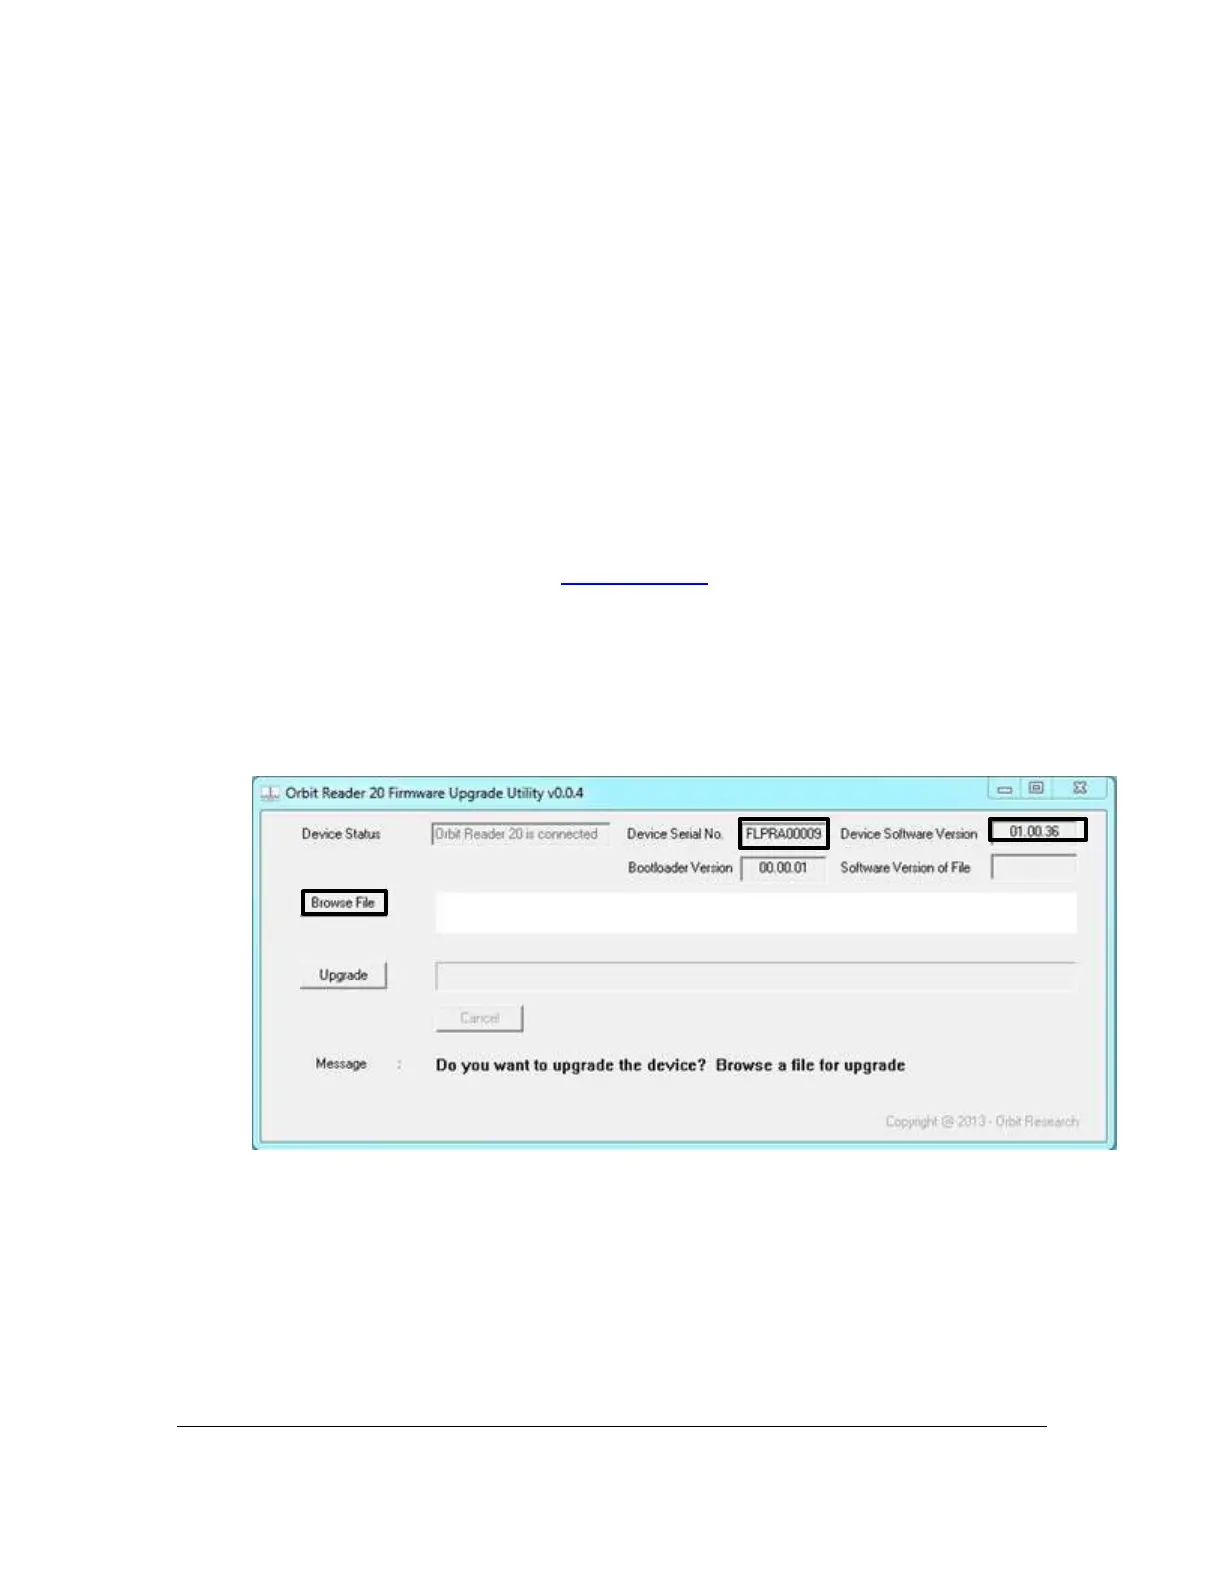
3. In the Release folder on your PC, run the Orbit Reader 20 Firmware Upgrade Utility. If
you receive an error message, see Troubleshooting section. The utility shows message
“Orbit Reader 20 is connected” in device status field. It also shows the message “Do you
want to upgrade the device?” in the message field at the bottom of the dialog.
4. Press and hold down the Right Panning forward button + Dot 5, then press and hold Dot
8.
5. Release Dot 8 first, then release the Right Panning key and Dot 5. This switches the Orbit
reader 20 into Upgrade mode. You will hear a tone on your PC.
6. The utility shows the device serial number and the software version of the device at top
right corner of the window. If the serial number is blank, repeat steps 4 and 5.
7. Activate the Browse button found in the dialog.
8. Browse and select the firmware bin file from your PC. The file is in the folder you
unzipped previously.
9. Once the file is selected, the dialog shows the software version of the selected file.
 Loading...