BODY / STEERING / S USPENSION
5.4
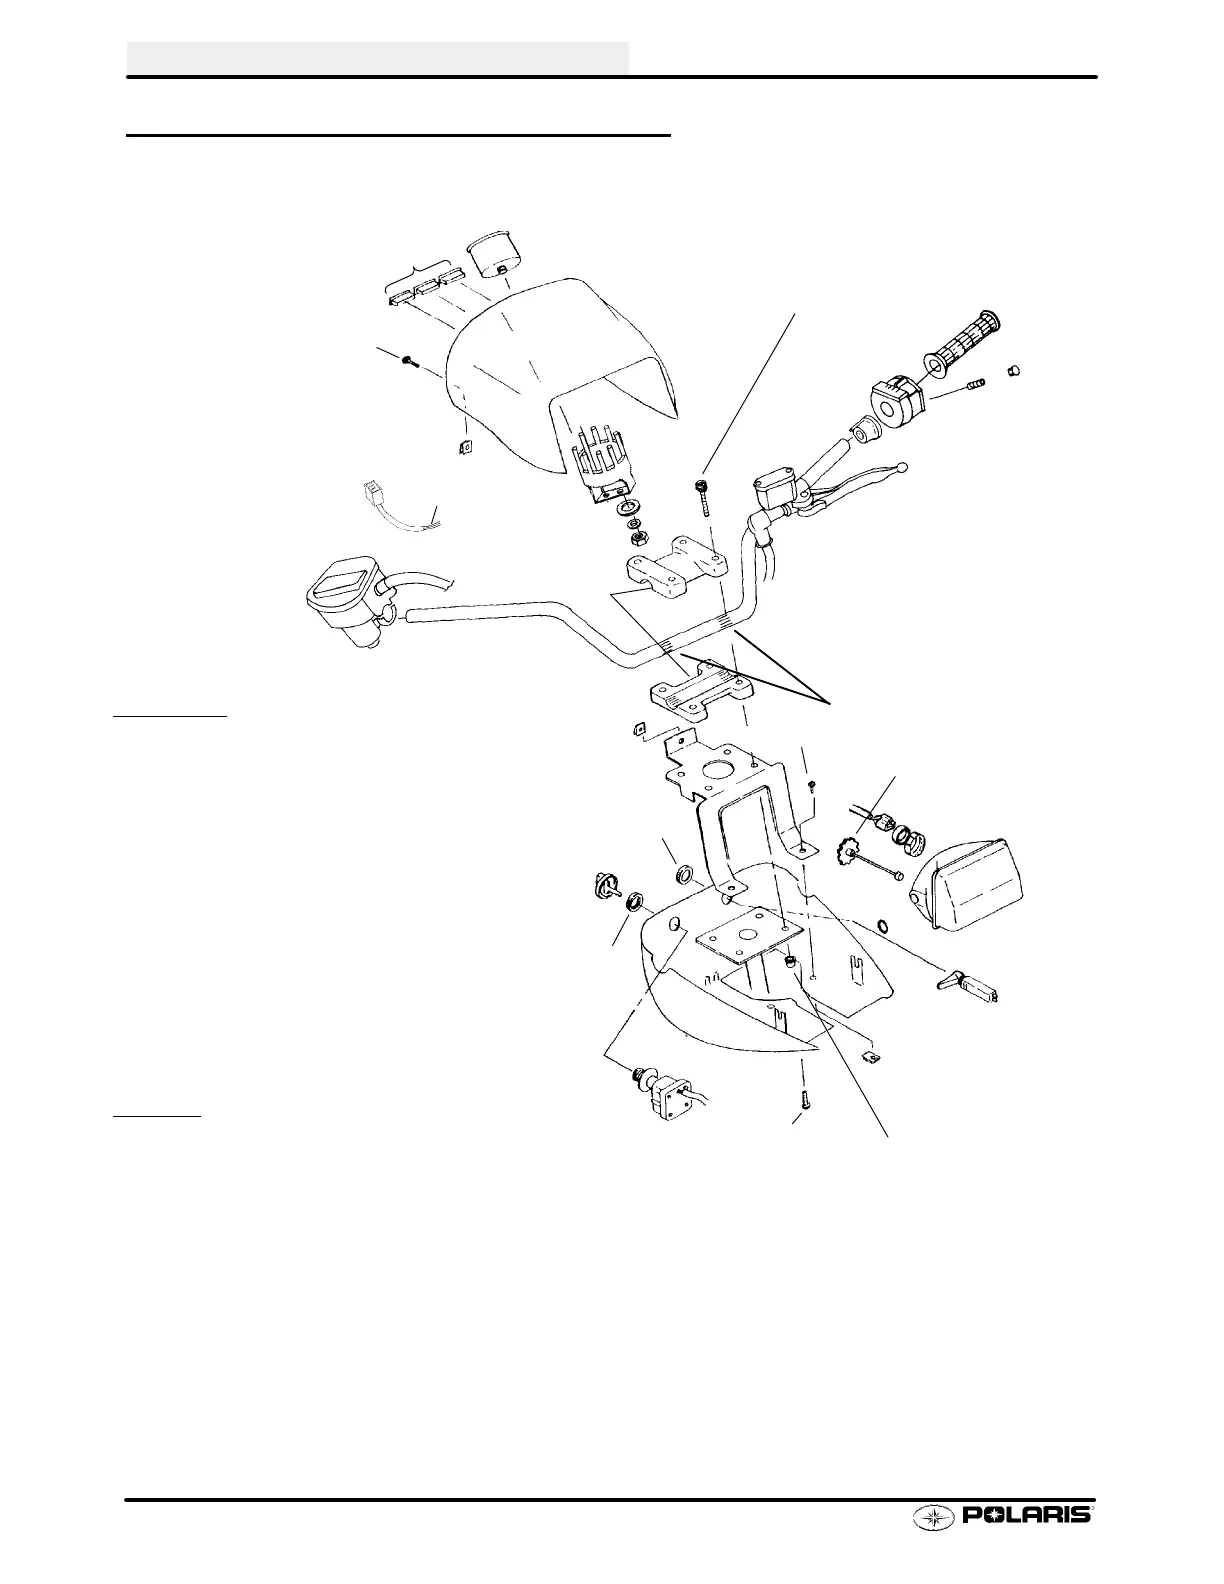
HEADLIGHT POD EXPLODED VIEW
11-13 ft. lbs.
(15-18 Nm)
Clean knurling when
repositioning handlebars
Adjuster
Torque bolts evenly so gap
is equal at front and rear of
handlebar block
Disassembly
S Remove two front Phillips screws (A).
S Remove three rear Phillips screws (B).
S Lift top half of pod.
S Disconnect speedometer cable or wire connec-
tors.
S Disconnect indicator light wire coupler and
headlight.
S Disconnect 12V power plug (where applicable).
S Removeignitionswitch(C)andchokecable(D).
S Remove headlight with adjuster .
S Remove two screws securing bottom
half of pod (E).
Assembly
S Install bottom of pod onto handlebar and secure to brackets.
S Install key switch, choke cable, and headlight.
S Connect indicator light wire coupler to indicator lights in top half of pod.
S Connect 12V power outlet (where applicable)
S Connect headlight.
S Connect speedometer cable or connectors to speedometer.
S Install top of pod onto bottom half, making sure interlocking tabs mate properly.
S Install twofront Phillipsscrews. NOTE: Whenassembling anewpod,use thescrew topre-thread
the two front holes in the top pod before mating halves.
S Install three rear Phillips screws, aligning with Tinnerman™ clips.
S To adjust headlight, refer to procedure outlined in Maintenance chapter.
S To apply decals, refer to 5.12.
Handlebar clamp torque:
11-13 ft. lbs. (15-18 Nm)
To harness
connector
A
B
C
D
E
 Loading...